
官方网站: https://opnsense.org
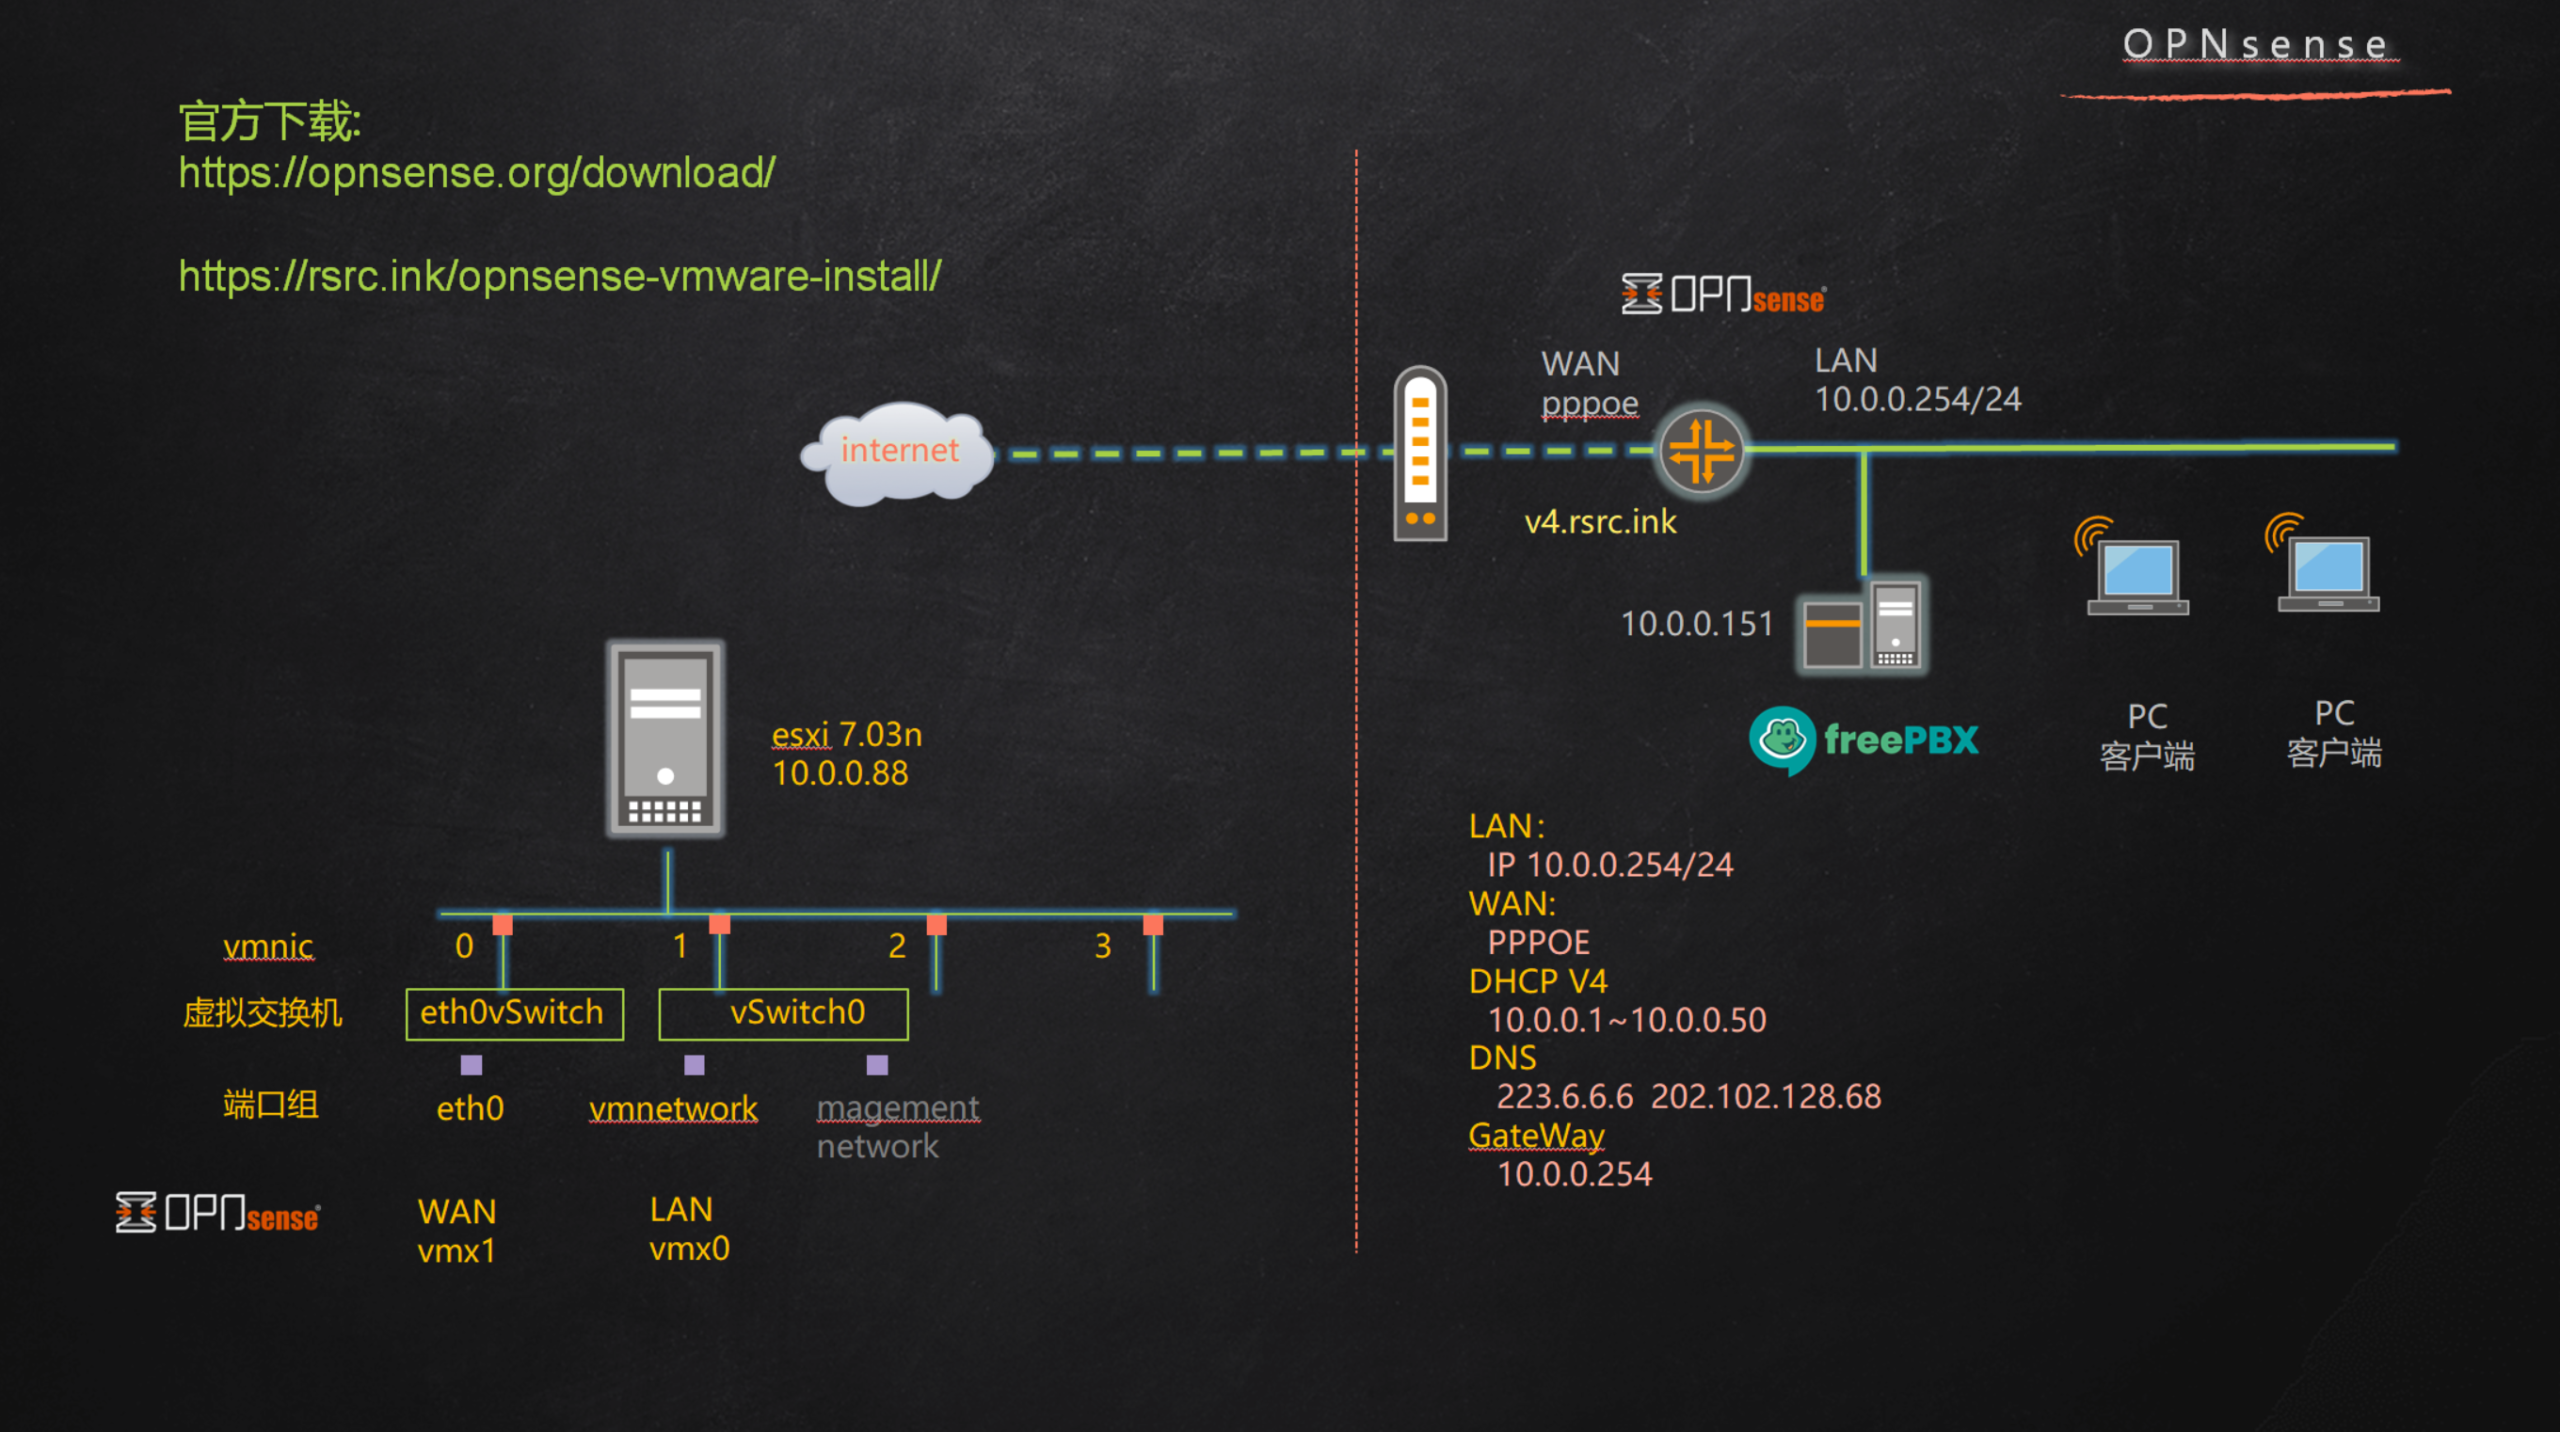
esxi网络示例说明
…………………………………………………………………….
安装步骤:
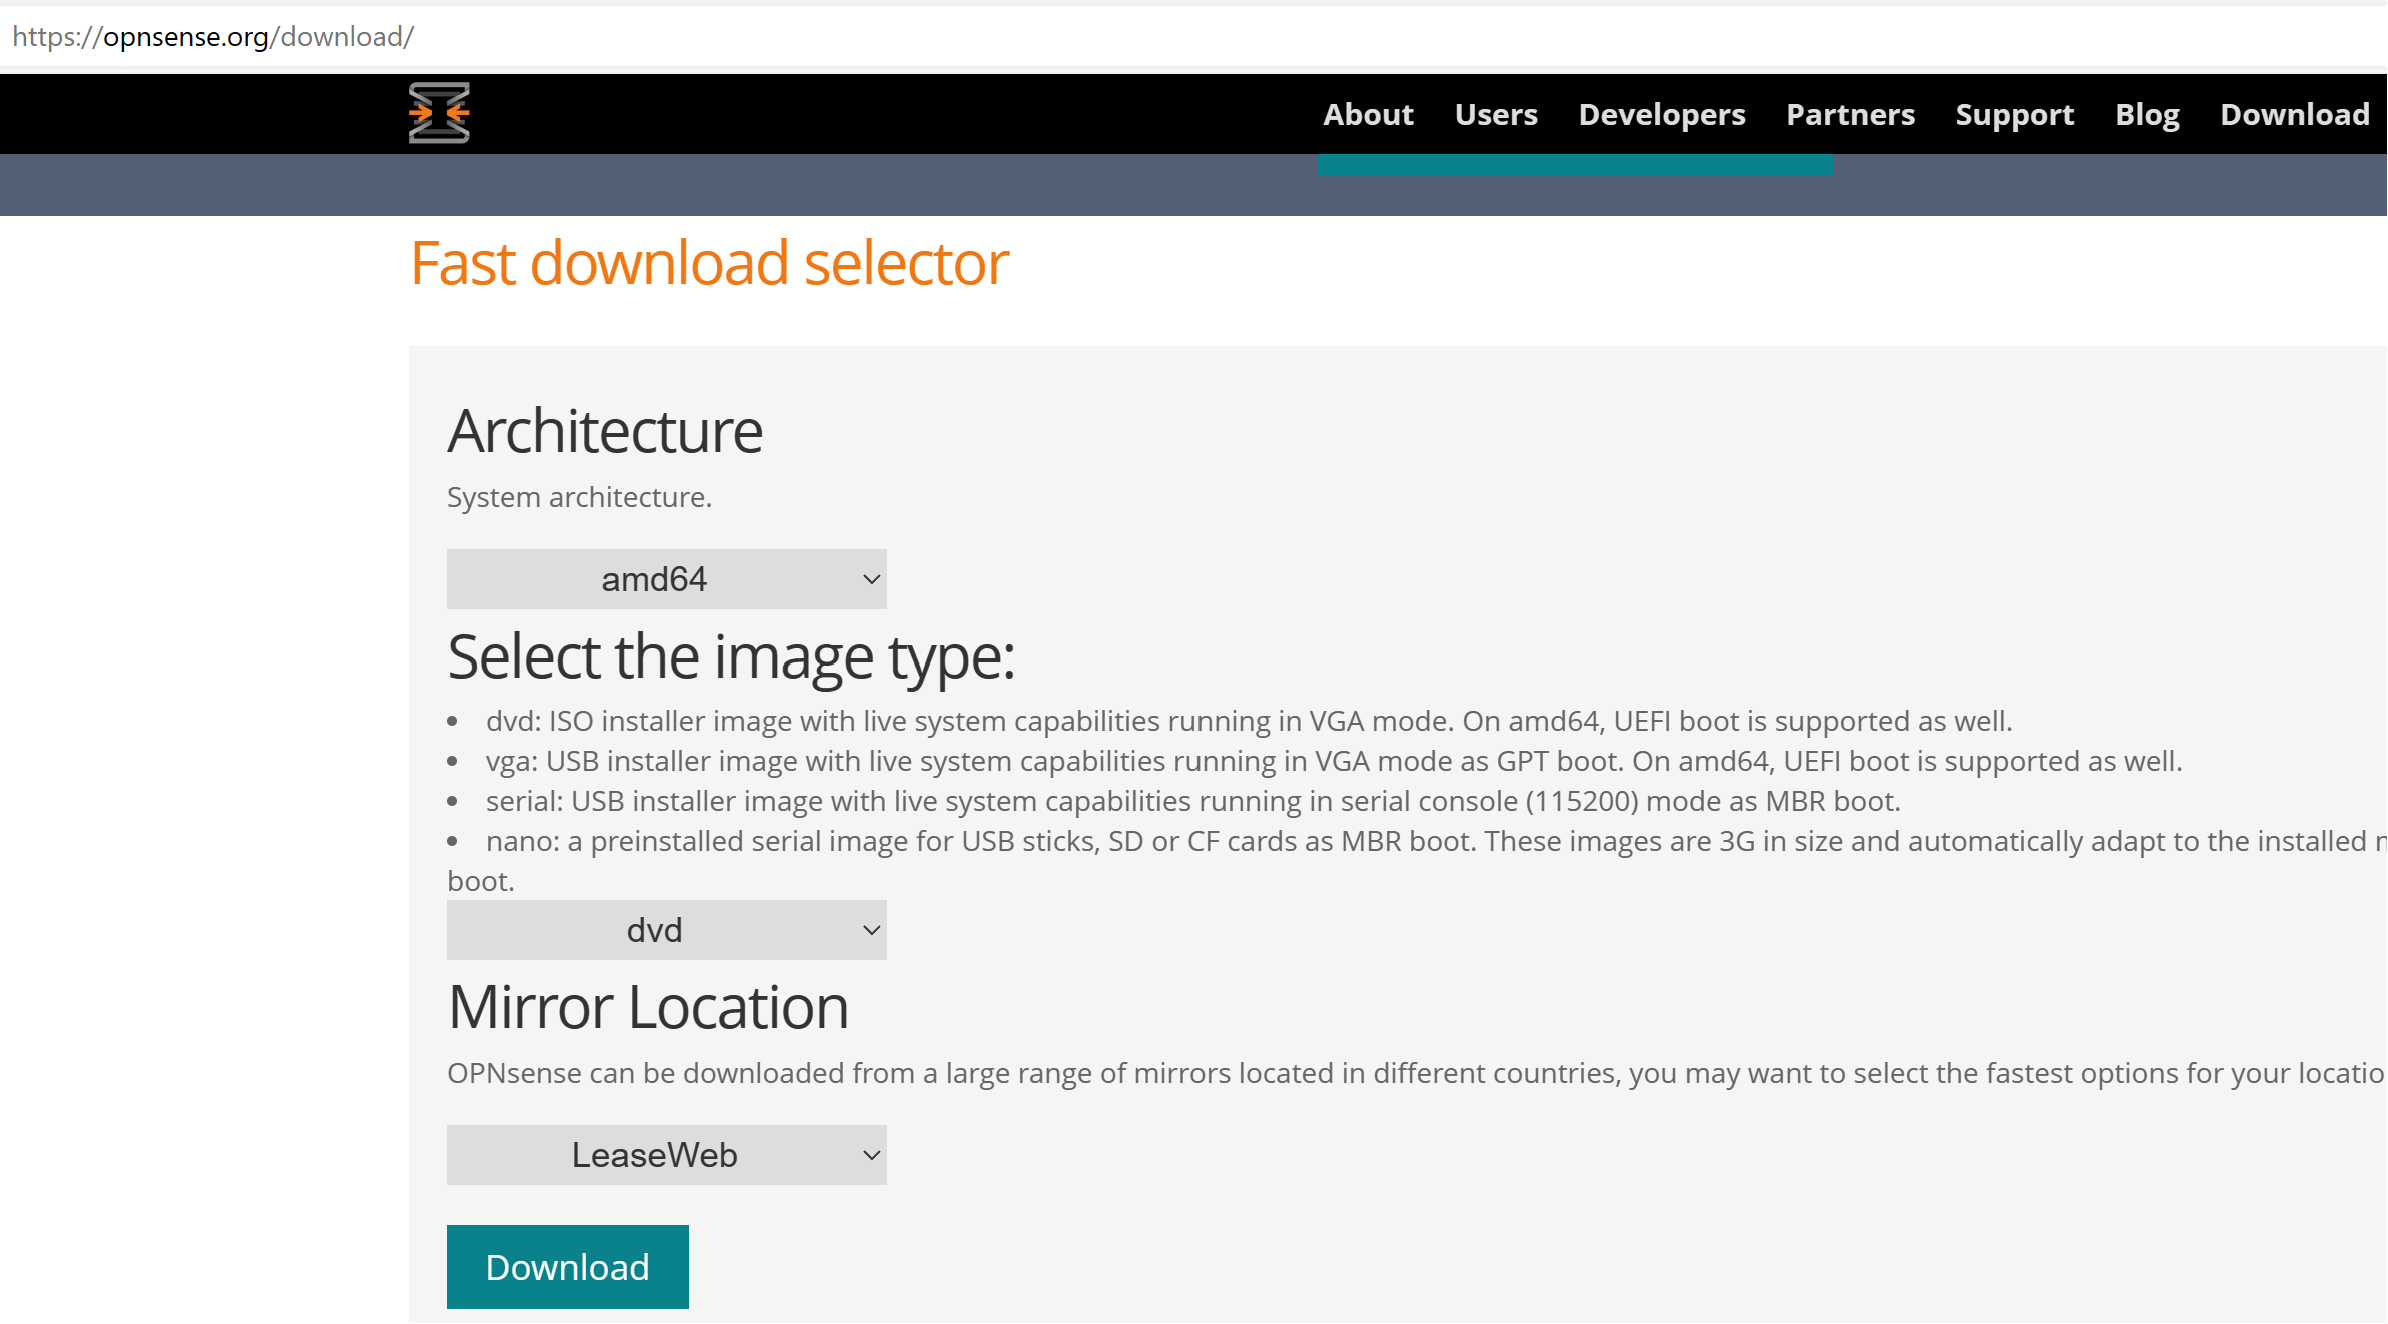
1、下载OPNsense-23.7-DVD-amd64镜像
下载页面:https://opnsense.org/download/
系统架构选 “amd64”
“image type” 镜像类型选 “DVD”
…………………………………………………………………….
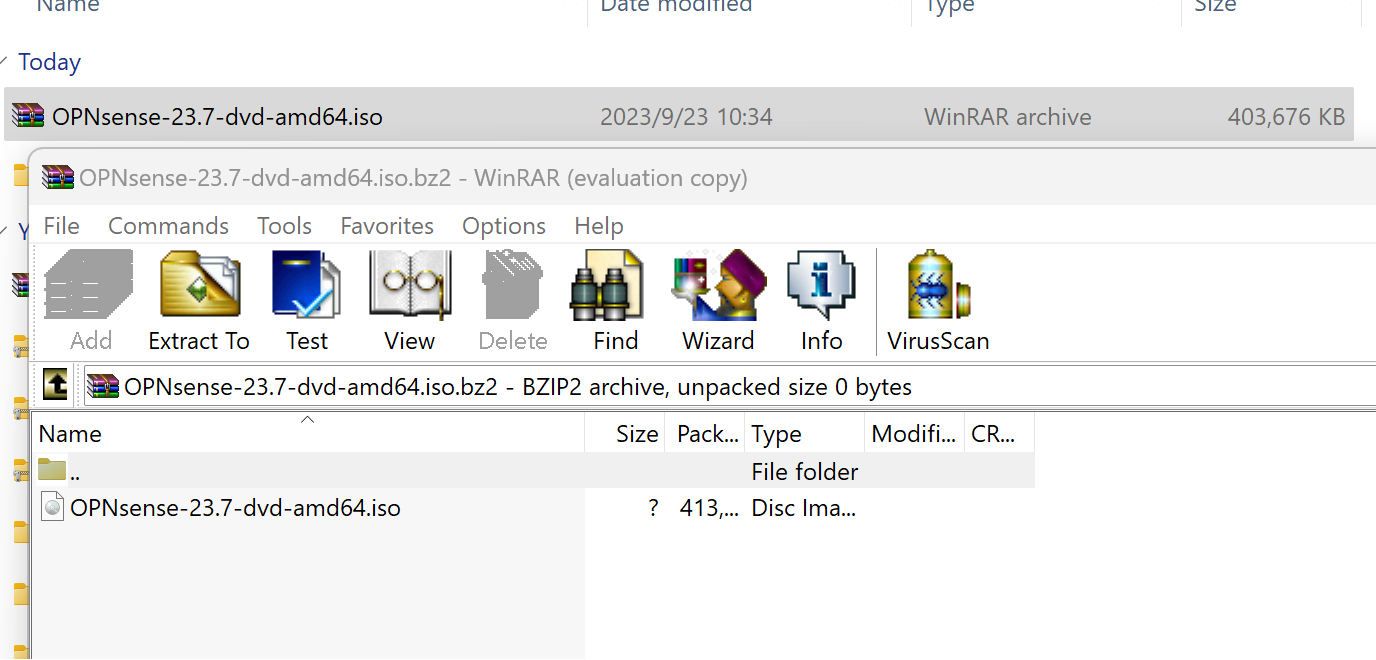
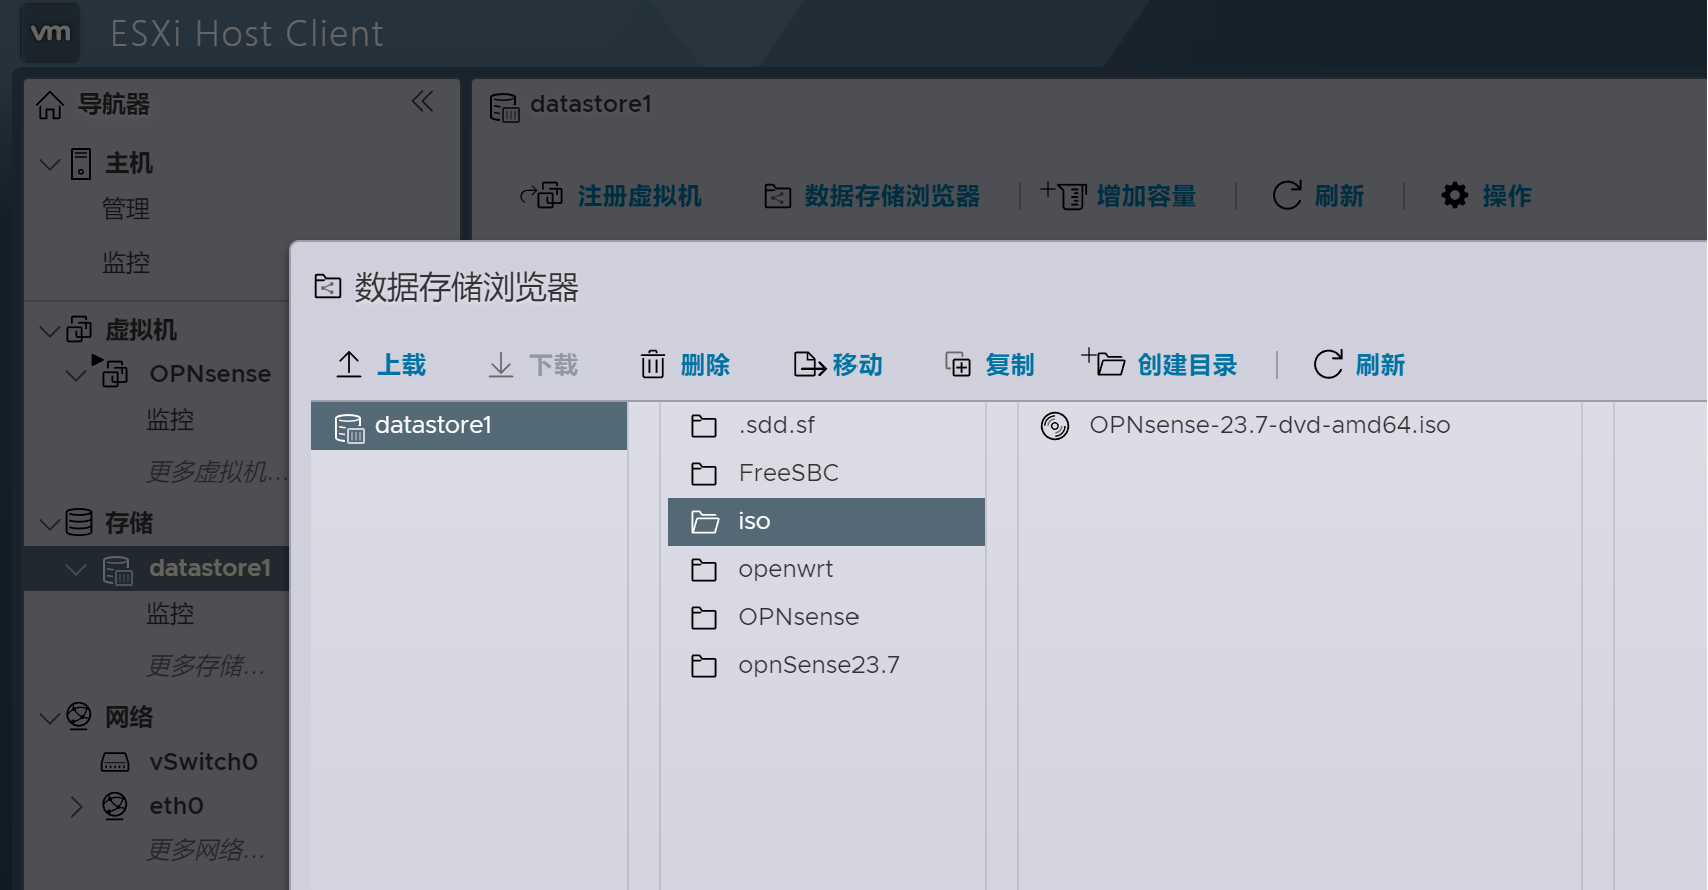
2、解压出镜像并上传至esxi 数据存储
…………………………………………………………………….
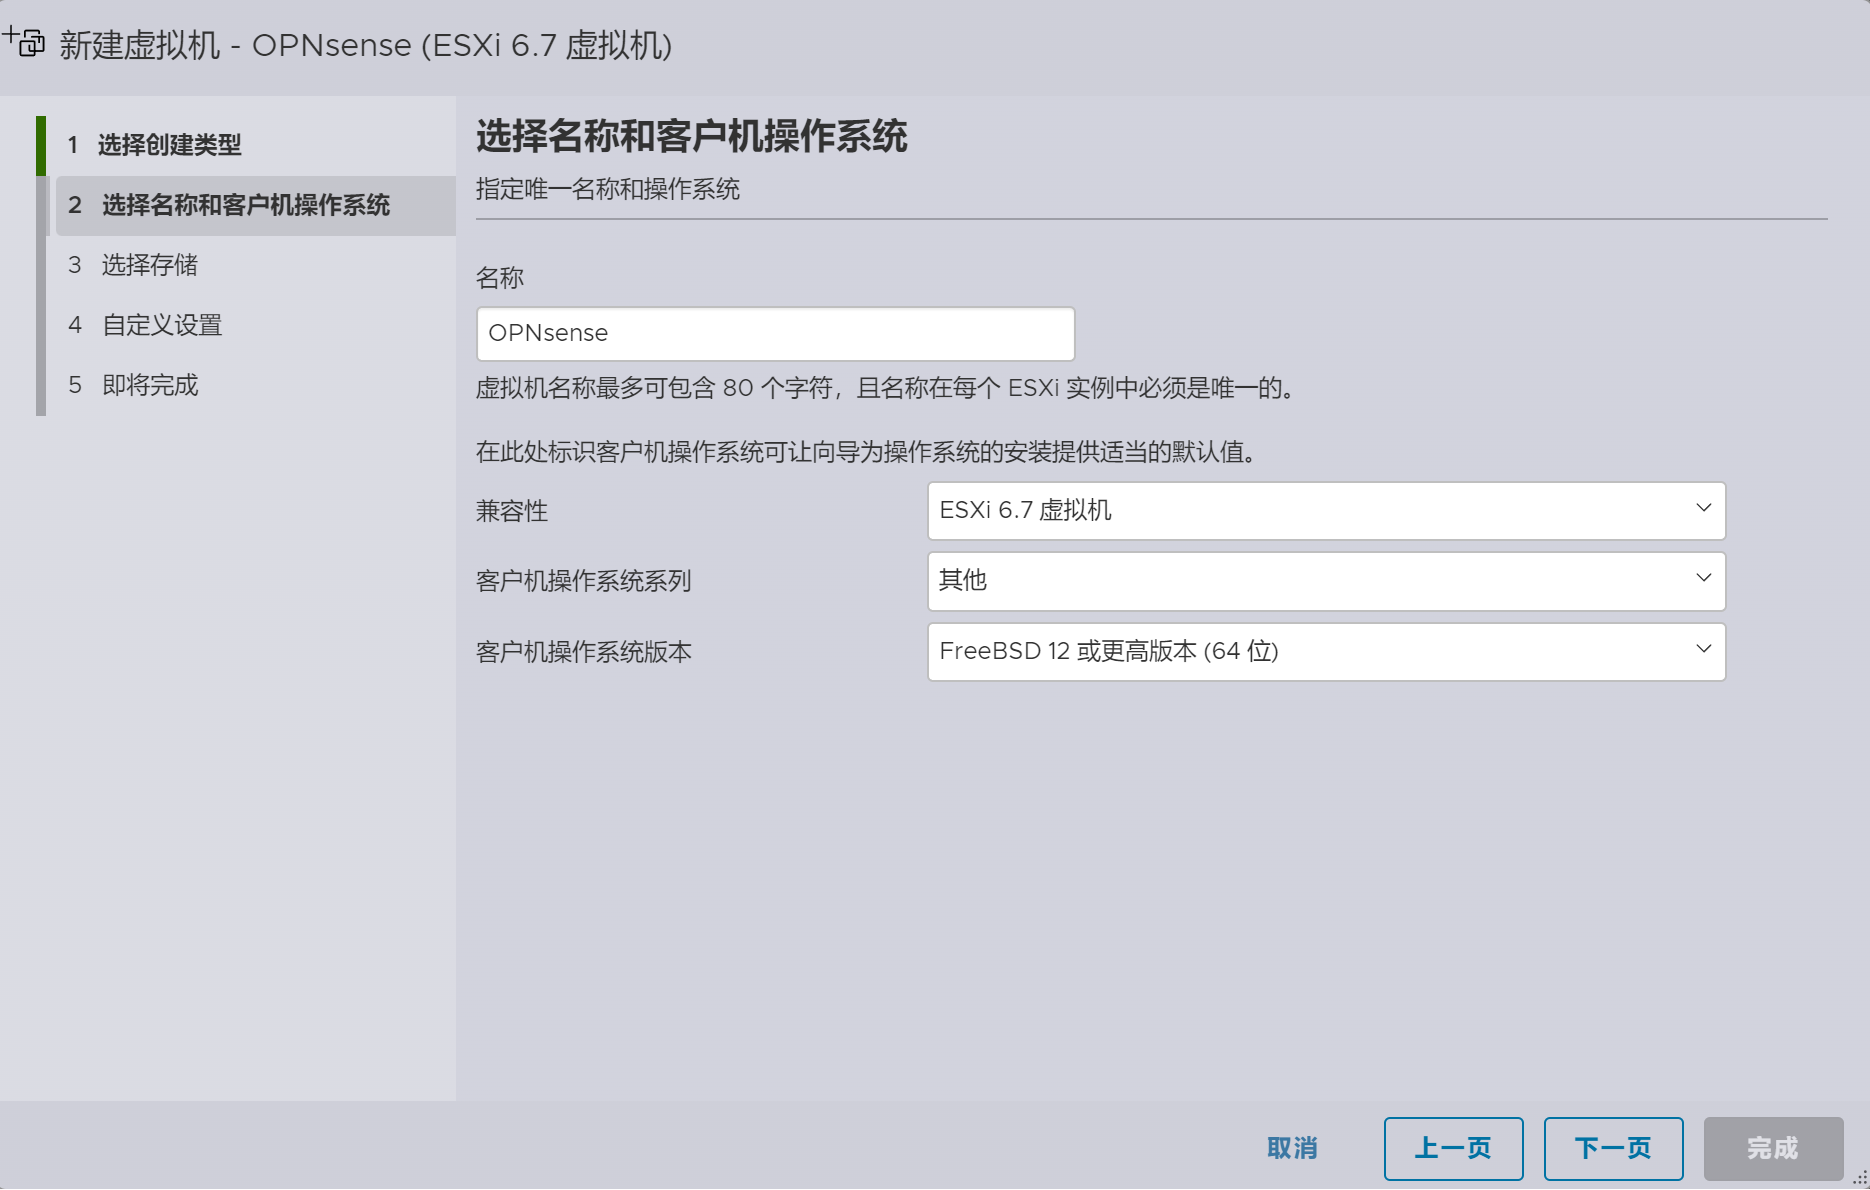
3、新建虚拟机
客户机操作系统系列选择“其它”
操作系统版本选择“FreeBSD ”
…………………………………………………………………….
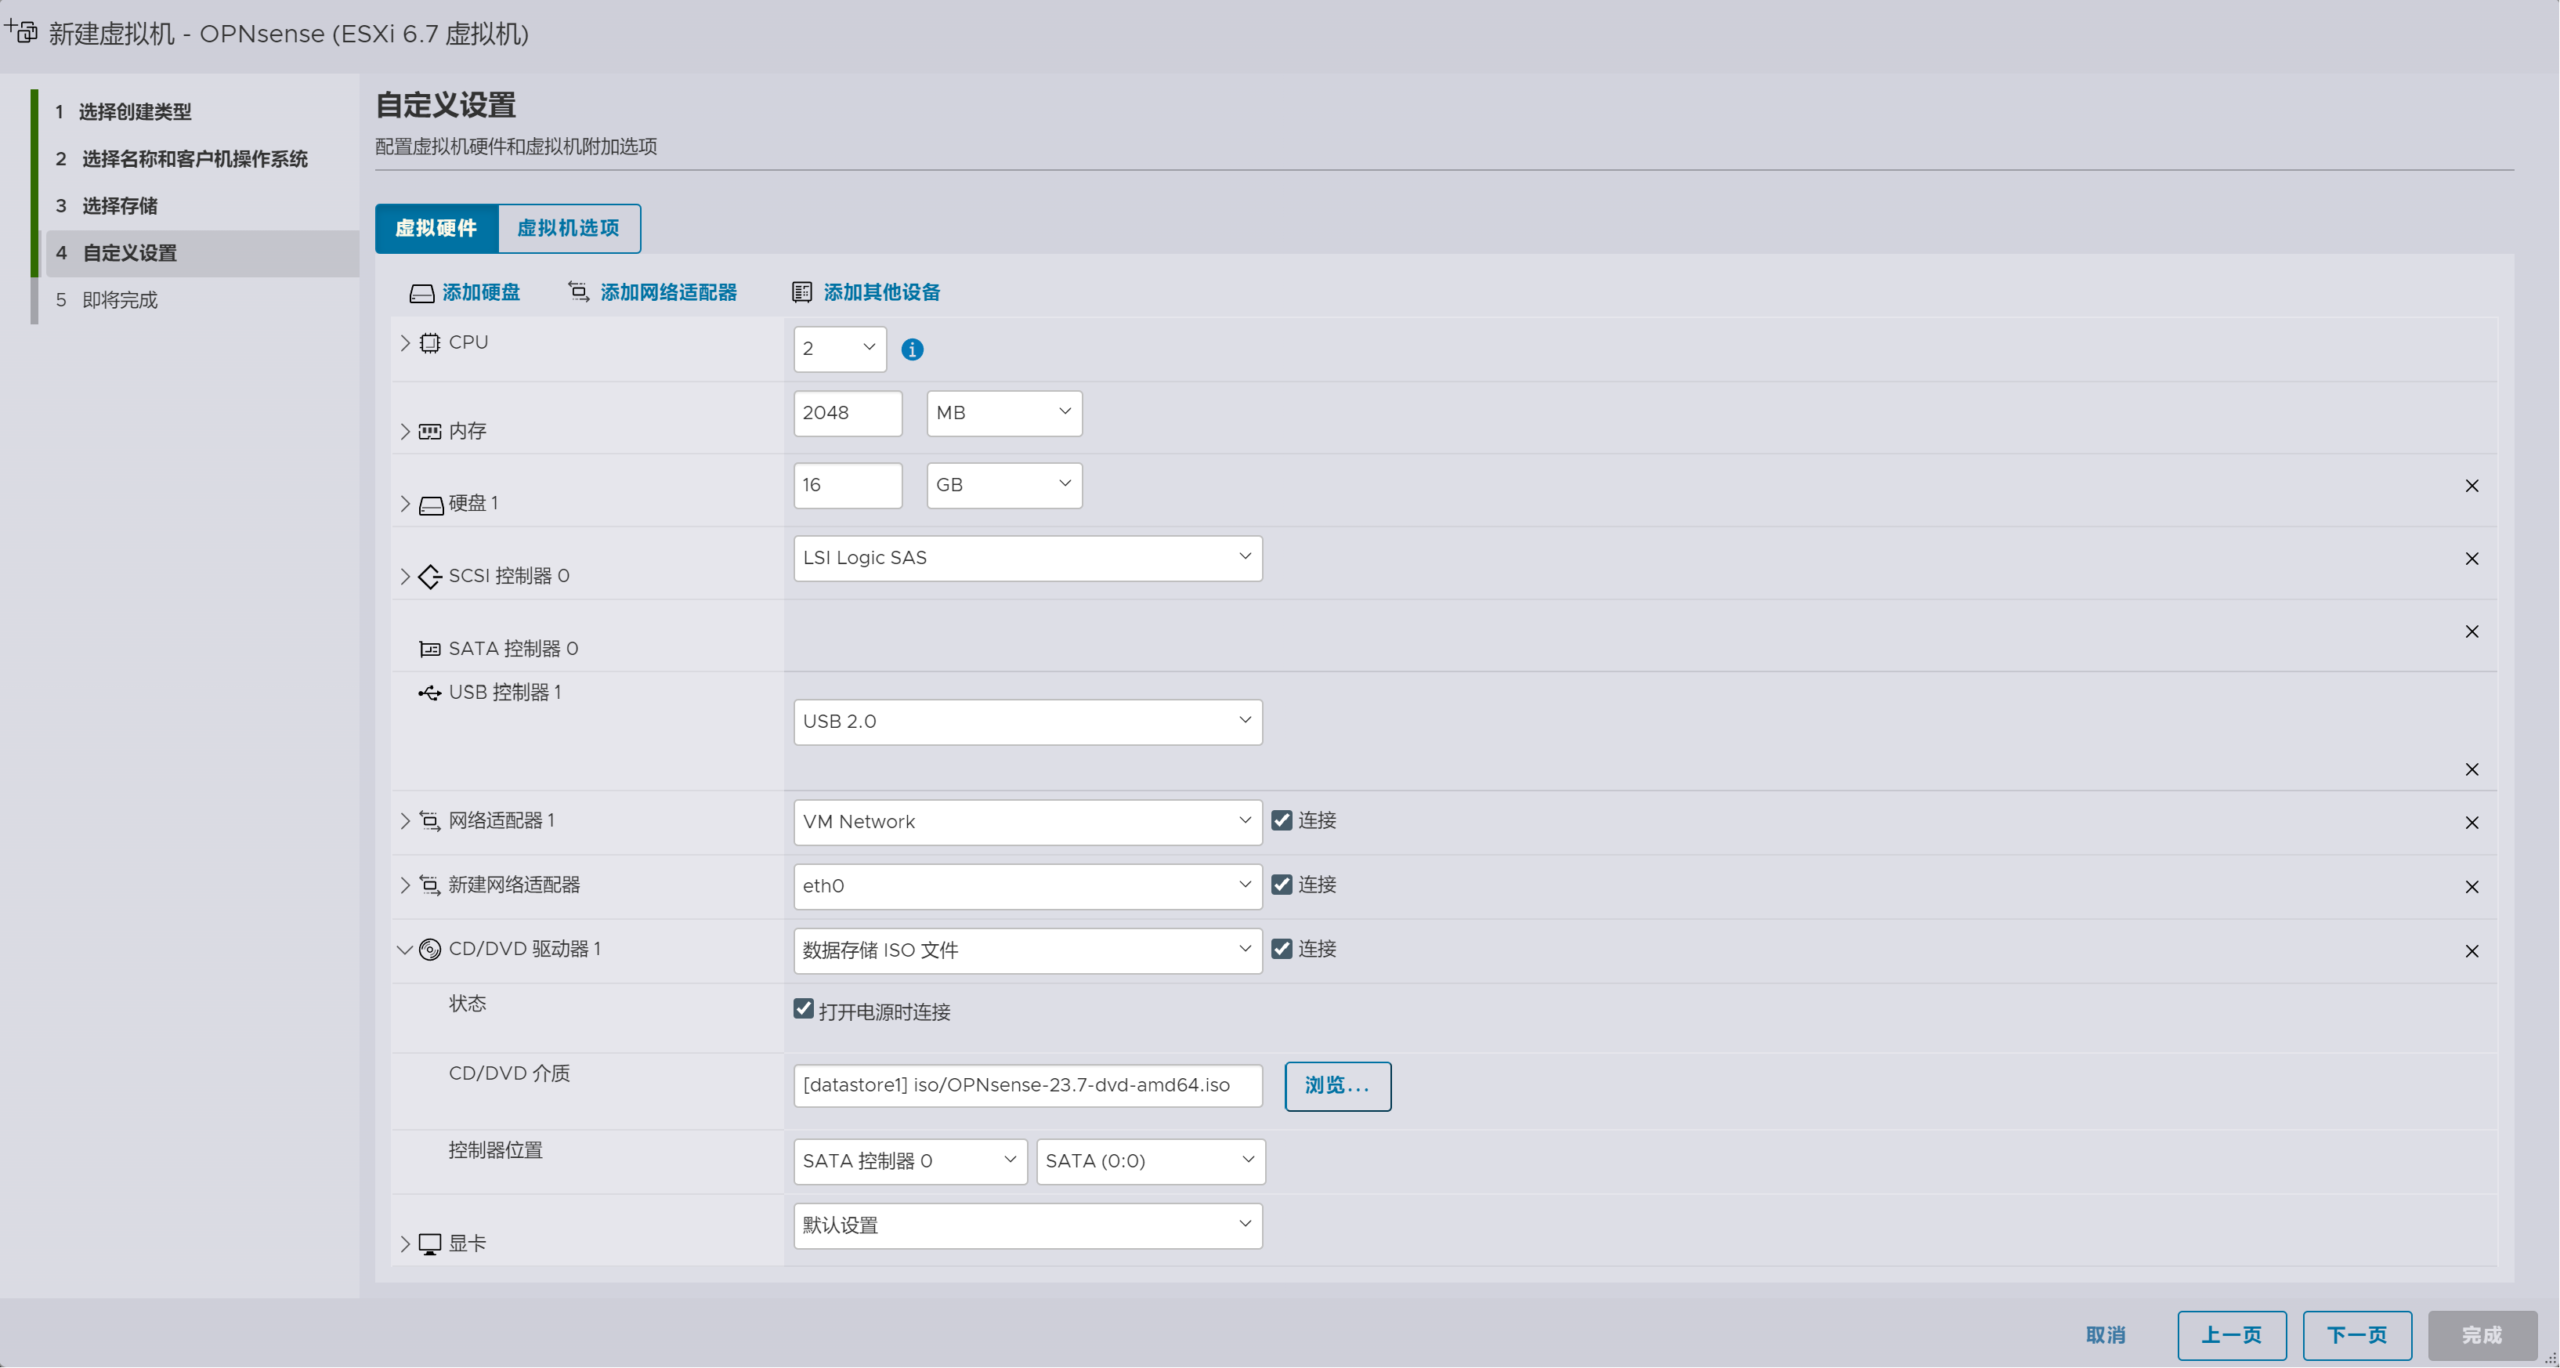
分配内存 “2GB”,硬盘空间“16GB”,CD/DVD驱动器1选择“数据存储ISO文件”,CD/DVD介质选择opnSense DVD镜像,添加网络适配器(vmnetwork 为opnsense LAN口,eh0为WAN口)
…………………………………………………………………….
编辑端口 “eth0” 和 “VMnetwork”,安全选项发中的混杂模式 更改为接受

…………………………………………………………………….
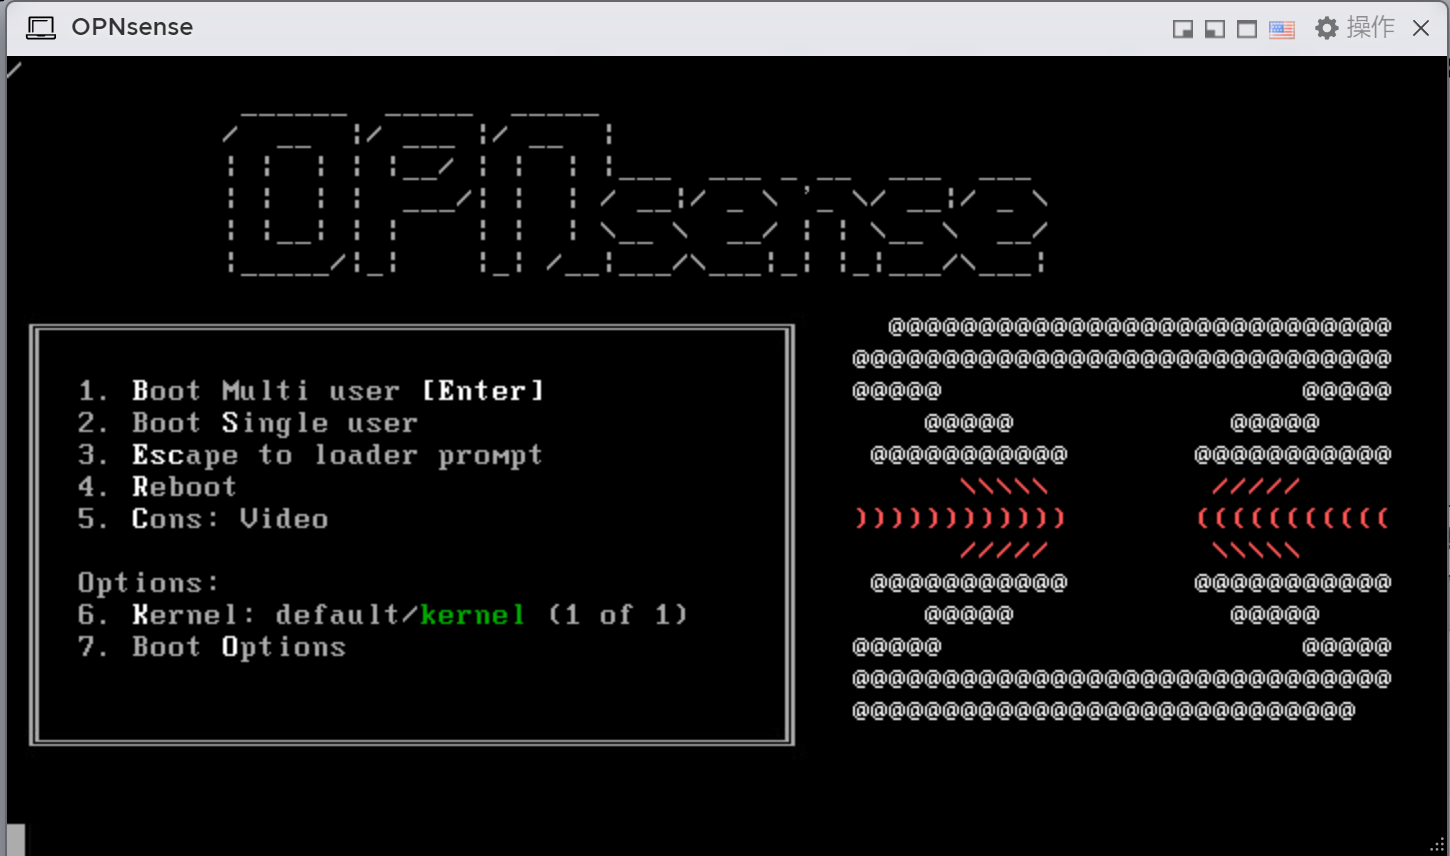
4、启动 opnsense客户机,安装配置 opensense
首次启动显示以下页面,不选任何选项,系统以live镜像方式运行
…………………………………………………………………….
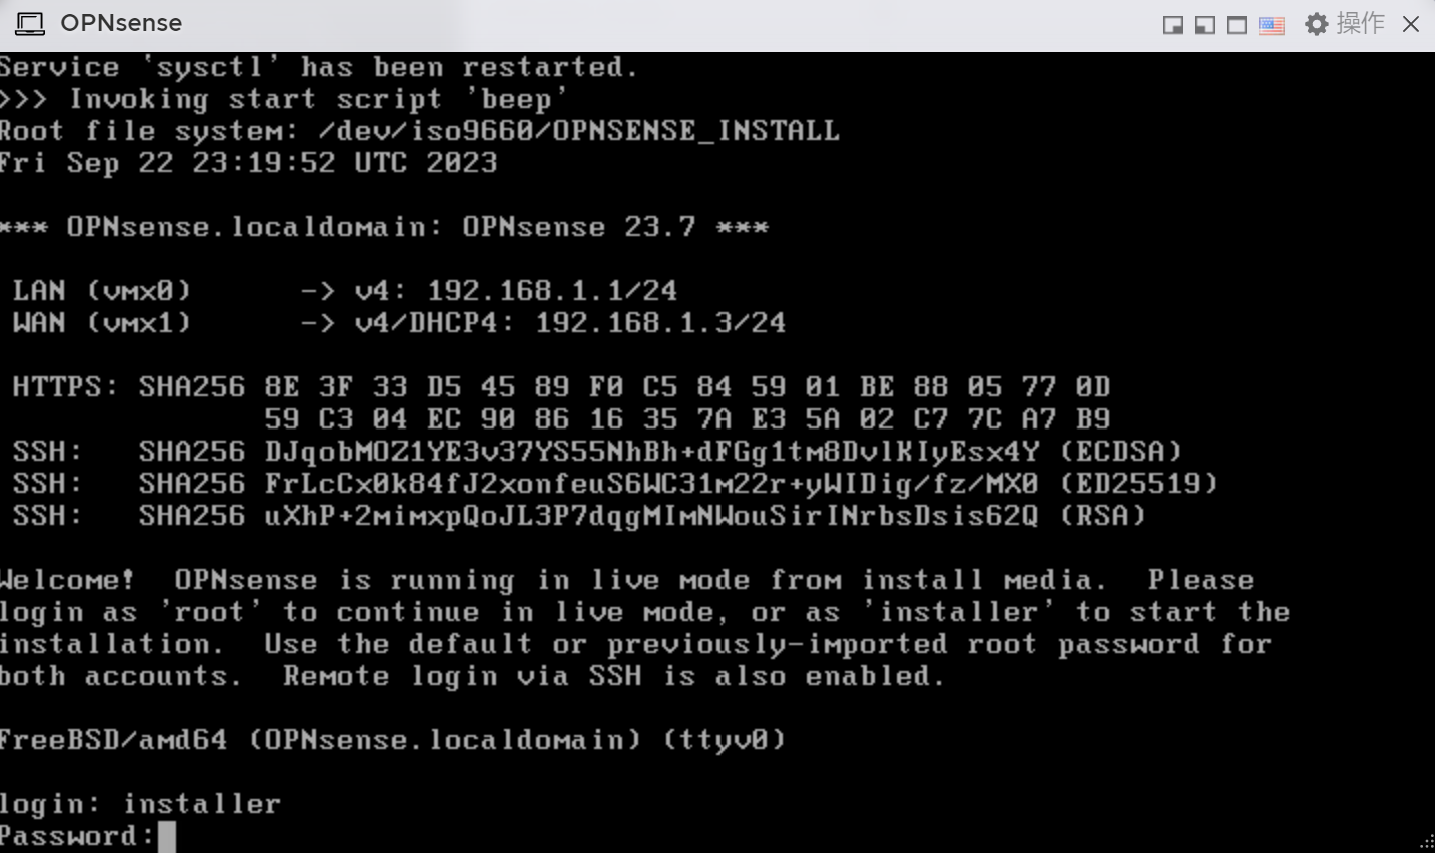
至以下登录页面,用户名输入 “installer”,密码“opnsense” 进入安装模式
…………………………………………………………………….
直接回车使用默认键盘布局
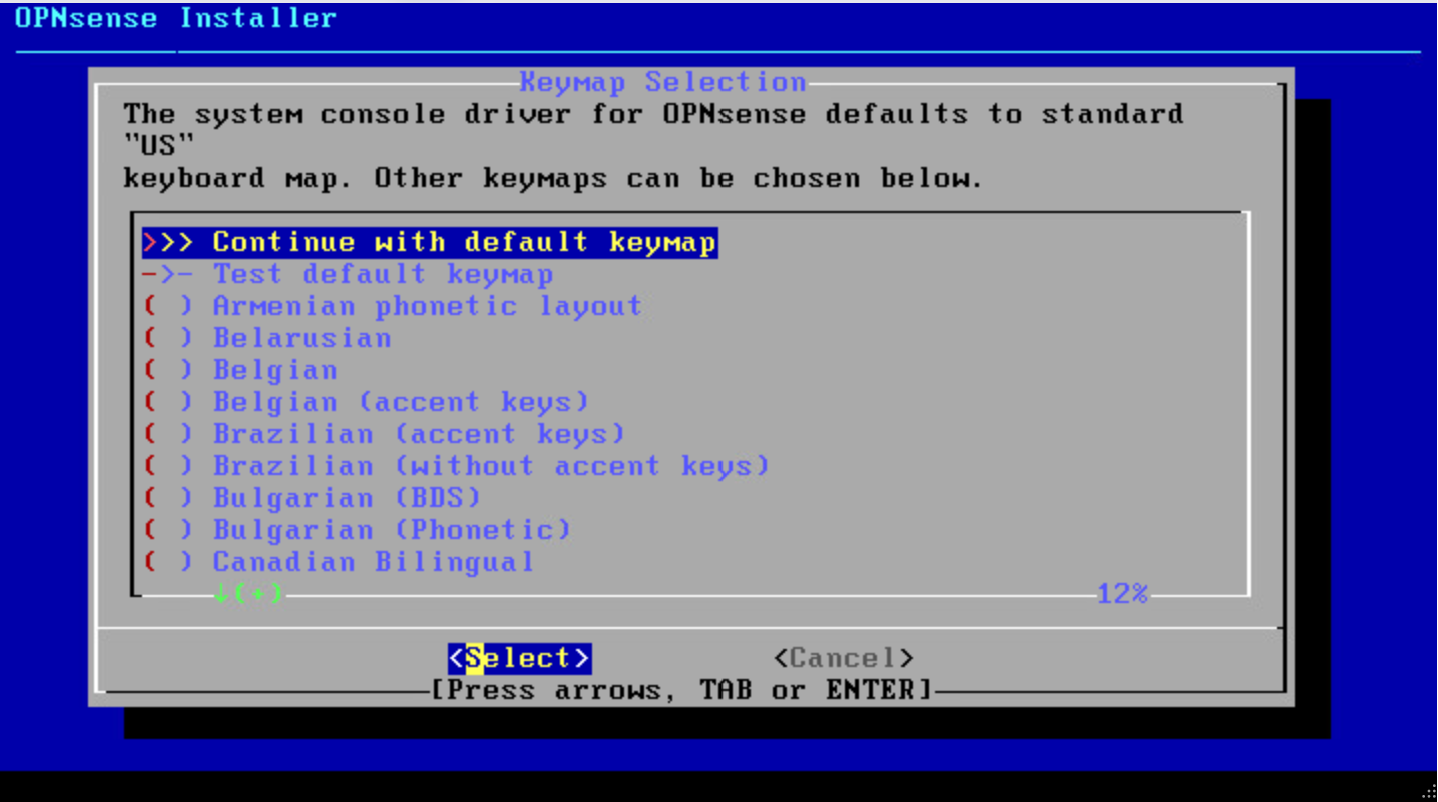
…………………………………………………………………….
直接回车,默认安装使用UFS文件系统
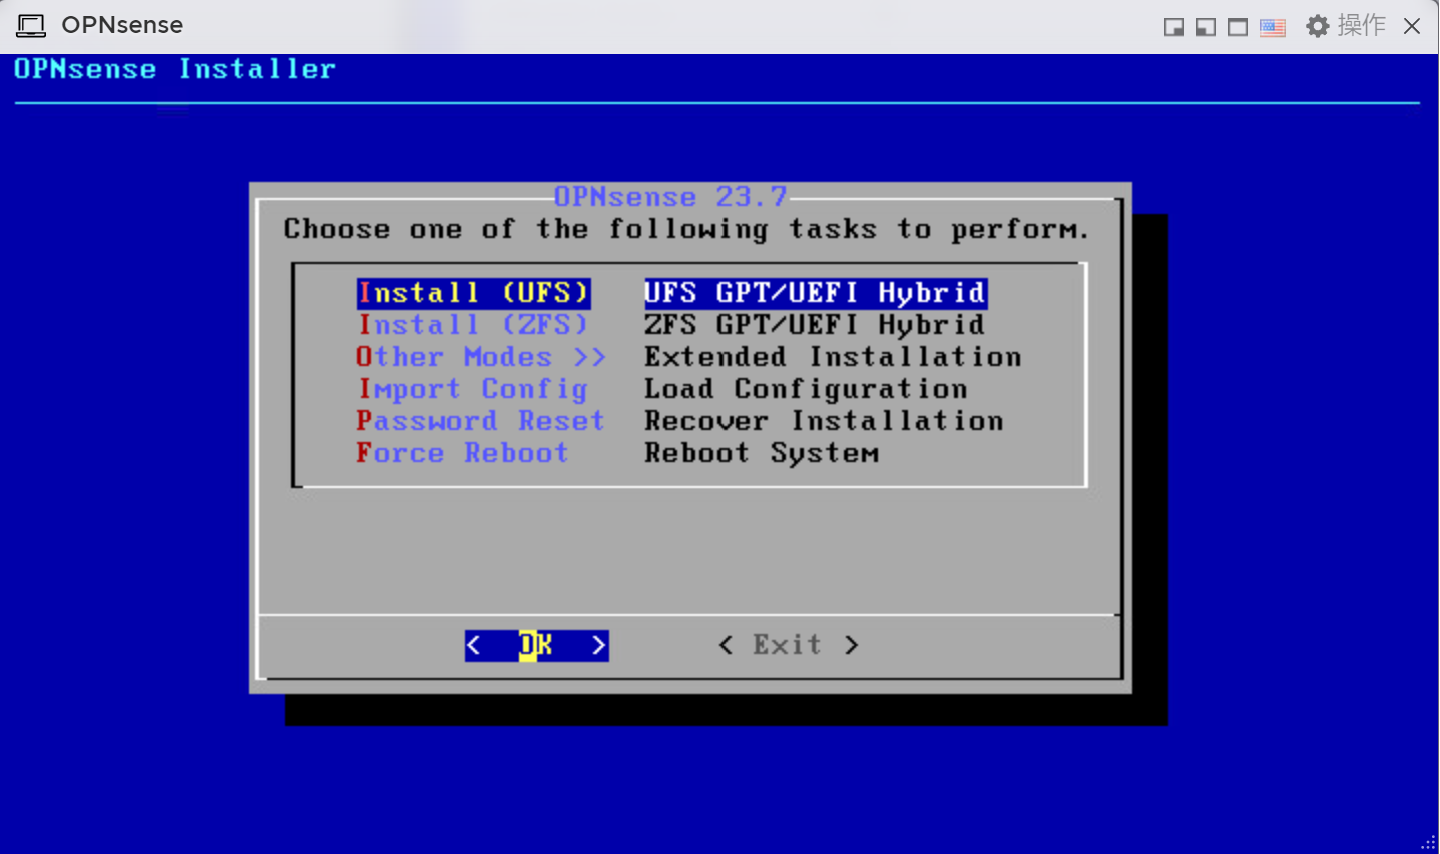
…………………………………………………………………….
直接回车,使用默认所分配置的虚拟磁盘da0进行安装
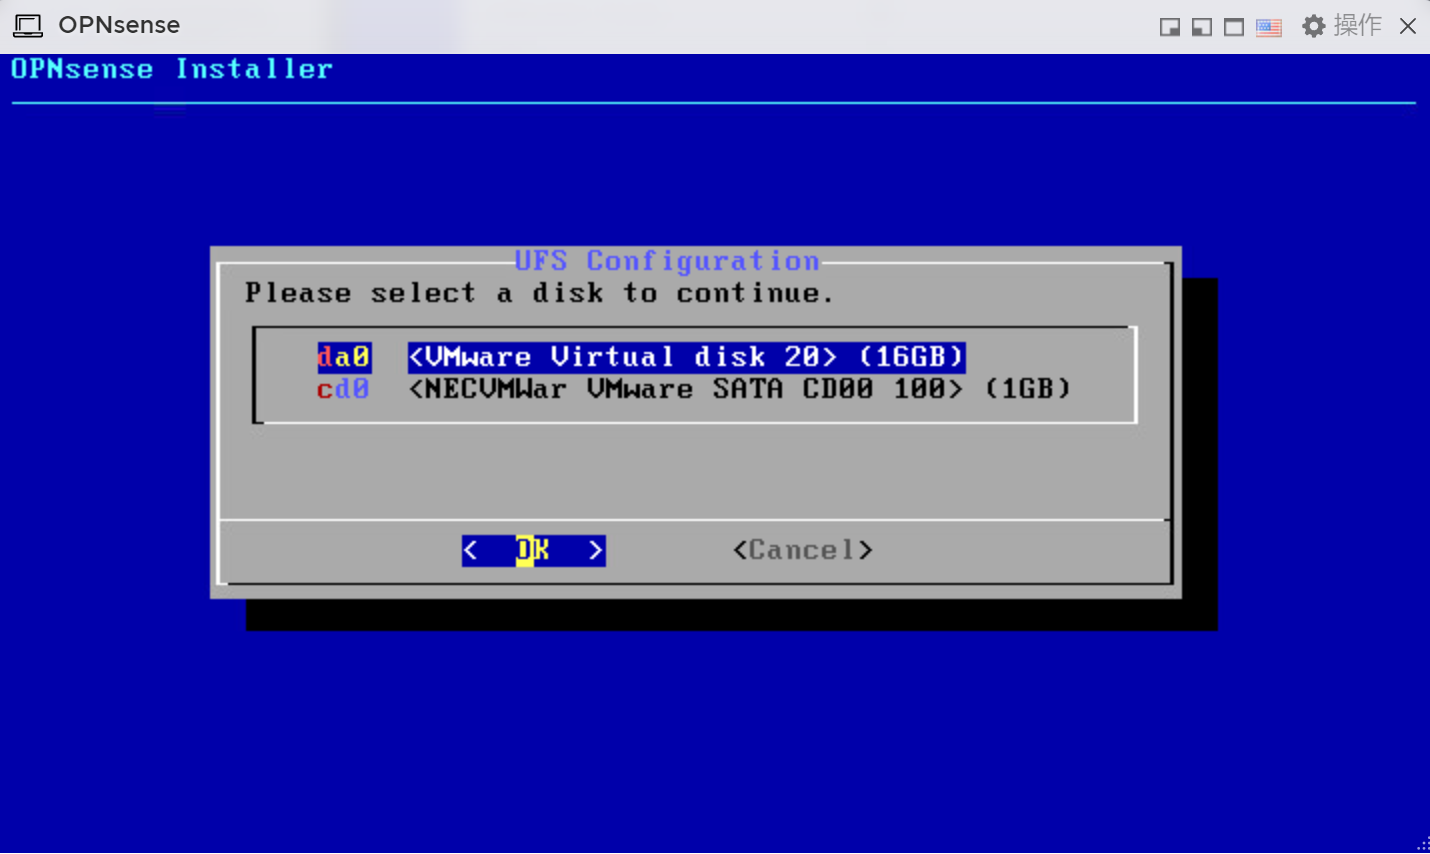
…………………………………………………………………….
选择”yes“ 按回车键进行安装
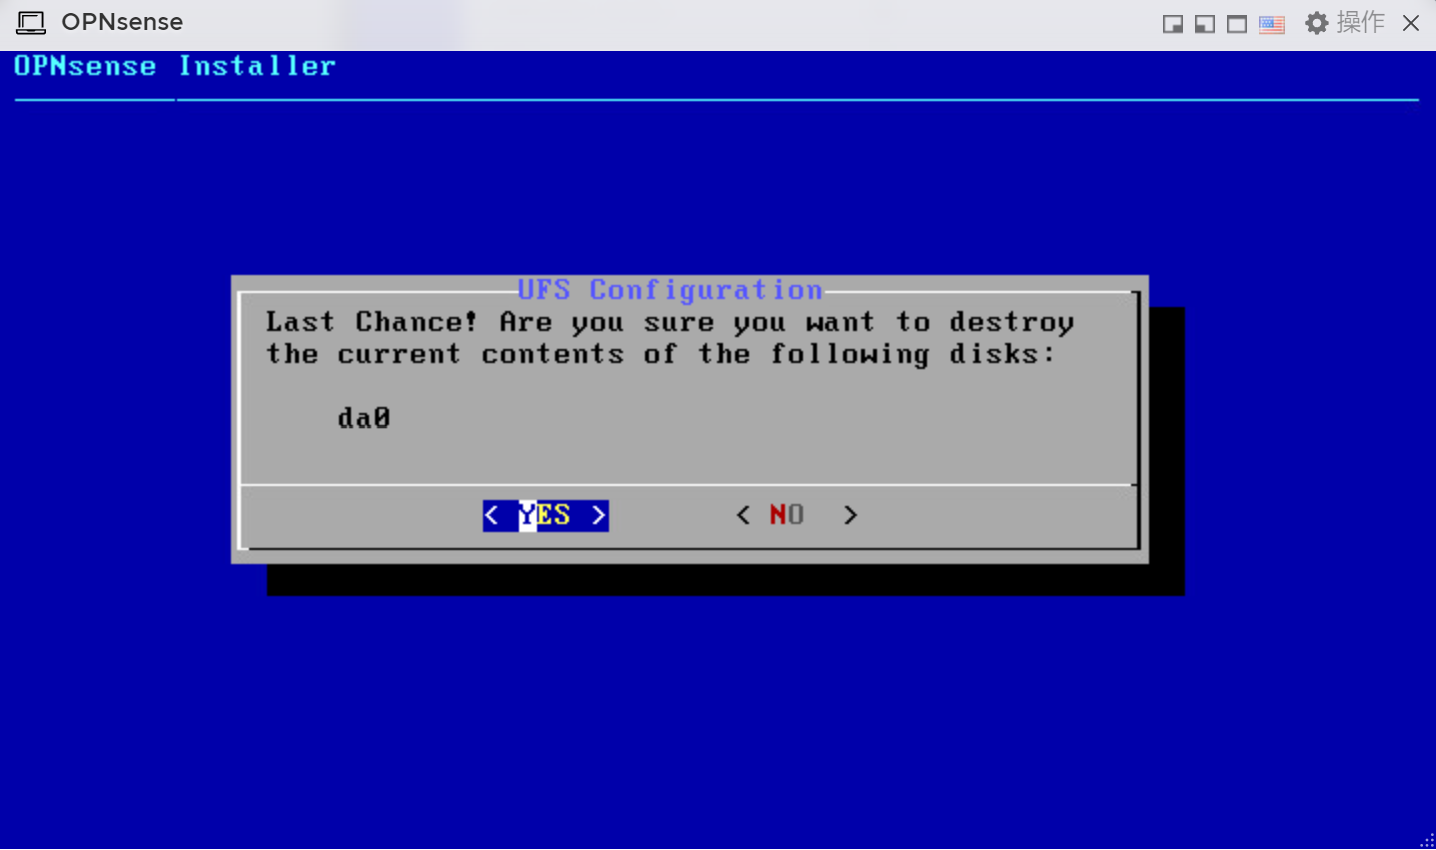
…………………………………………………………………….
系统开始从DVD镜像克隆至虚拟磁盘,需等待一段时间
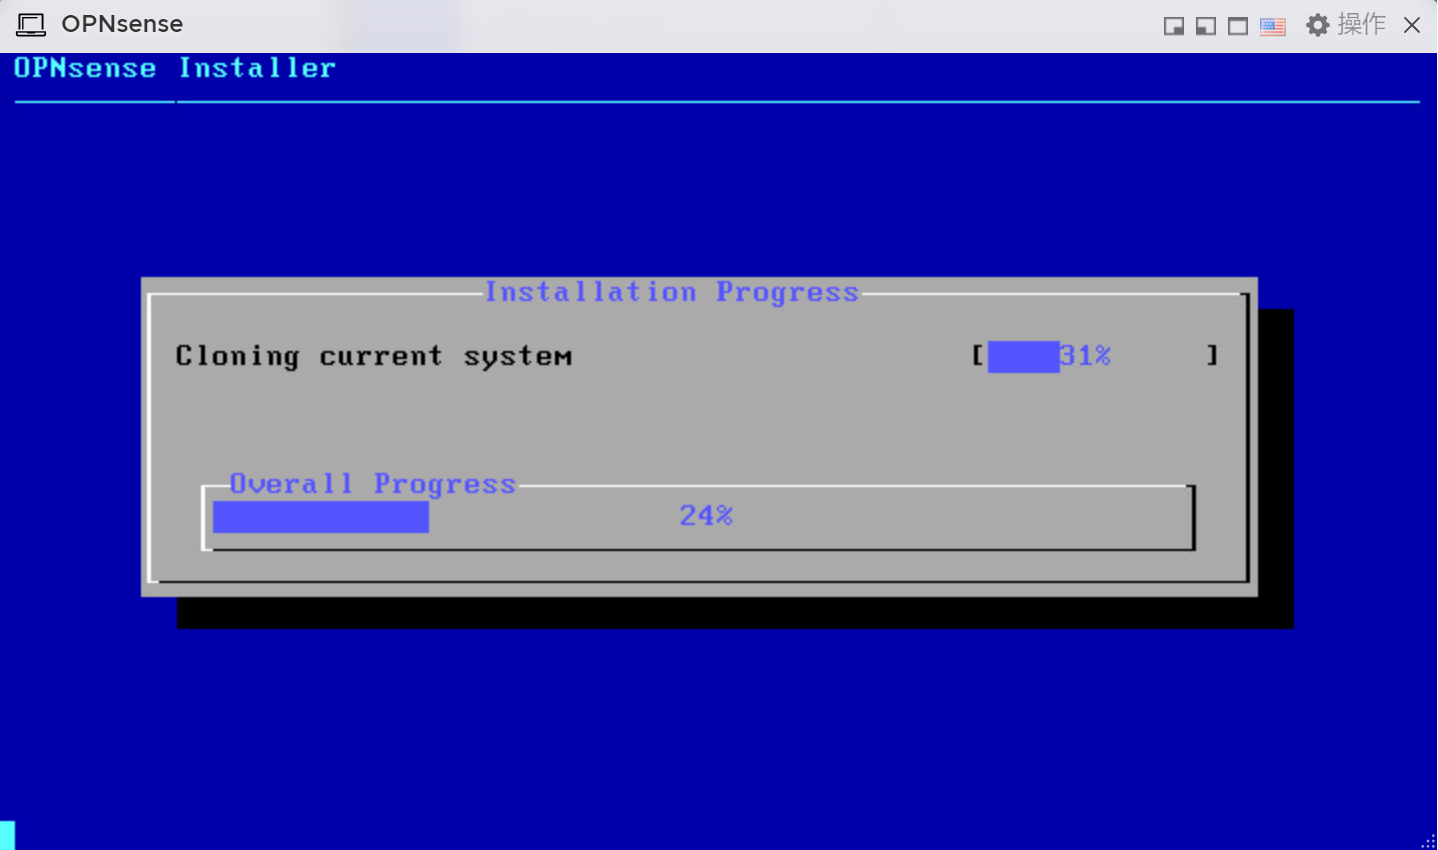
…………………………………………………………………….
回车,开始设置root用户口令
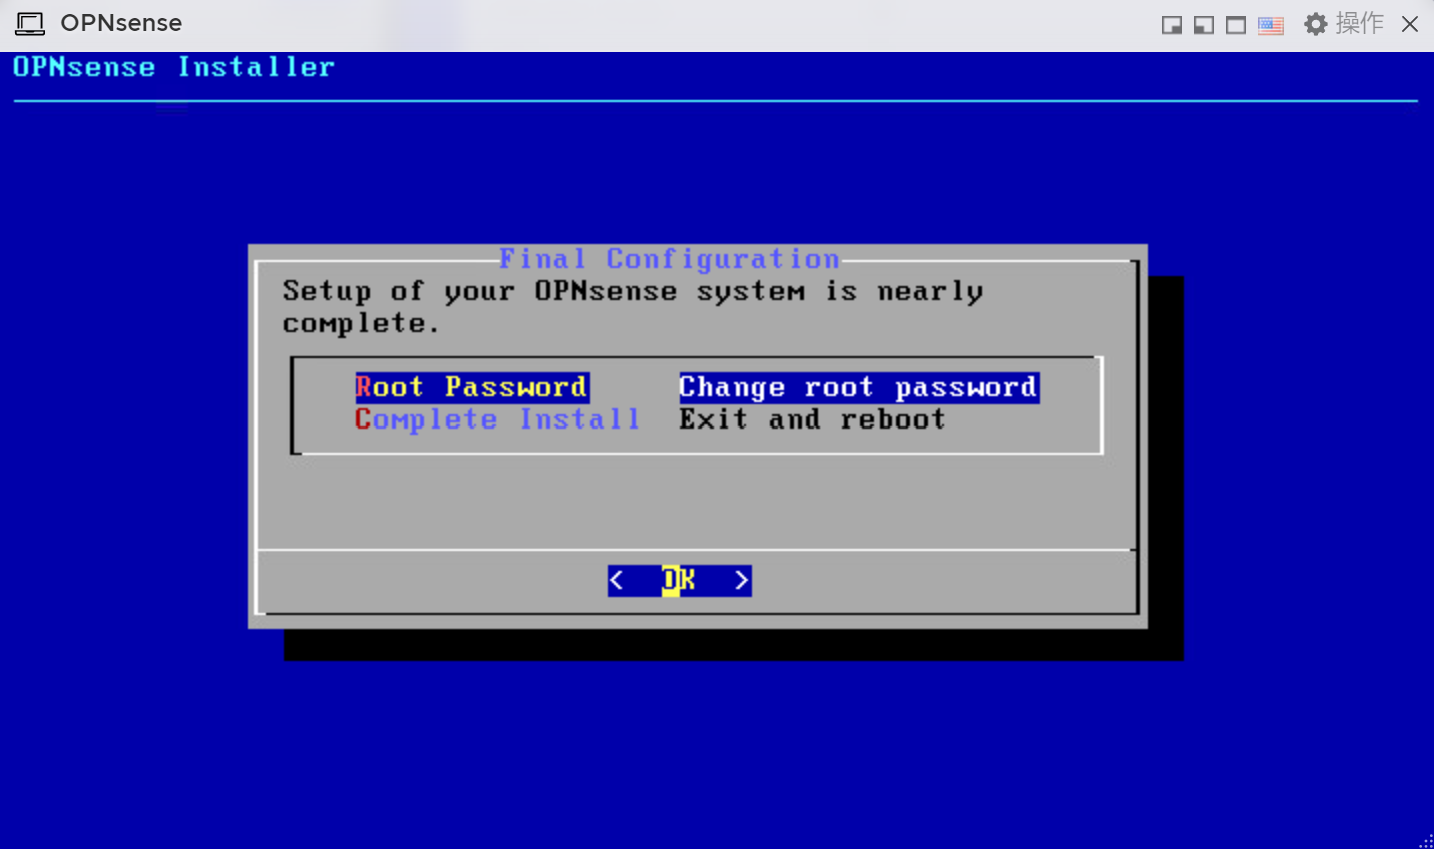
…………………………………………………………………….
输入root口令,回车确认(需2次确认)
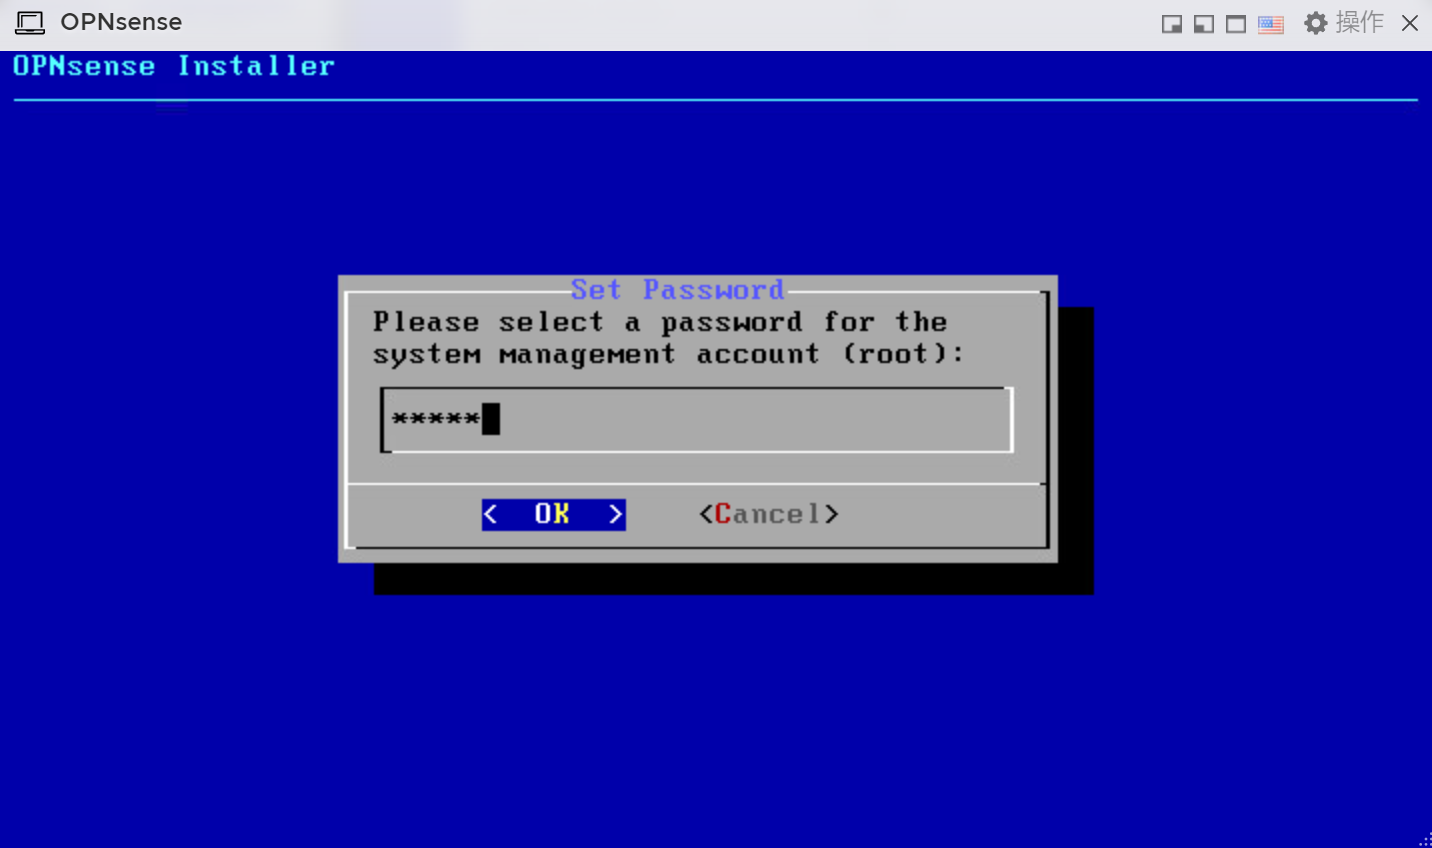
…………………………………………………………………….
完成安装,限出并重启
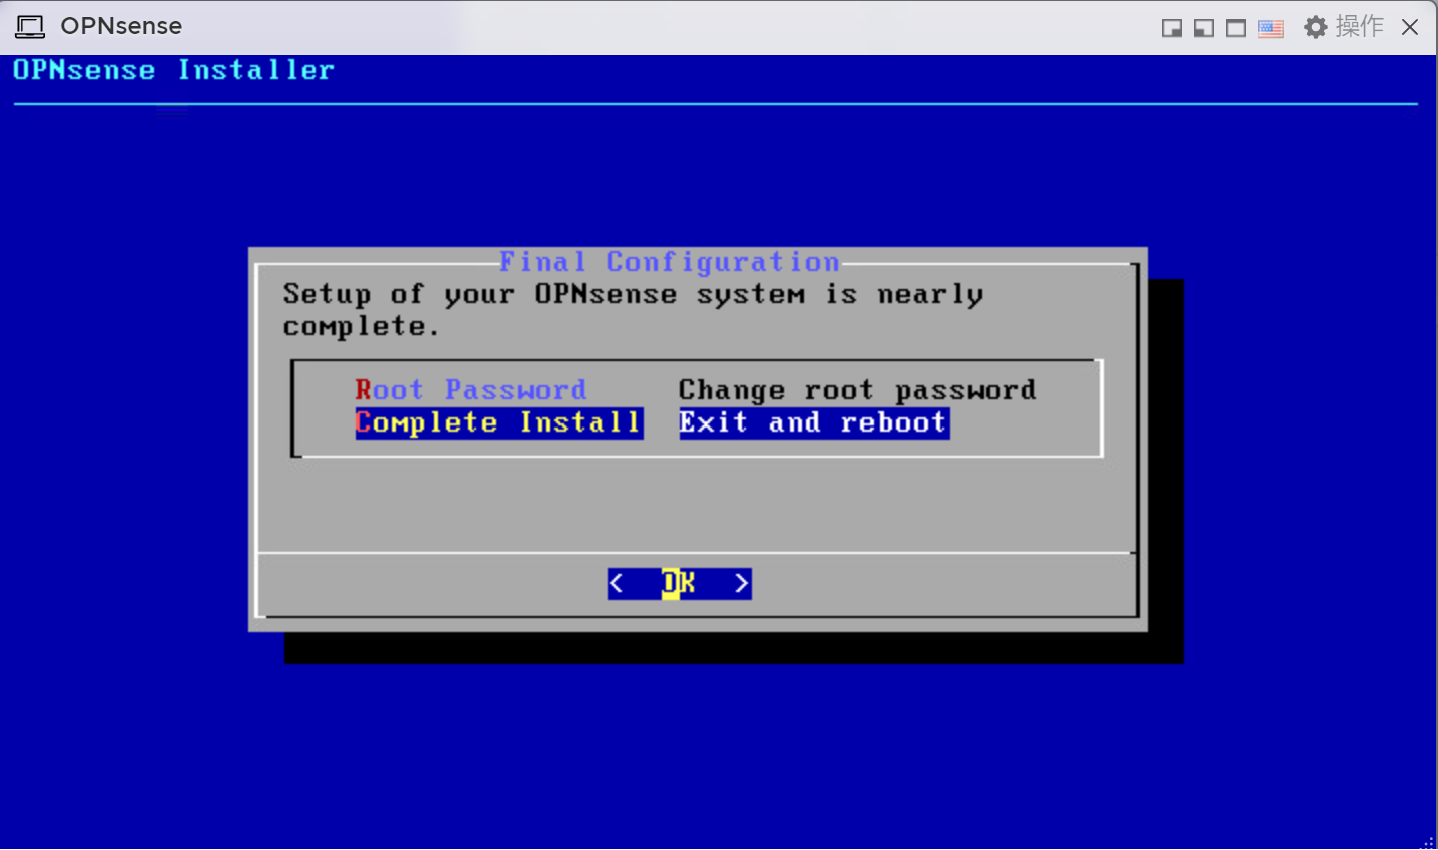
…………………………………………………………………….
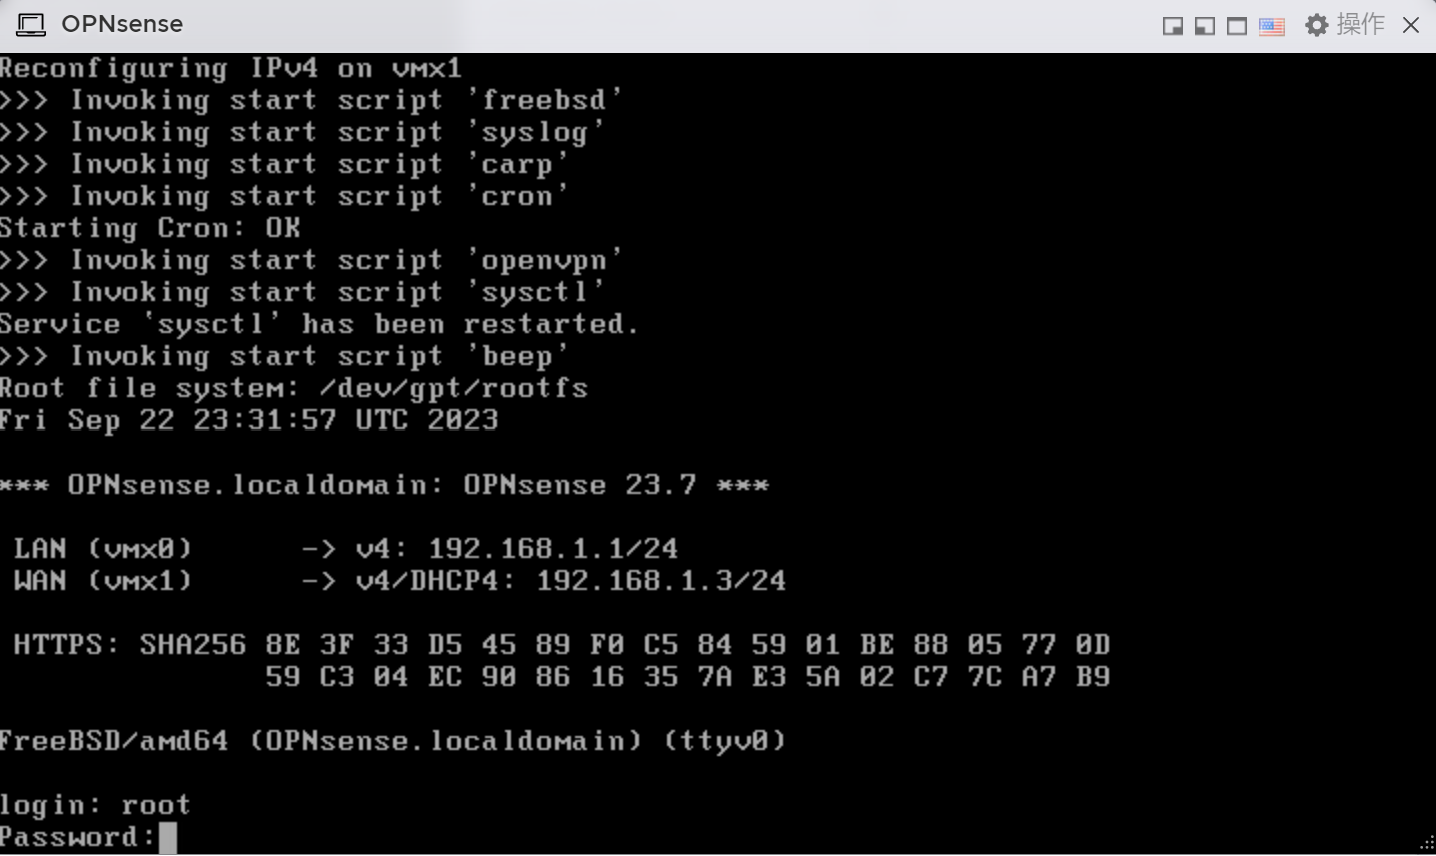
重启后显示LAN口默认地址 192.168.1.1/24
可在当前窗口登录通过菜单进行安装配置,也可通过web浏览器进行配置
…………………………………………………………………….
浏览器访问 192.168.1.1
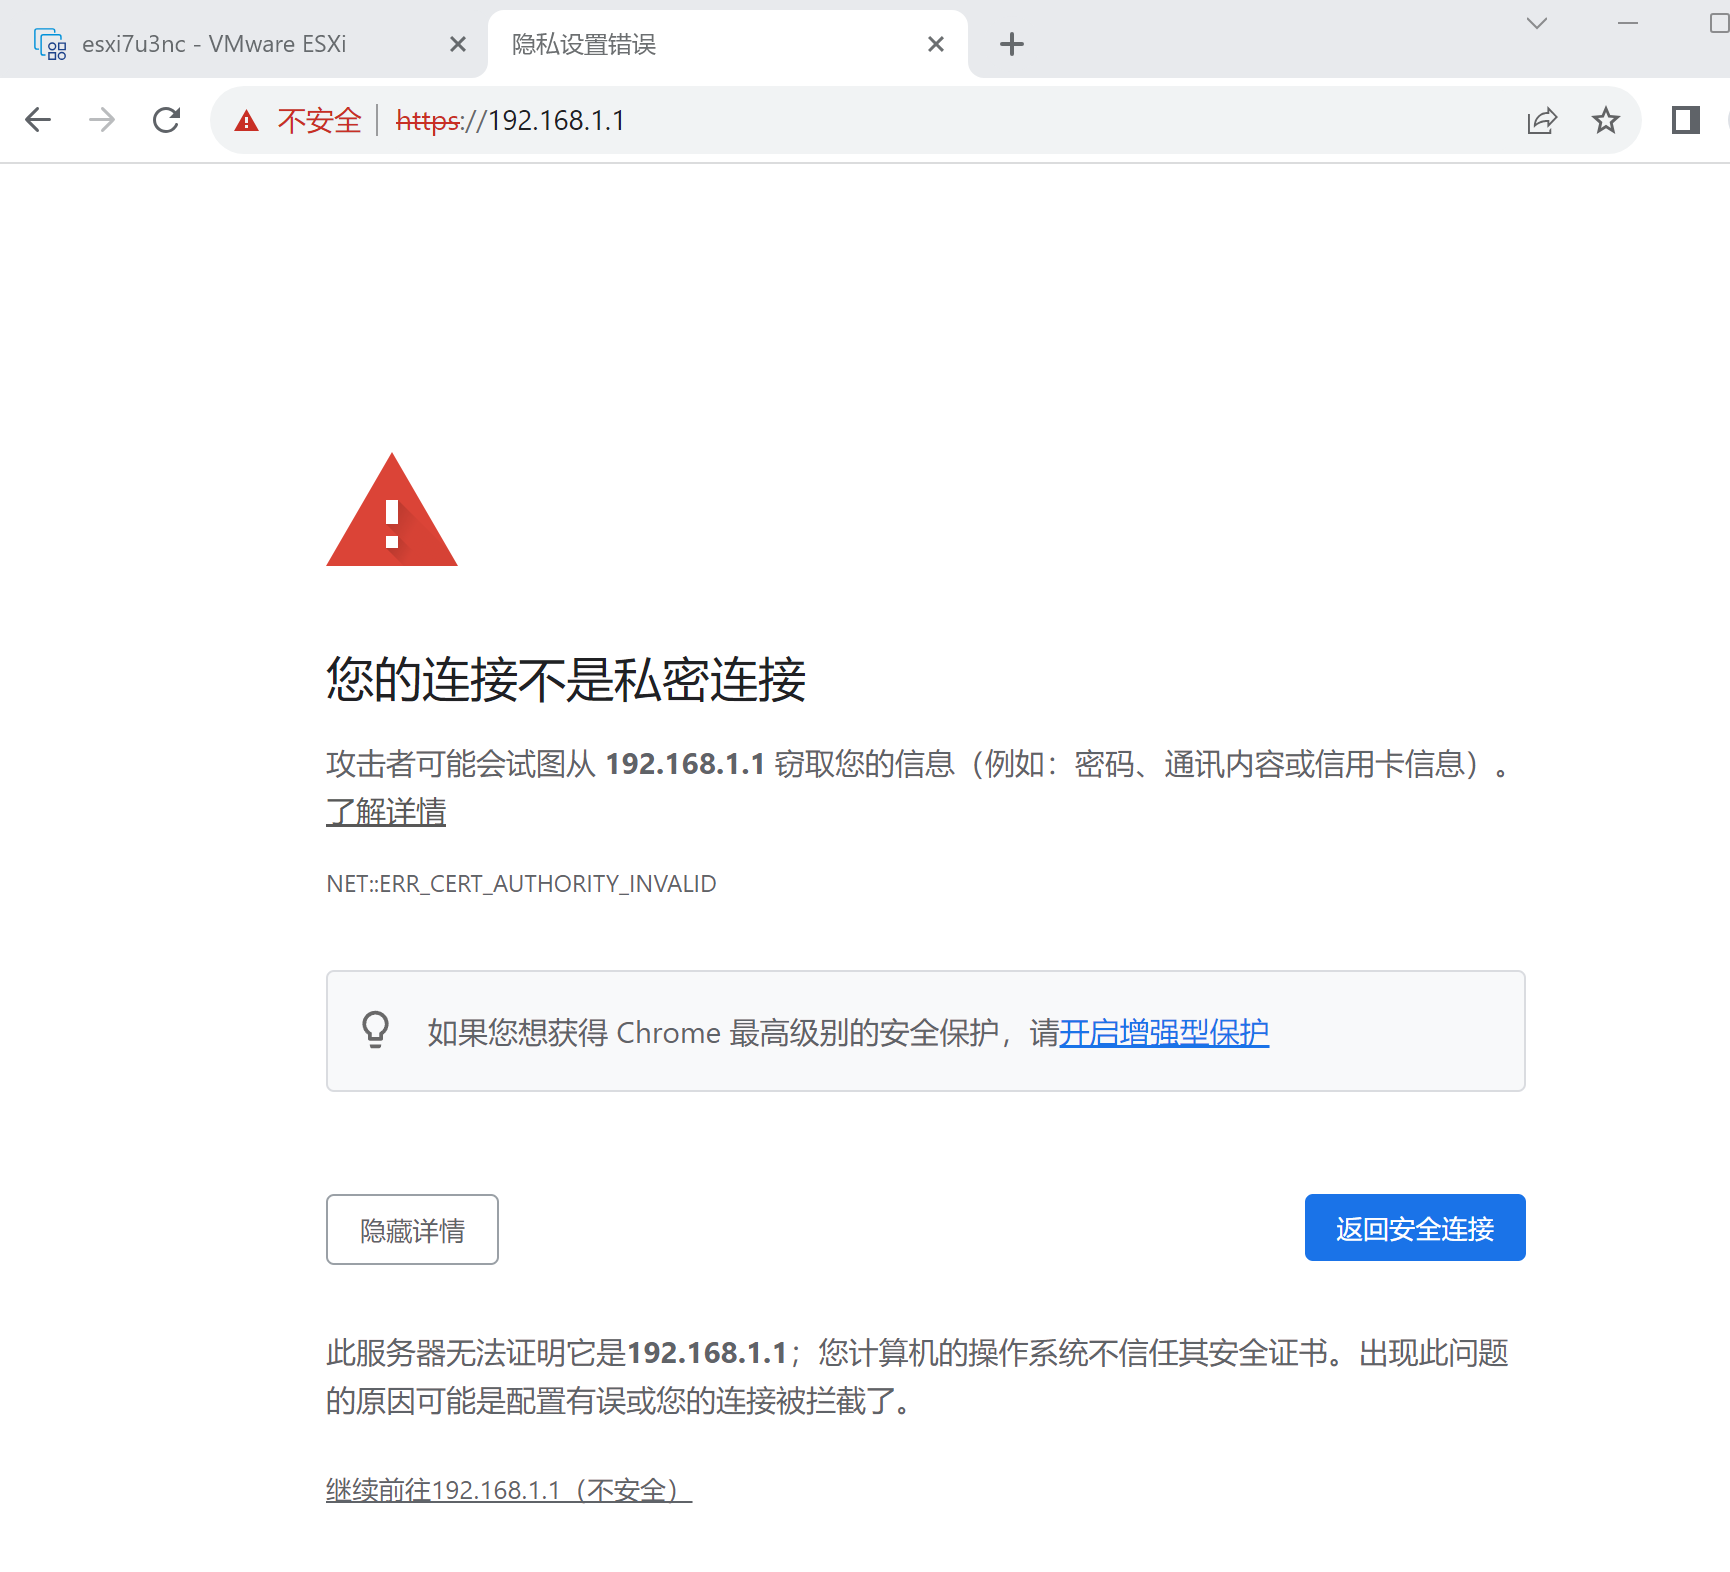
…………………………………………………………………….
web登录管理页面,用户名”root”,密码使用安装过程中设置的密码,如查安装过程中未设置root口令,此时默认密码为 “opnsense”
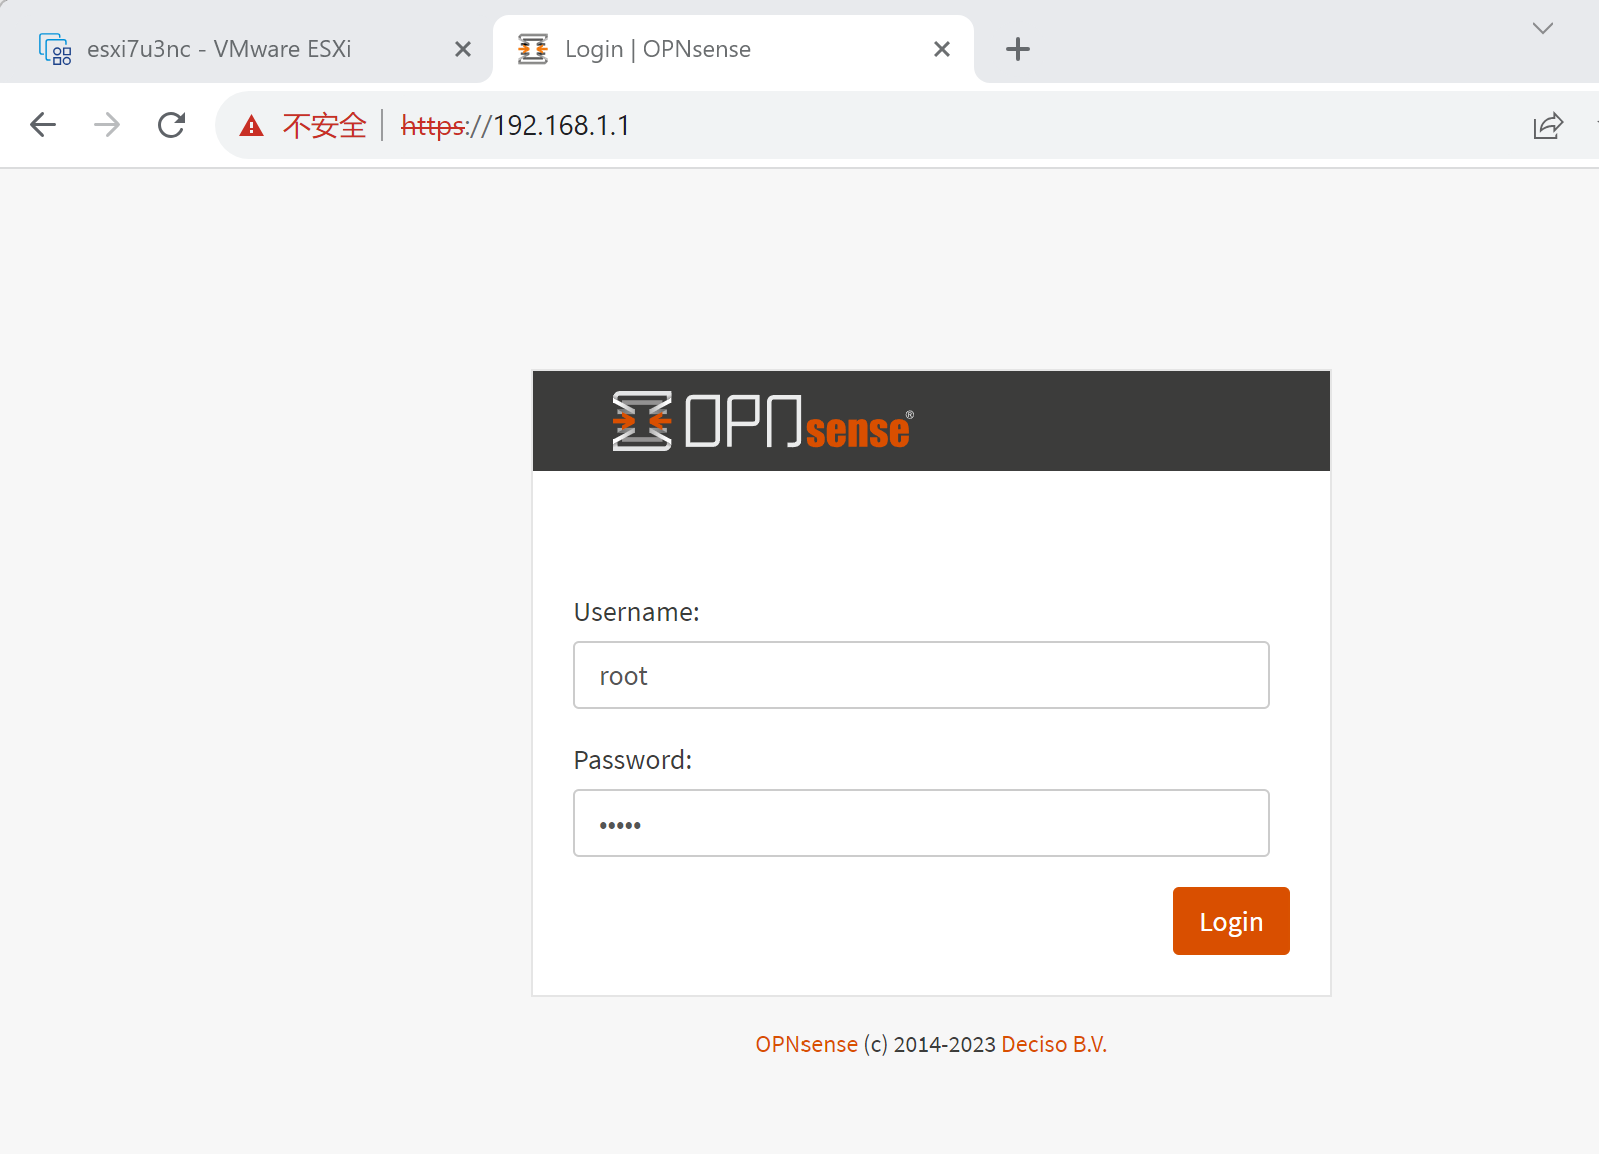
…………………………………………………………………….
进入管理页面,opnsense安装完成
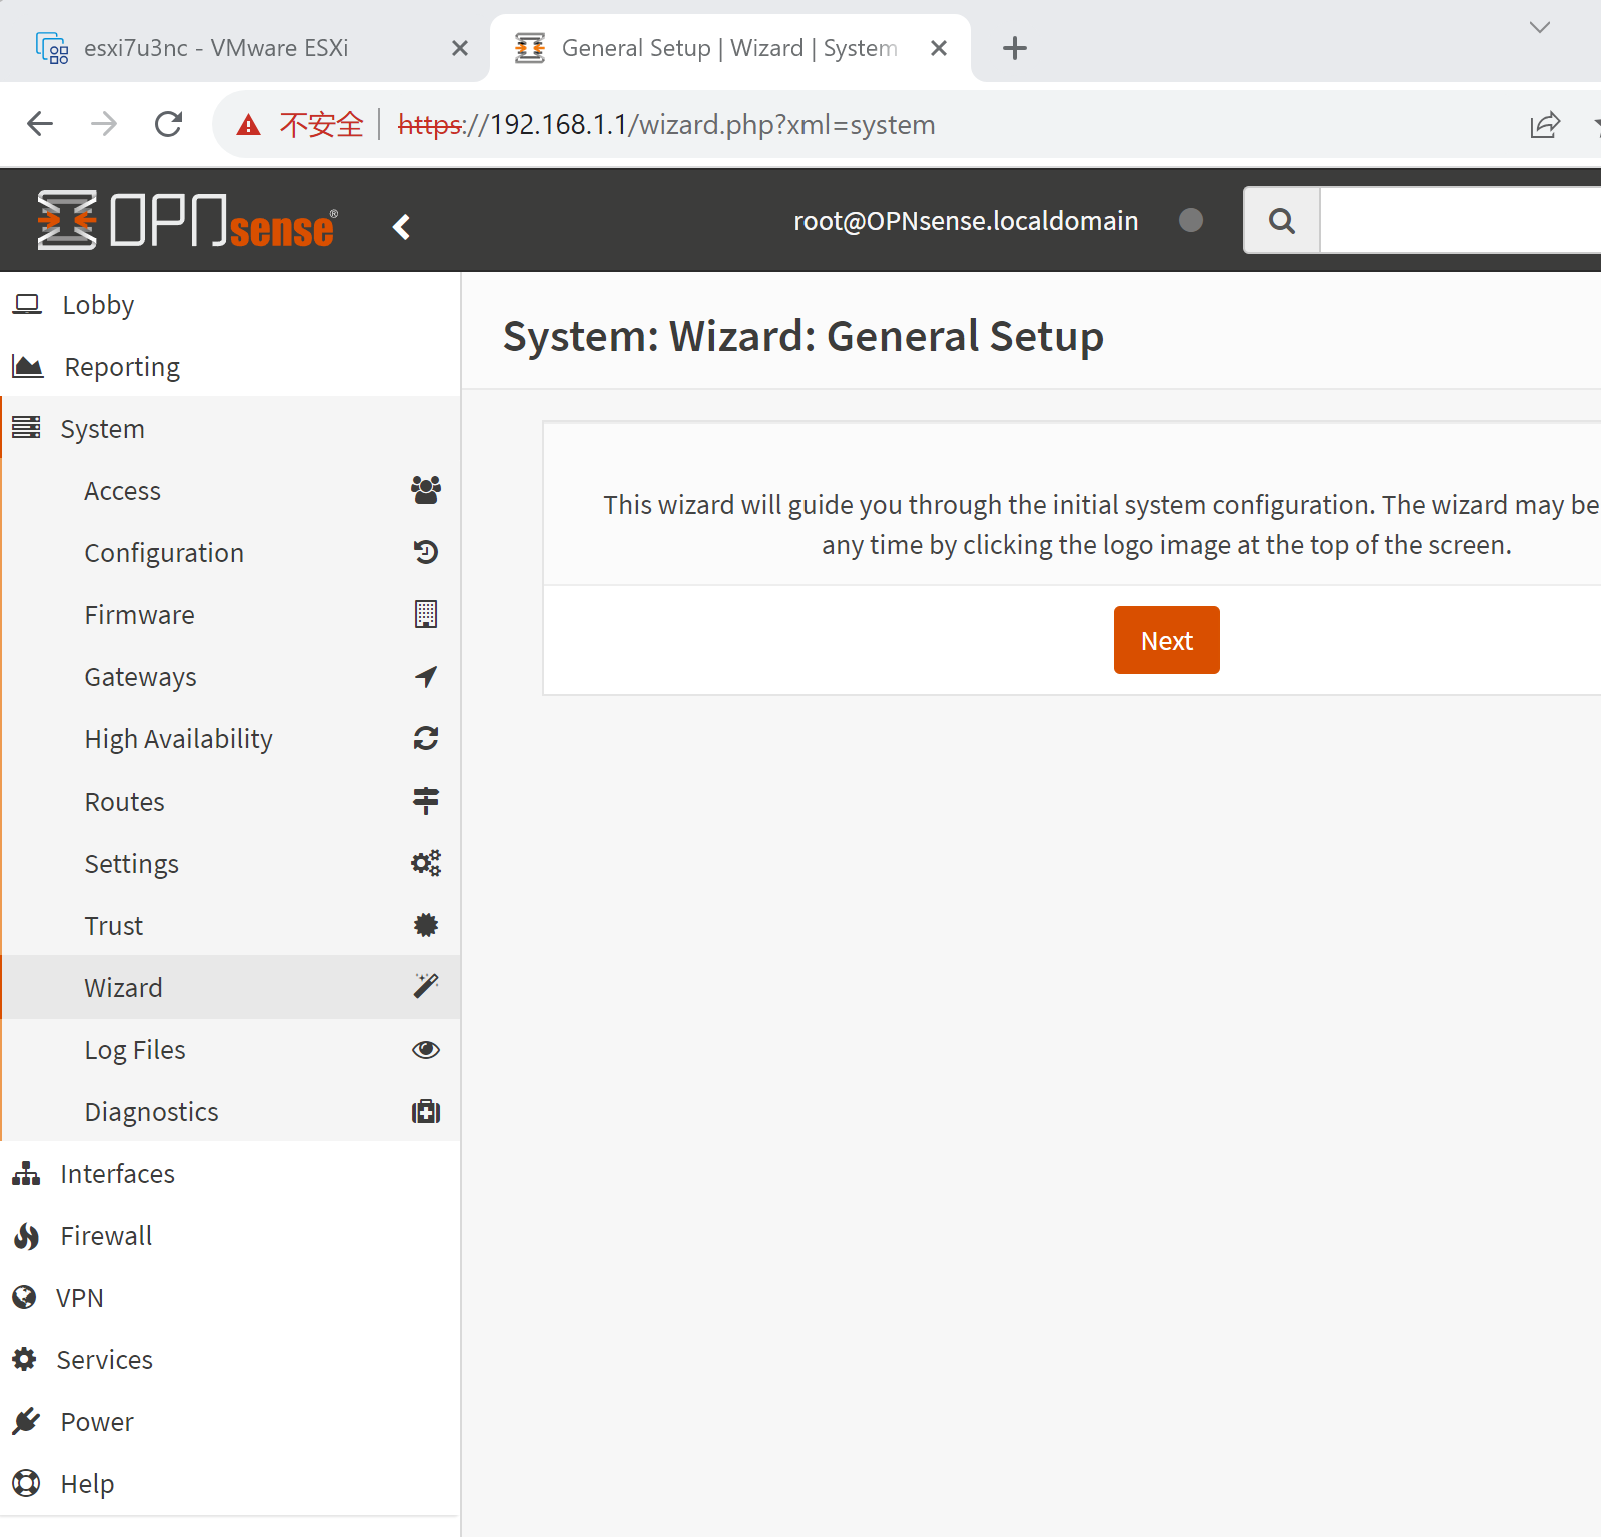
…………………………………………………………………….