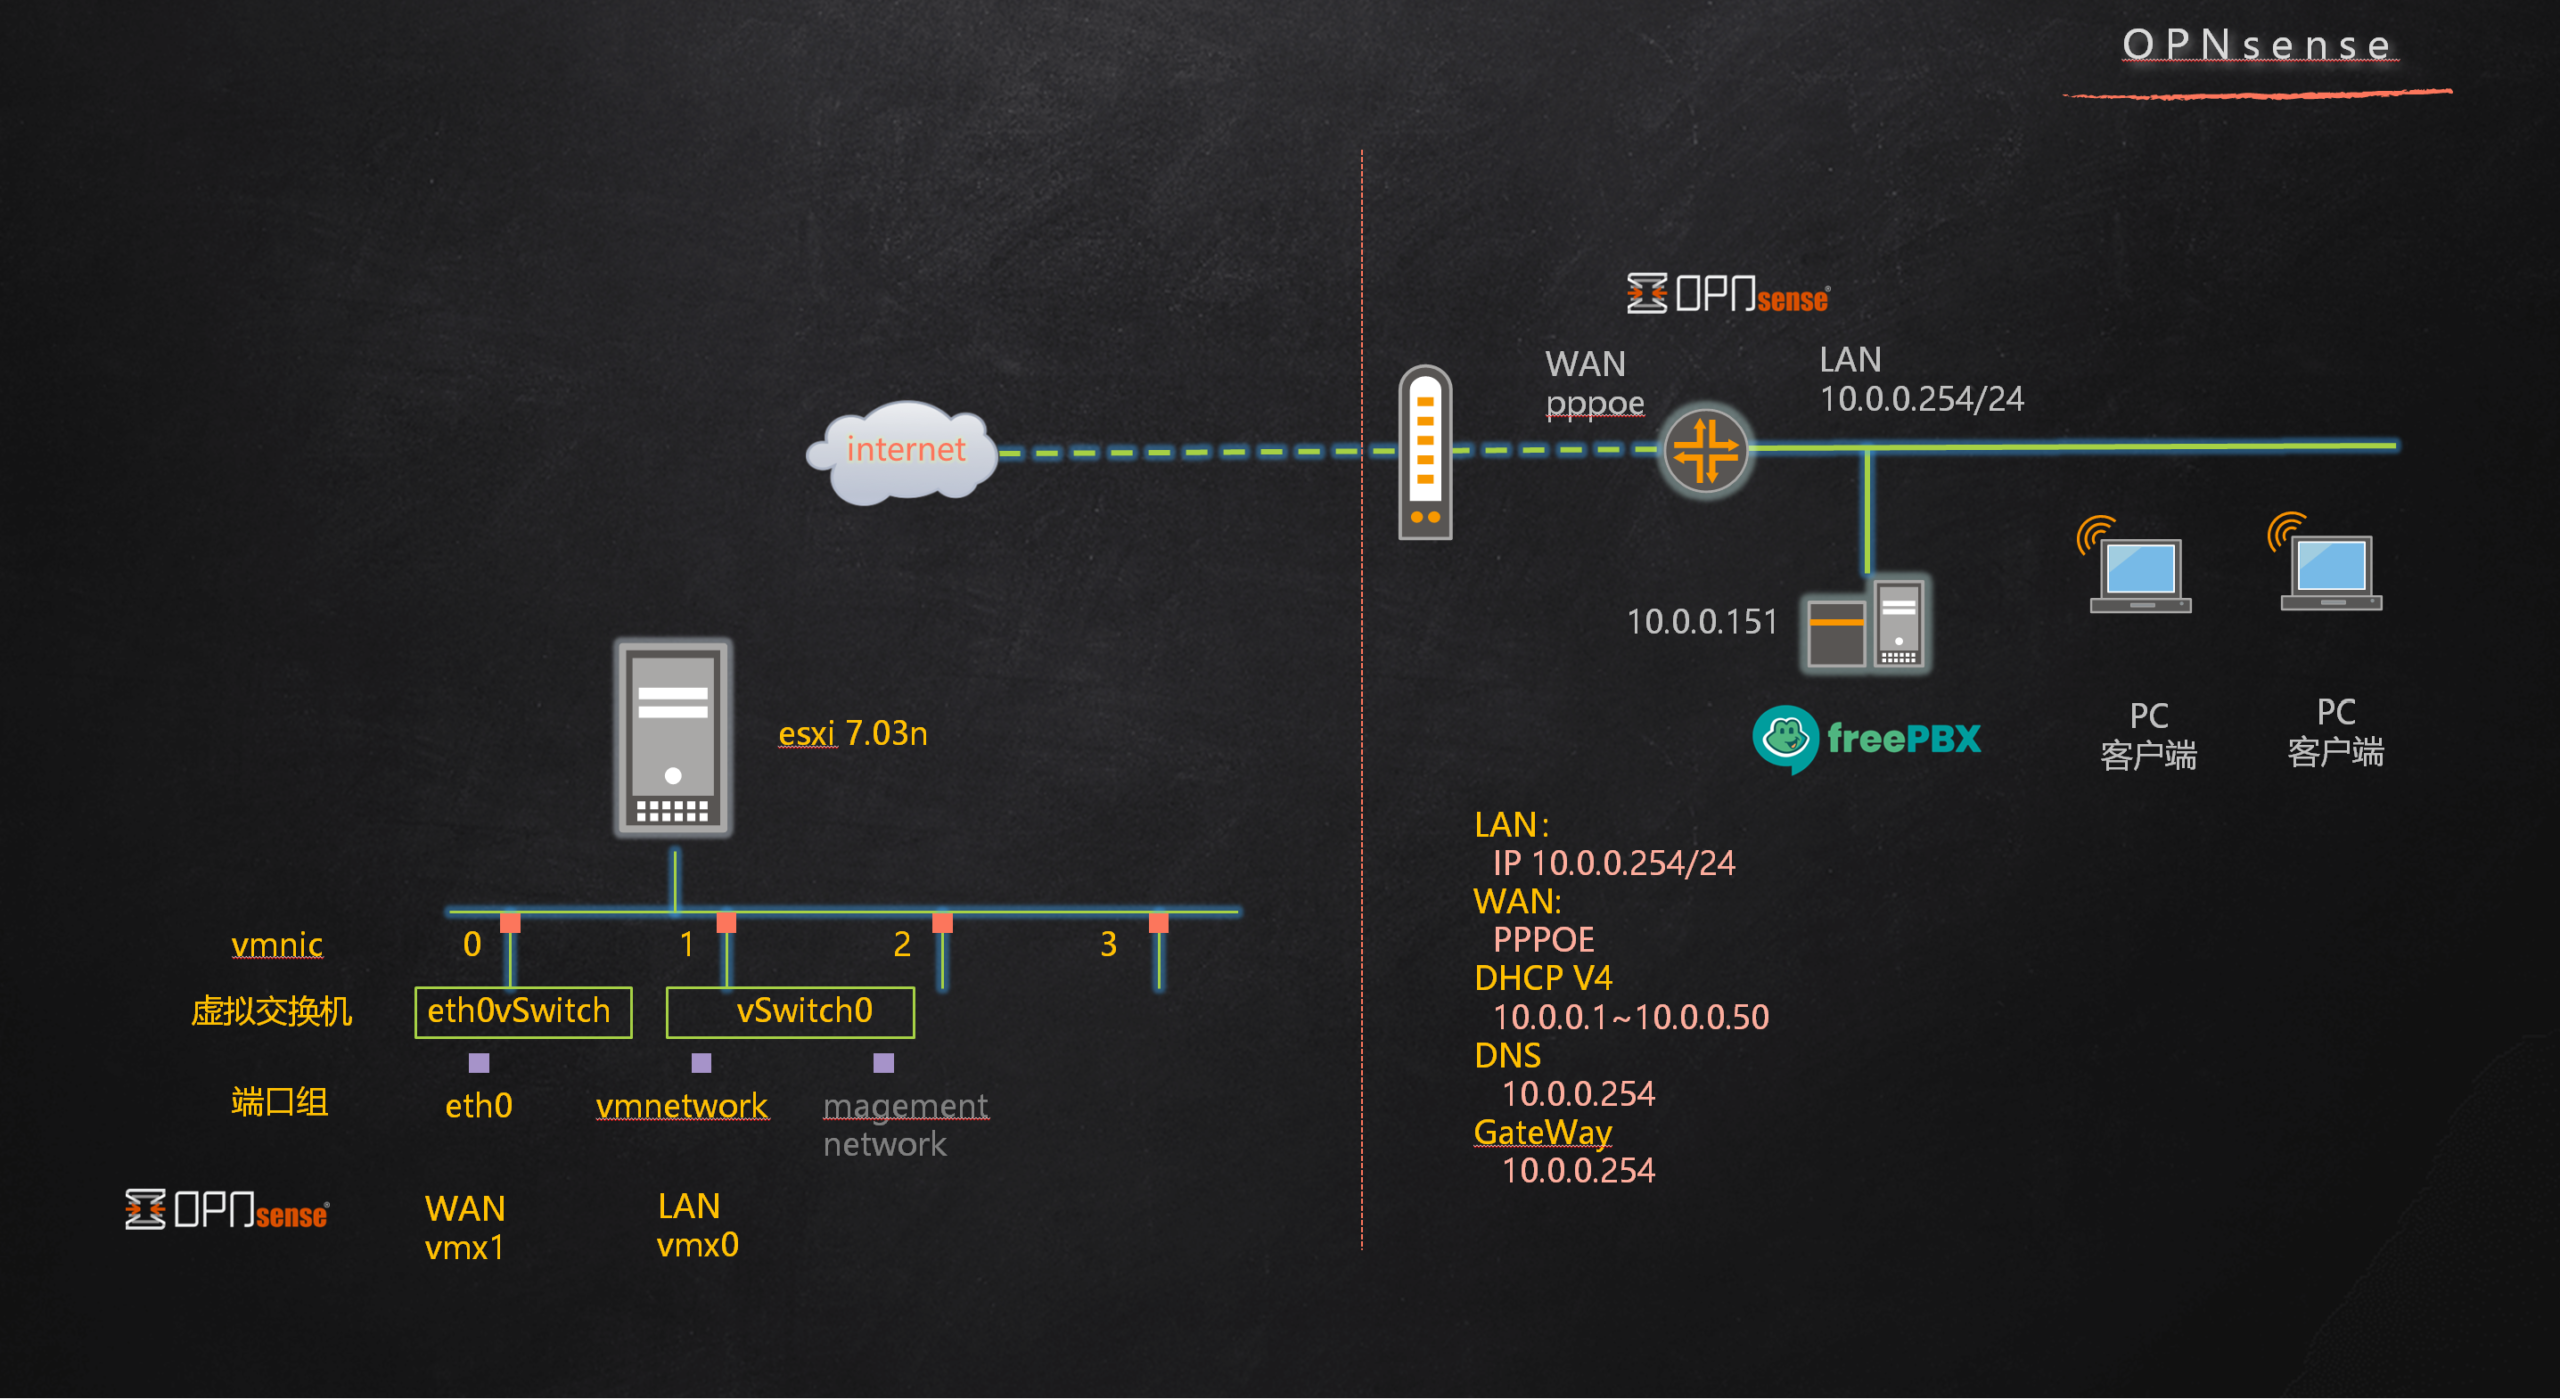
按图所示环境,在WAN口配置PPPOE,在LAN口配置DHCP实现内网用户访问互联网需求
…………………………………………………………………….
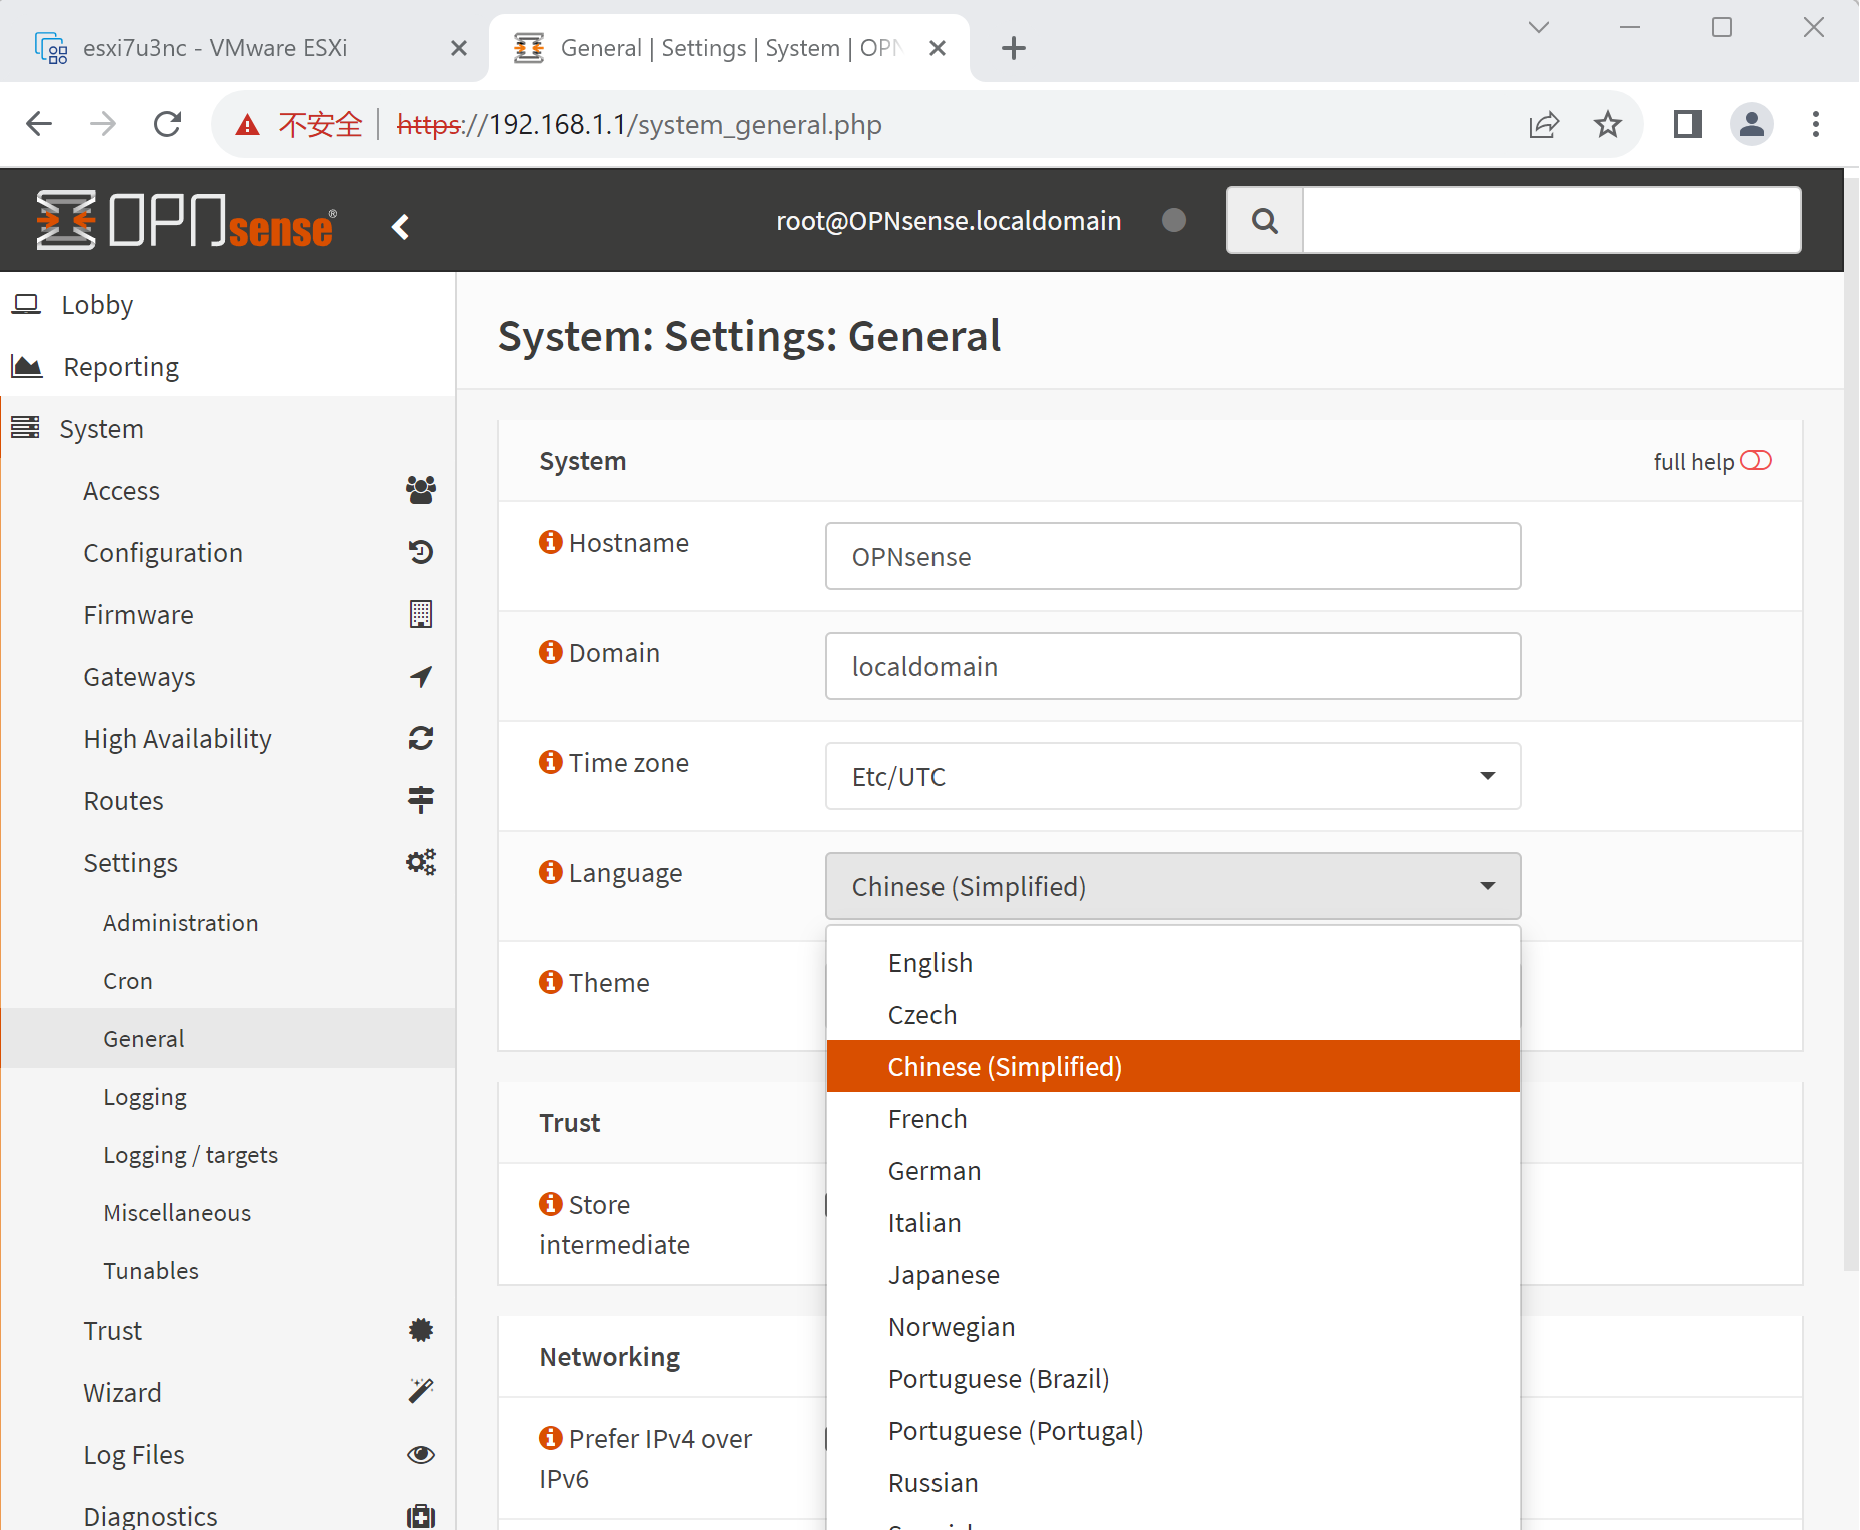
1、配置汉语
System—>General—>Language (Chinese simplified)
…………………………………………………………………….
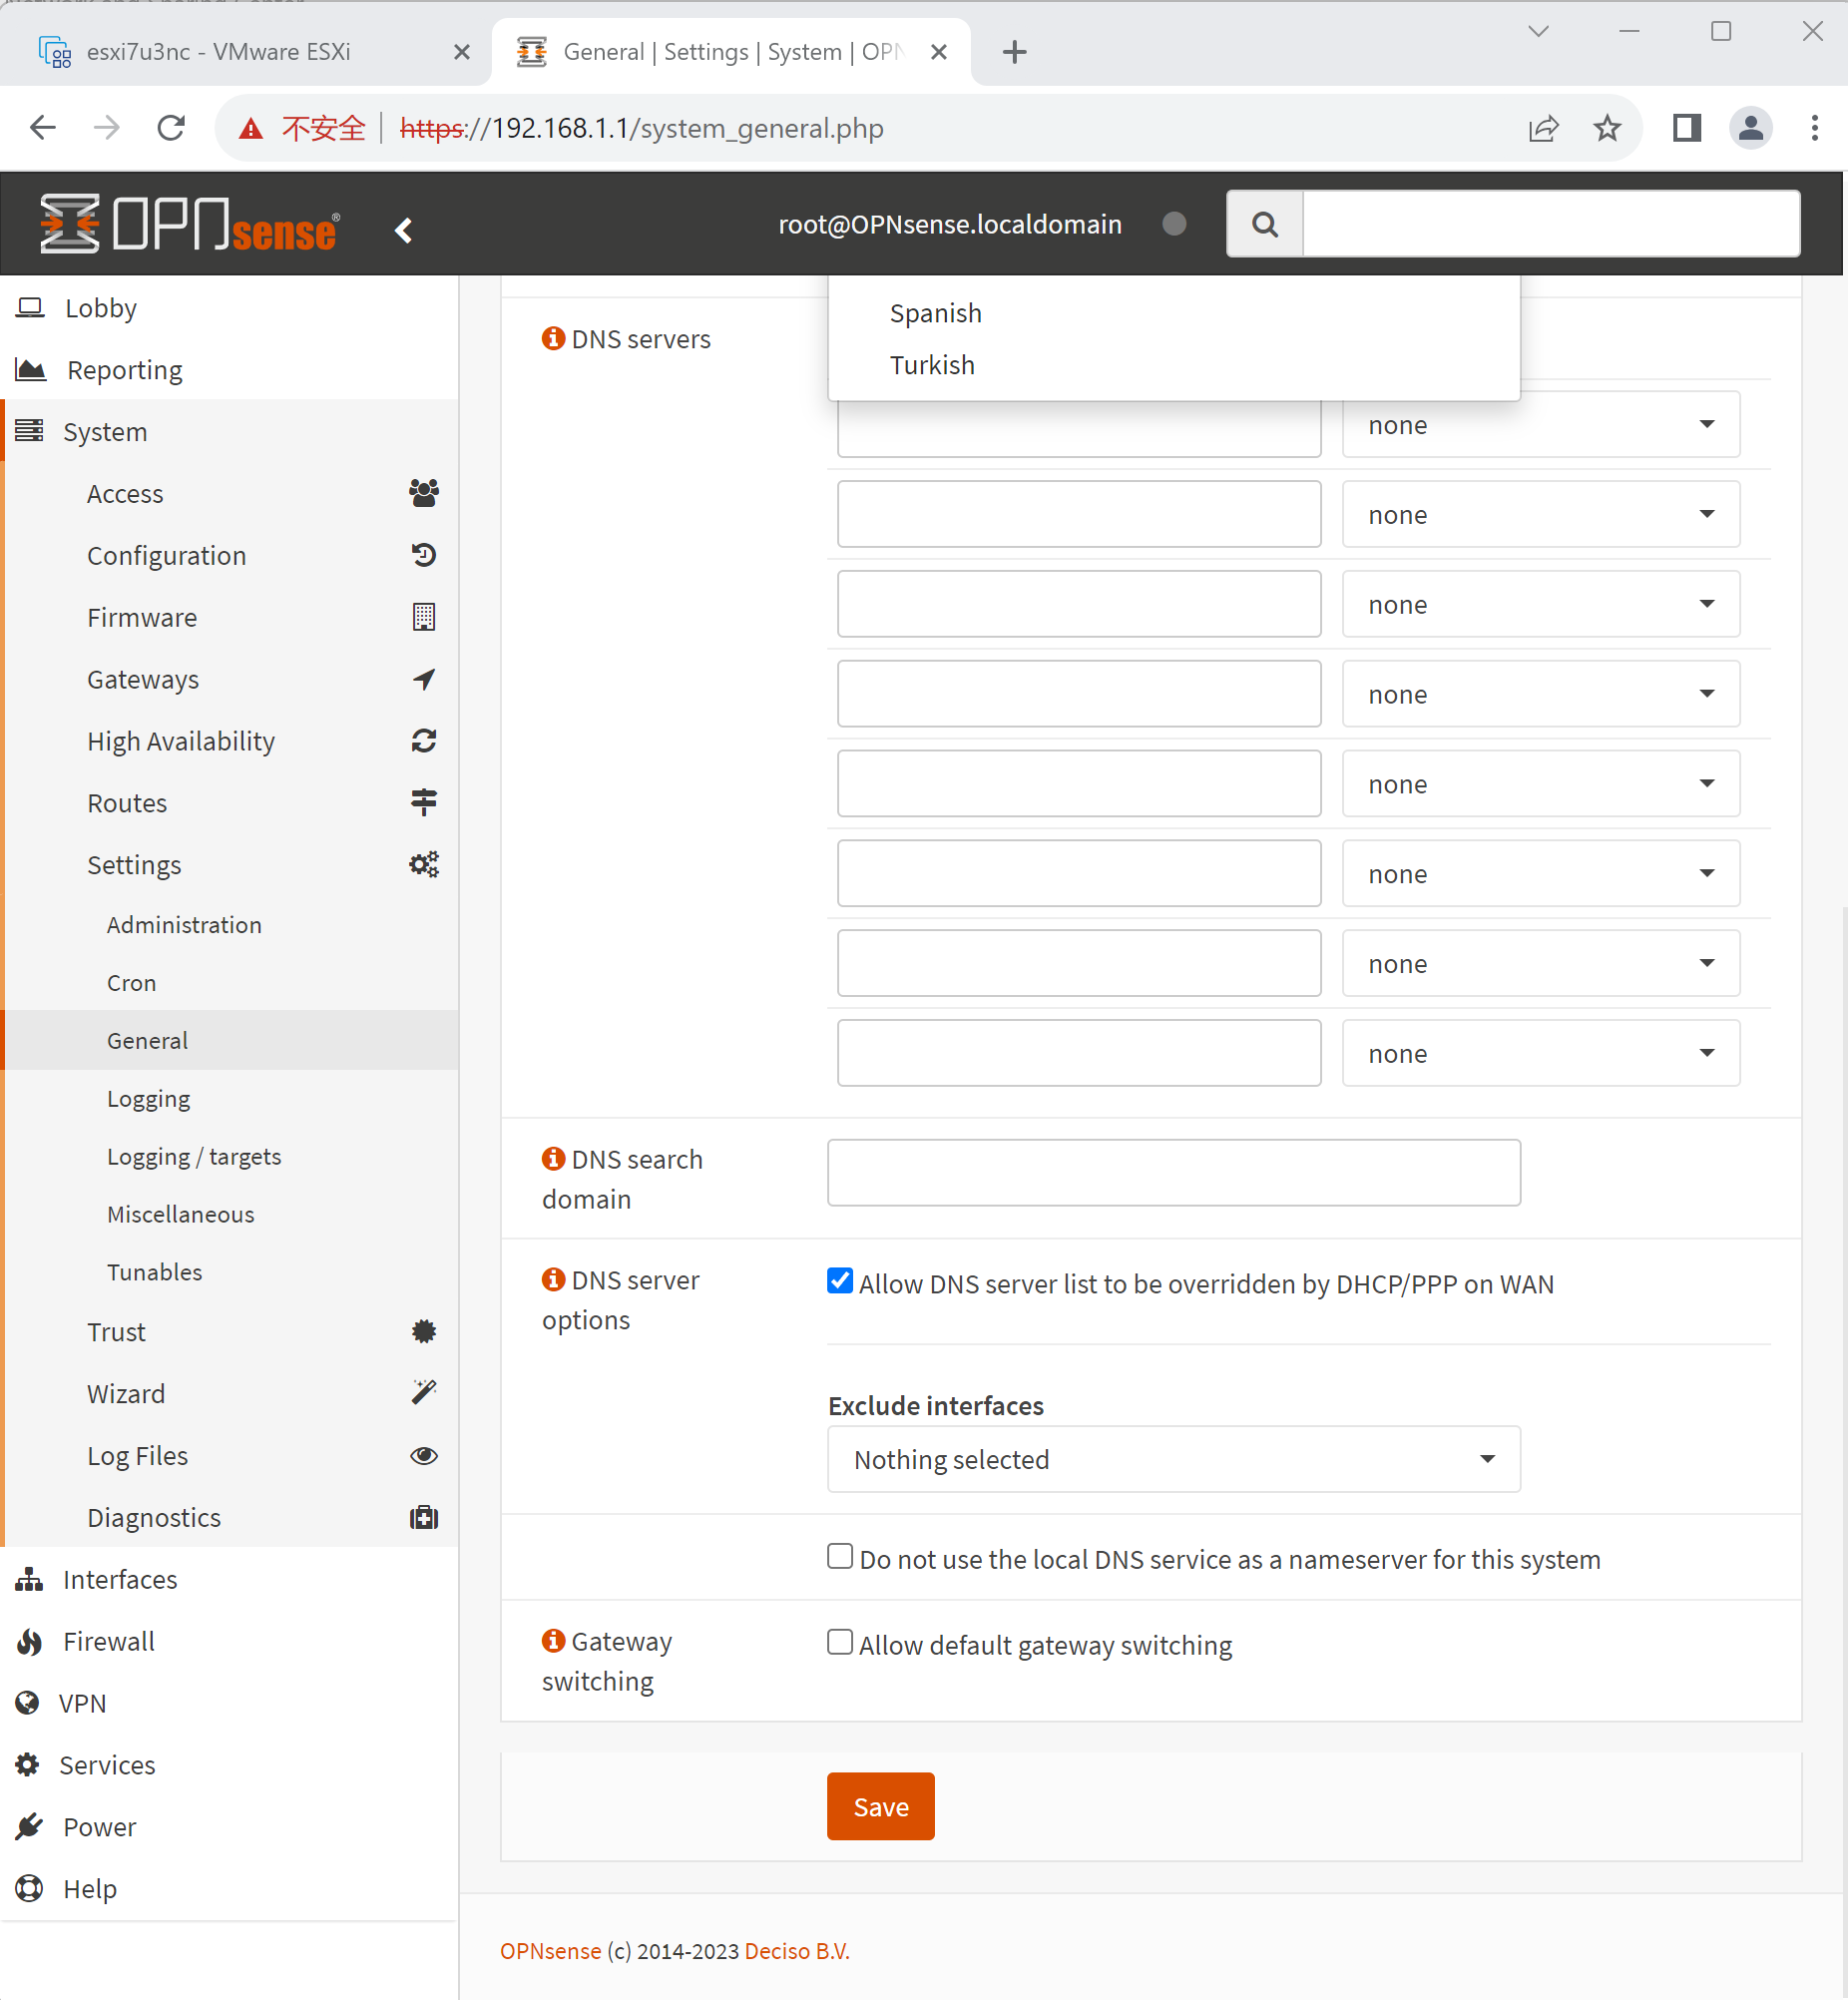
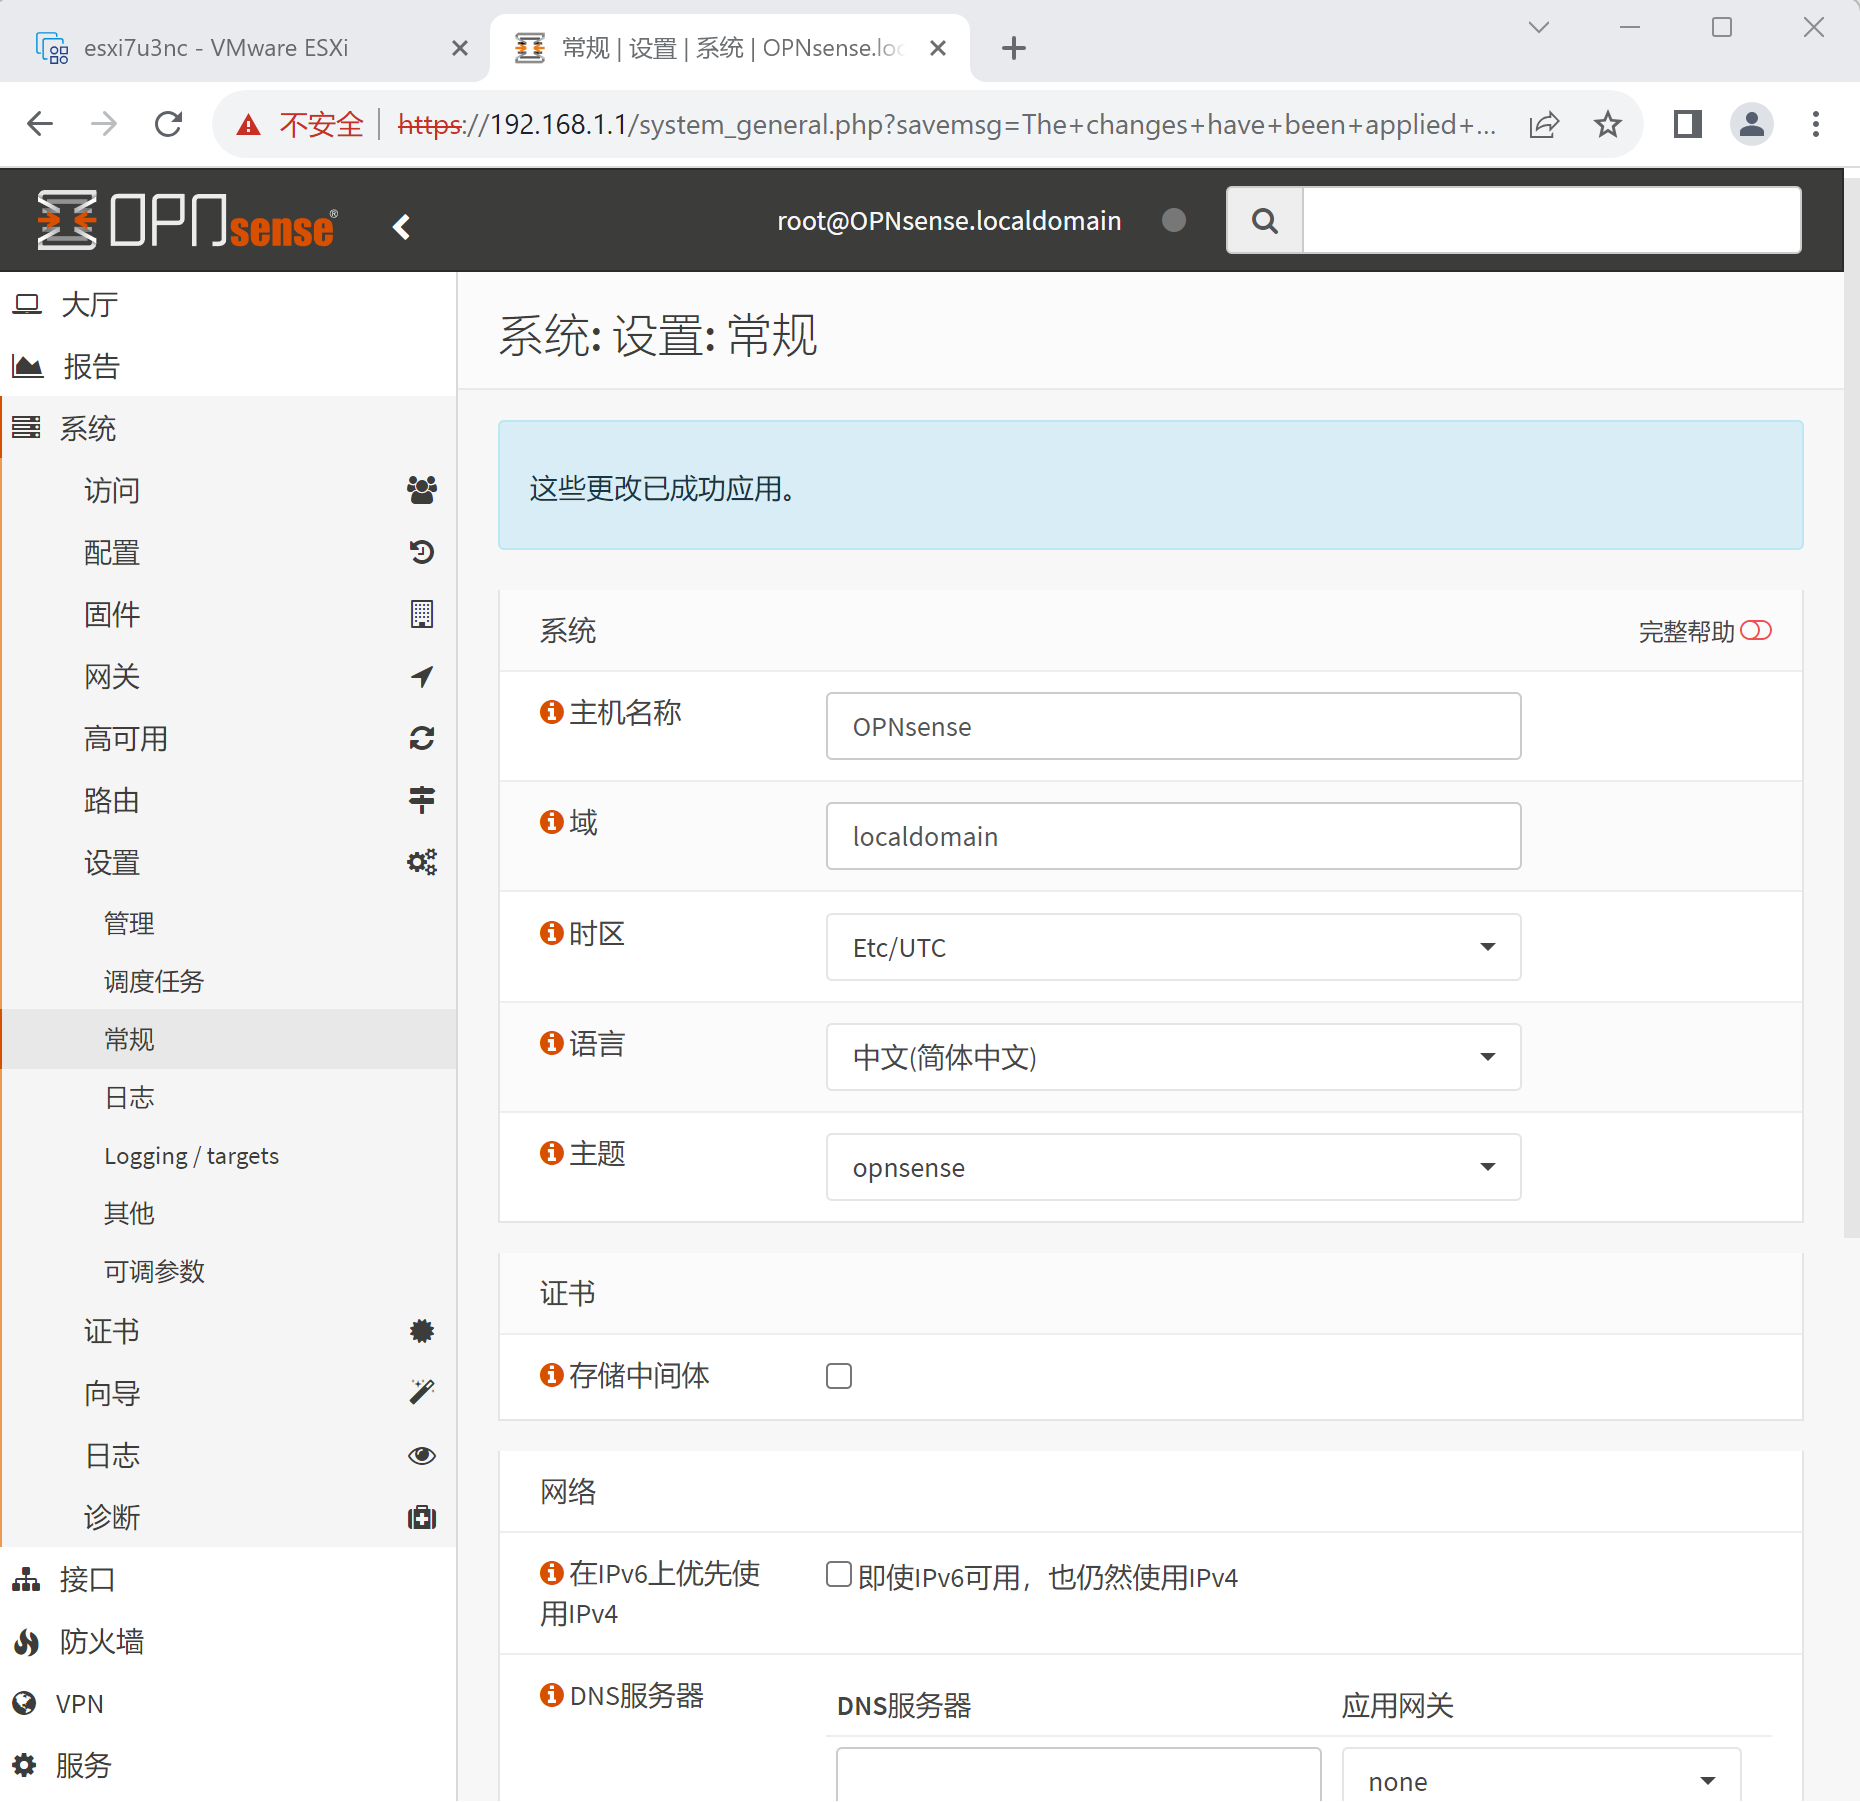
选择完成,点击保存
…………………………………………………………………….
页面已切换为汉语
…………………………………………………………………….
2、配置LAN口
接口—>[LAN]
—>IPV4配置类型(静态IPV4)
—>IPV4地址 (10.0.0.254/24)
保存并应用更改

…………………………………………………………………….
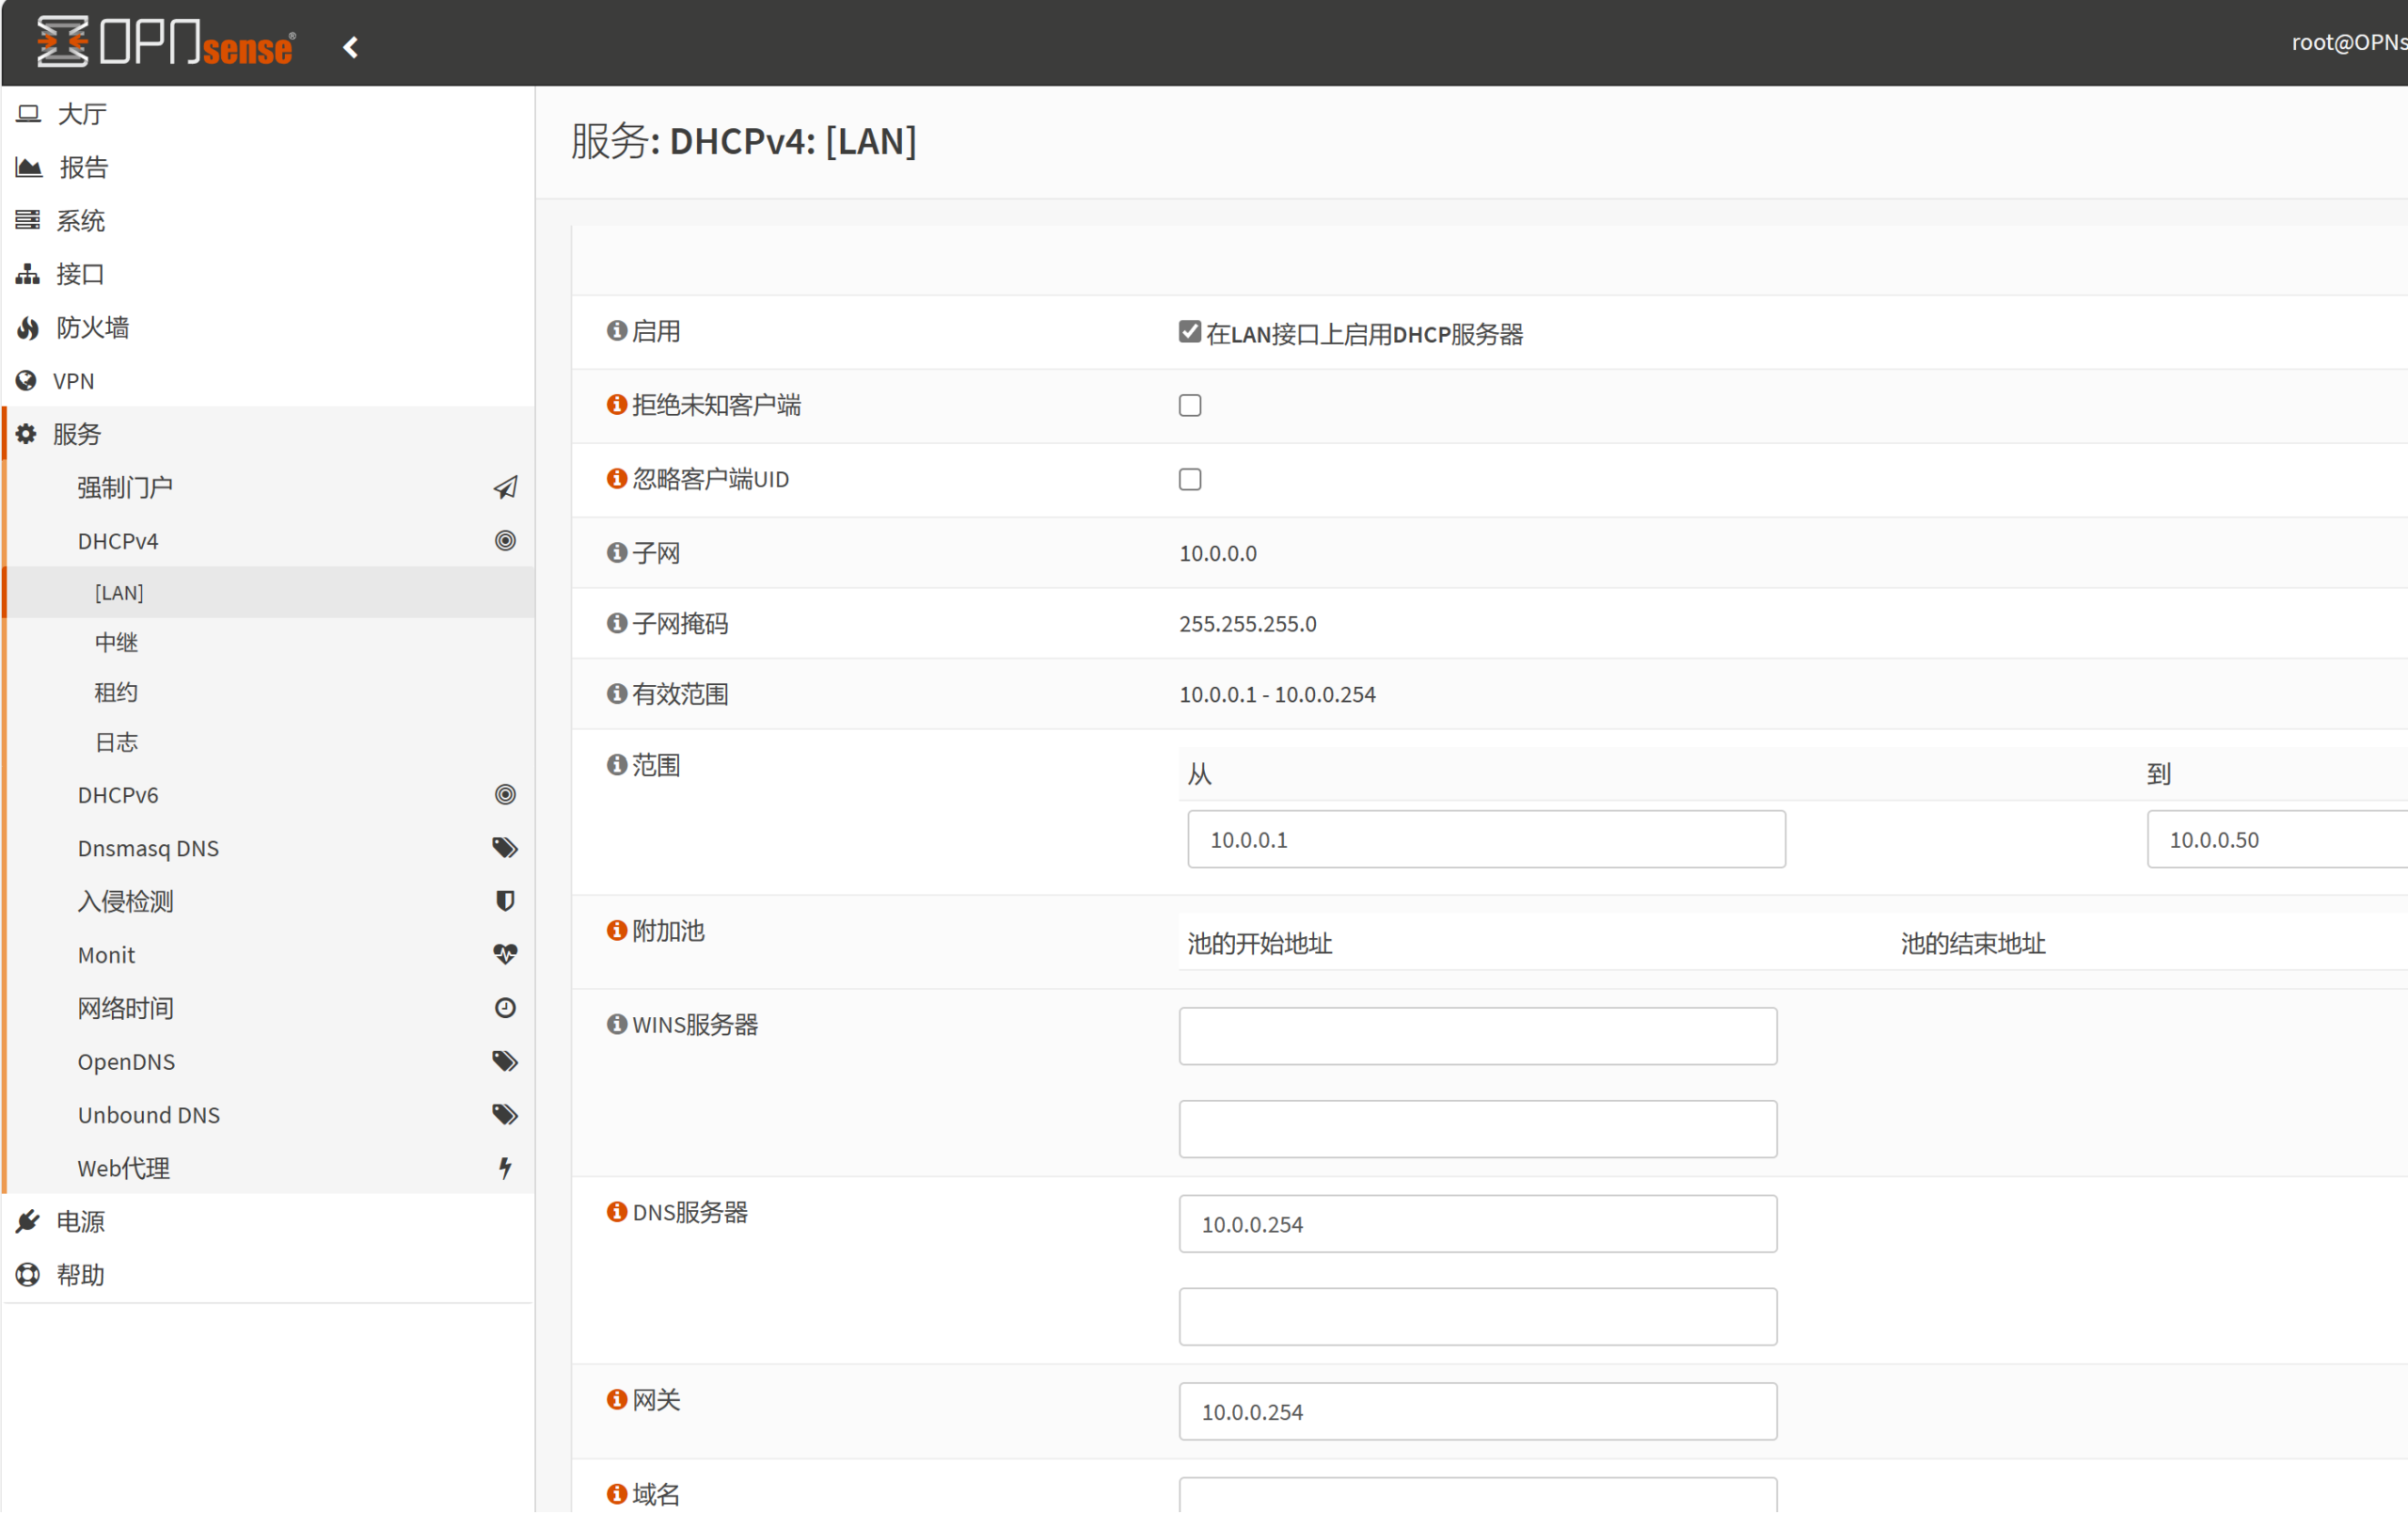
DHCPV4
服务—>[LAN]
—>子网 10.0.0.0
—>掩码 255.255.255.0
—>范围 从10.0.0.1 到 10.0.0.50
—>DNS服务器 10.0.0.254
—>网关 10.0.0.254
保存应用
…………………………………………………………………….
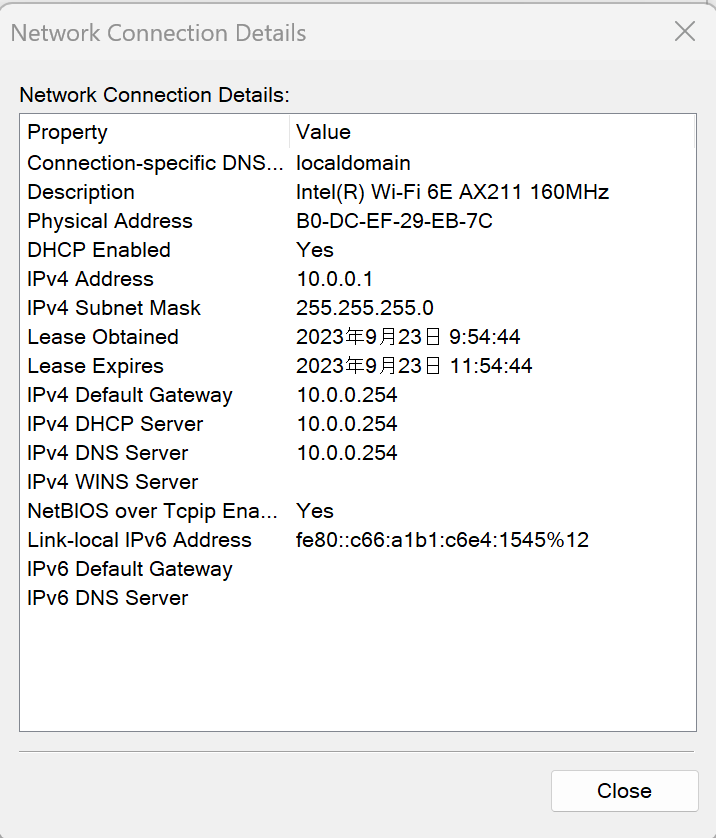
局域网设备已可通过DHCP获取地址
…………………………………………………………………….
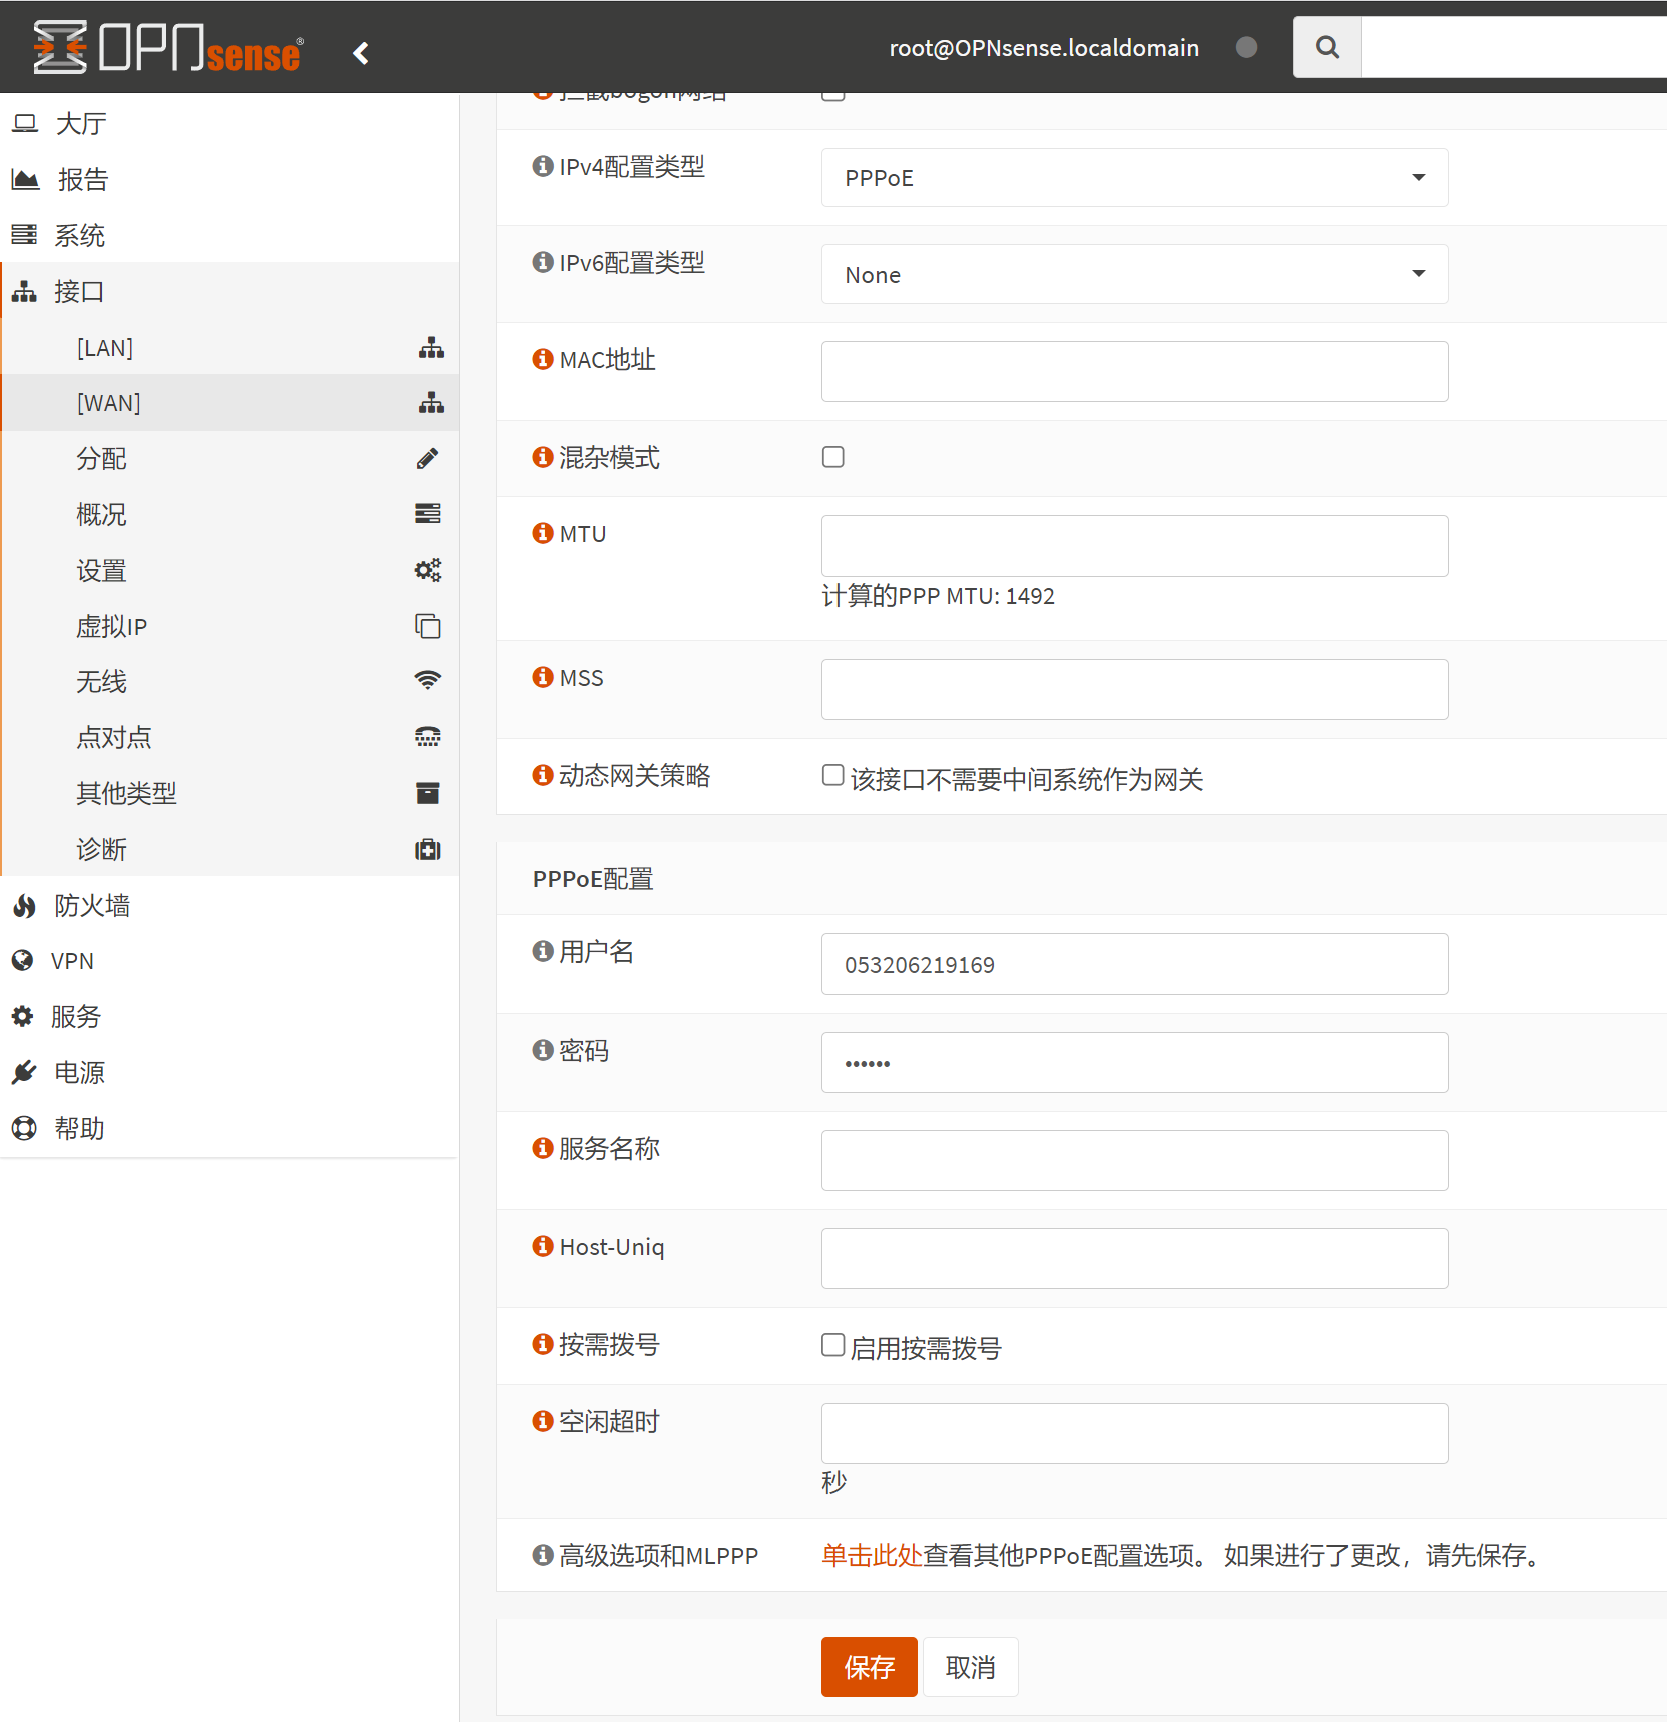
3、配置WAN口PPPOE
接口—>[WAN]
—>IPv4配置类型 PPPOE
—>PPPOE配置 用户名 “xxxxxxxx”,密码 “yyyyyy”
保存
…………………………………………………………………….
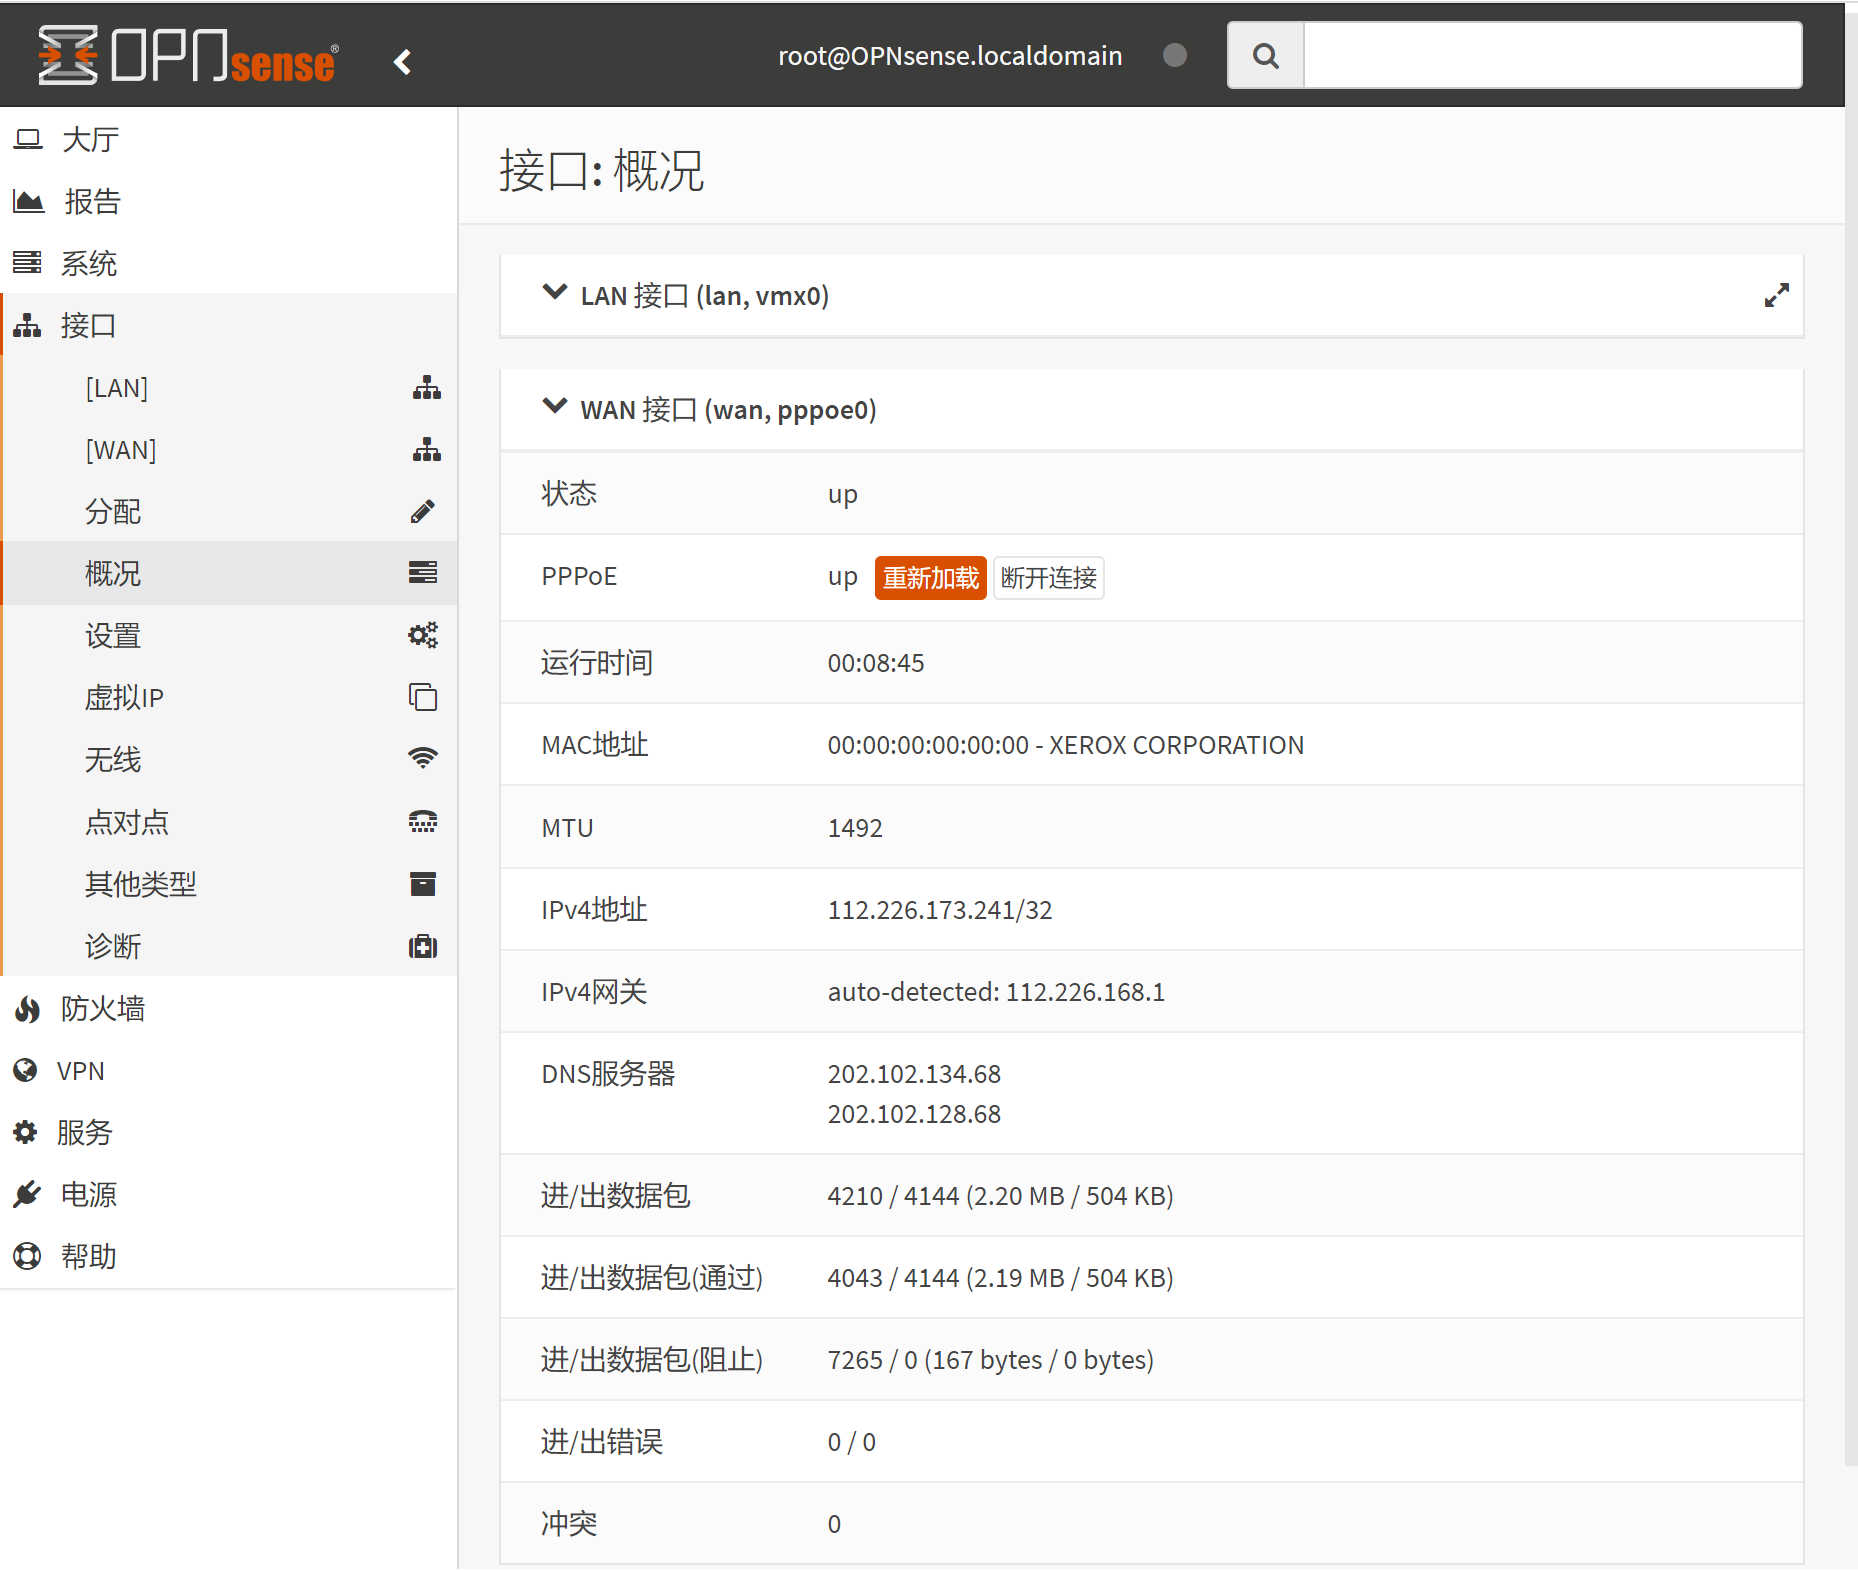
查看WAN接口状态,已通过PPPOE获取IPV4地址及DNS
…………………………………………………………………….
4、验证

…………………………………………………………………….