说明: 基于centos 7.6 部署 freepbx
云环境推荐腾讯云
阿里云同一实例,近期重新安装后部分页面无响应,多次重装问题依旧!
以下第二部分、第三部分所有centos 7.6适用!
第一部分 云环境部署
第二部分 Asterisk 16 安装
第三部分 FreePBX 16 安装
第四部分 配置及测试
freepbx官方下载:https://www.freepbx.org/downloads/
zoiper SIP客户端及freepbx ISO安装镜像: https://www.aliyundrive.com/s/33vG7Z83XqT
视频演示:https://space.bilibili.com/472539770
………………………………………………………………………………………………
第一部分 云环境部署
云系统镜像配置为CentOS 7.6
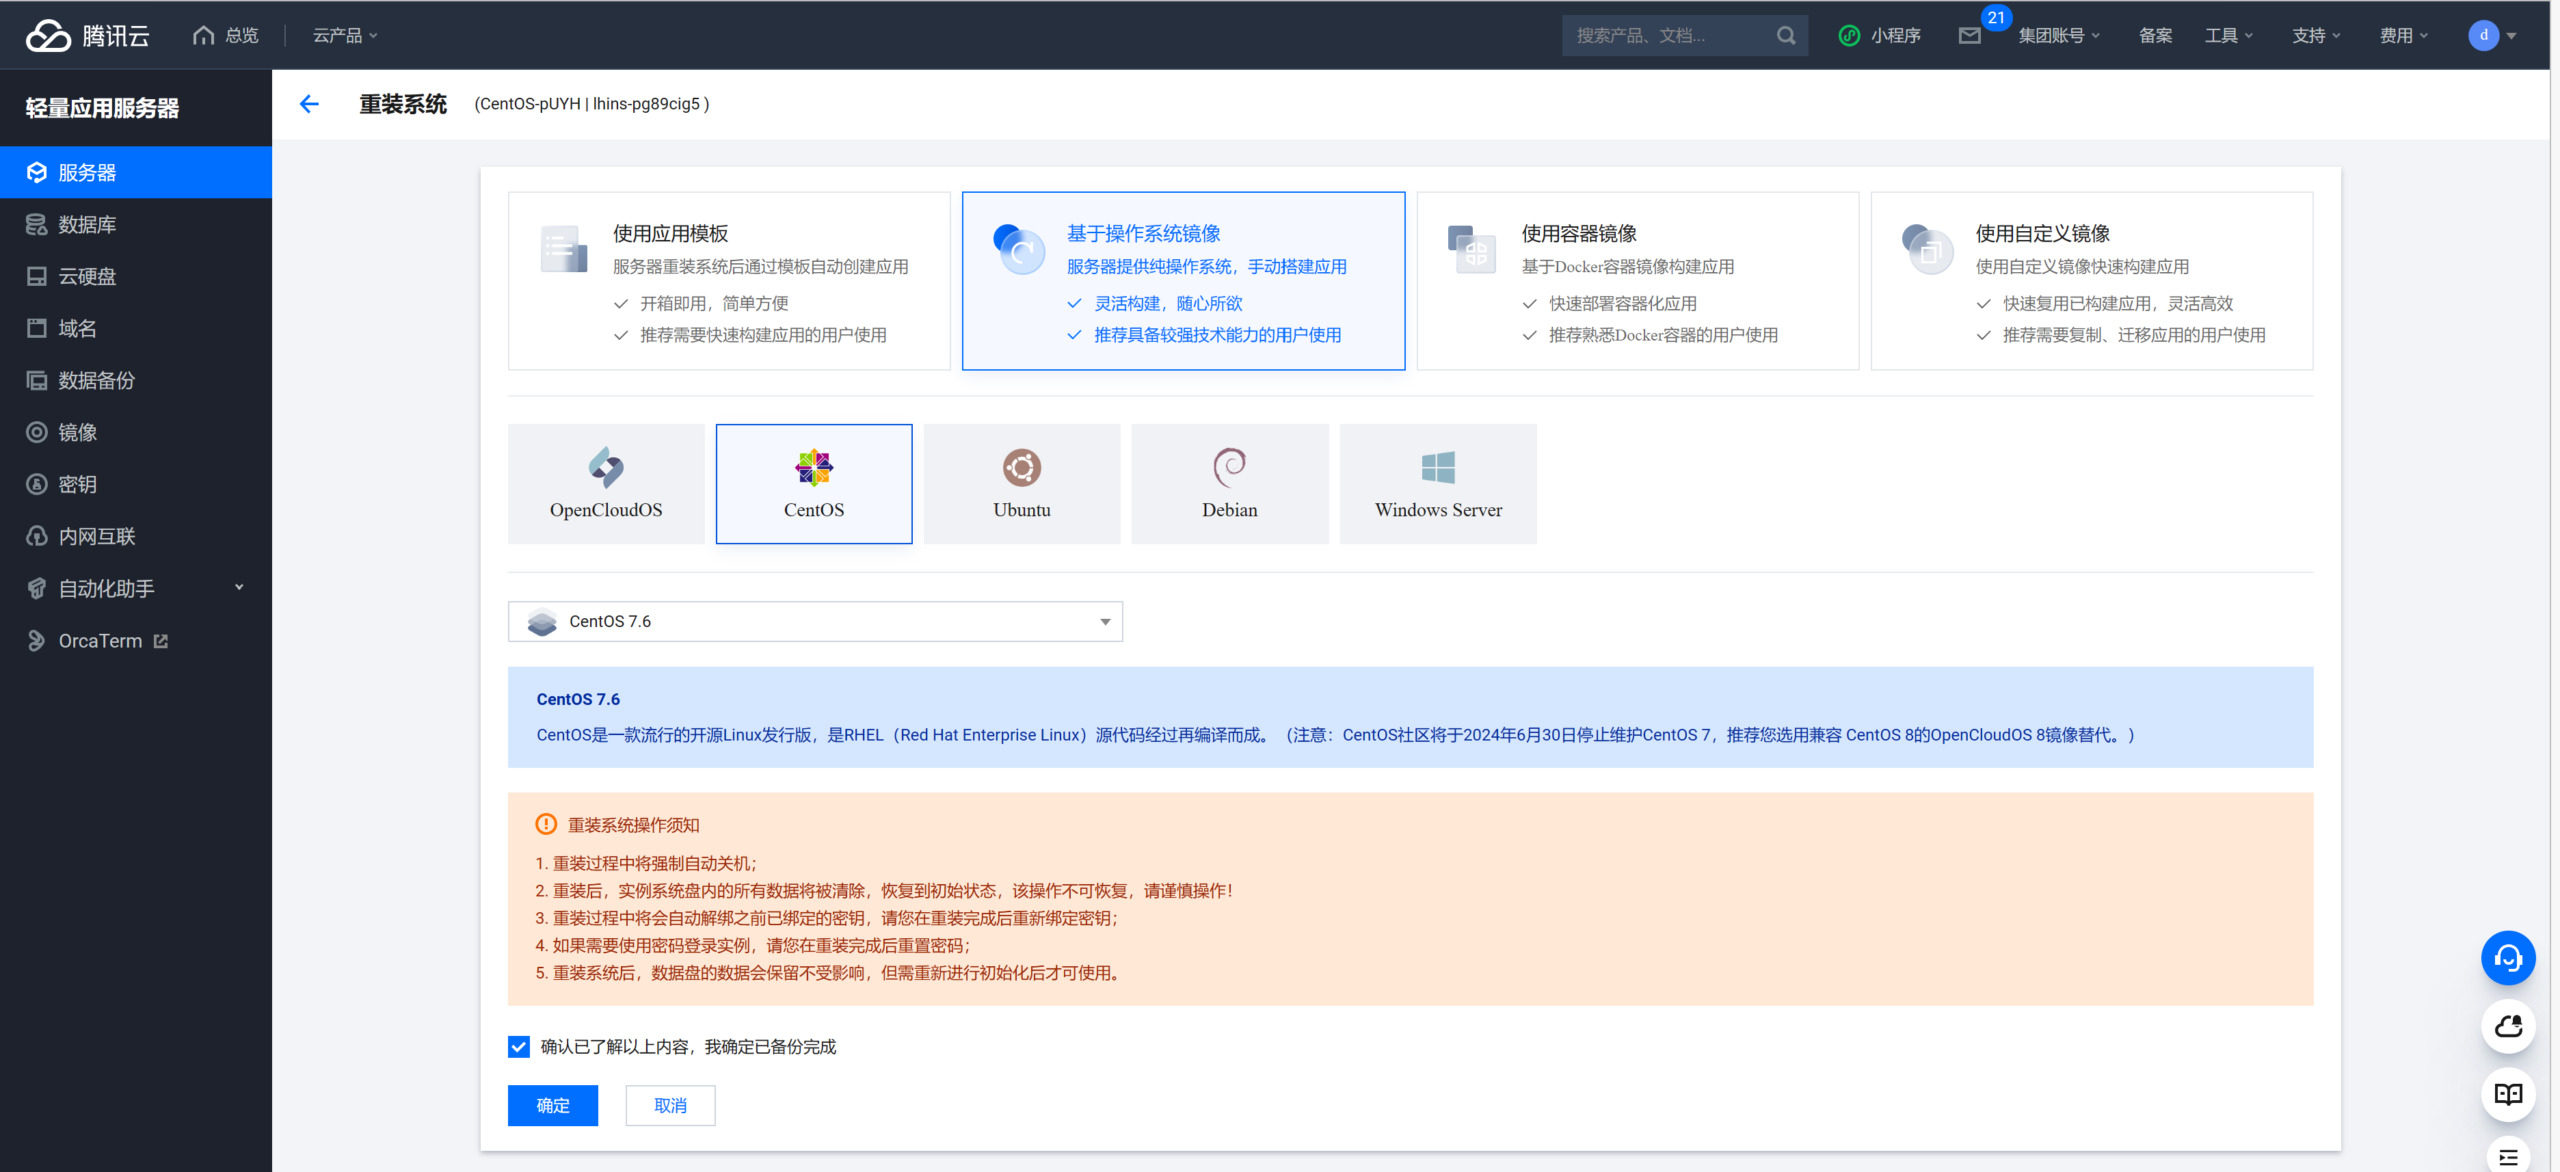
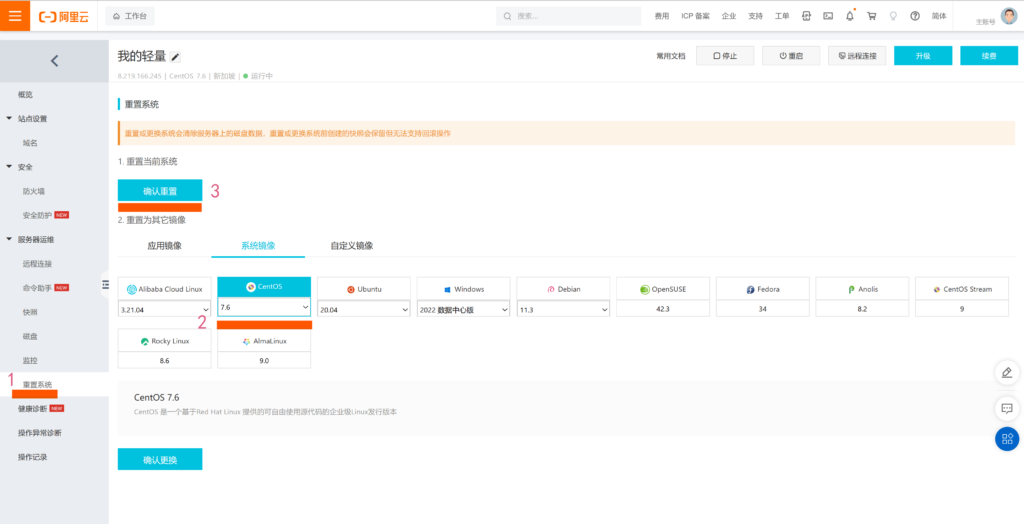
………………………………………………………………………………………………
修改CentOS 7 root 密码
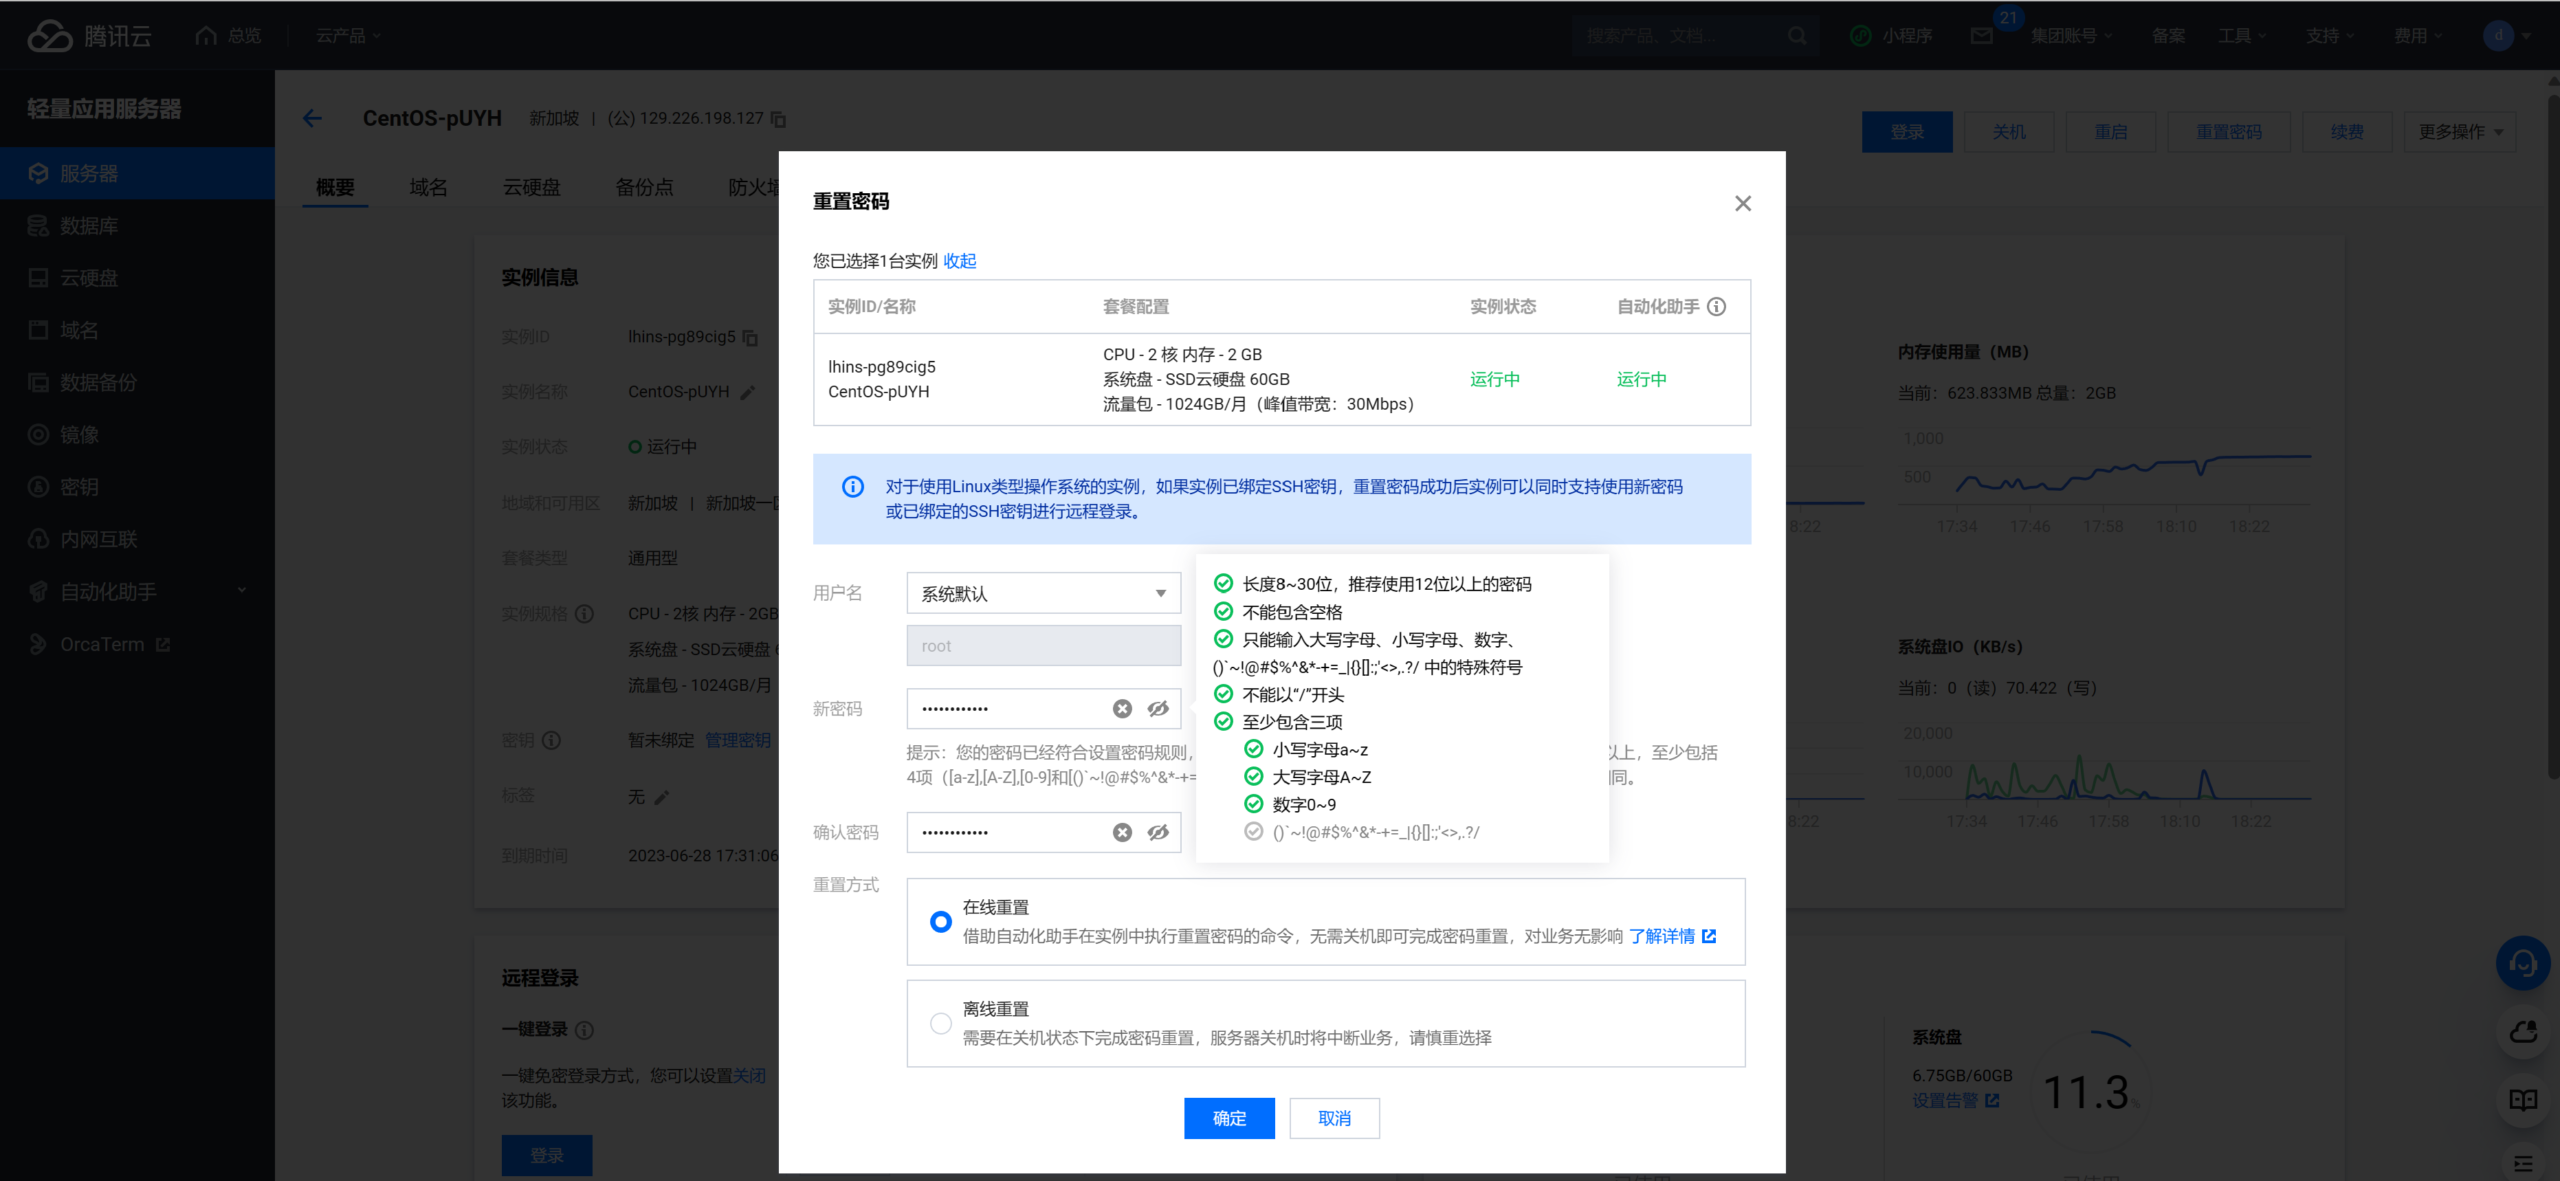
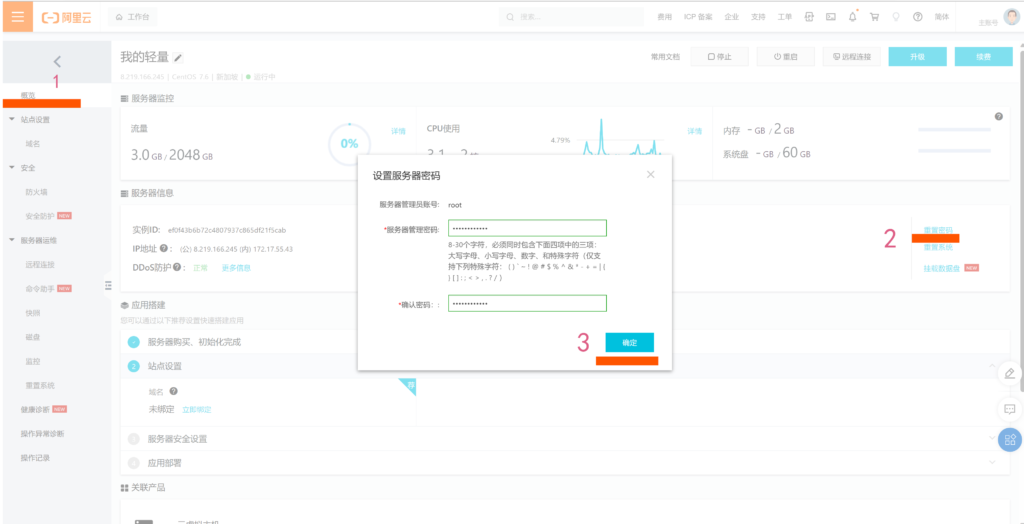
………………………………………………………………………………………………
第二部分 Asterisk 16 安装
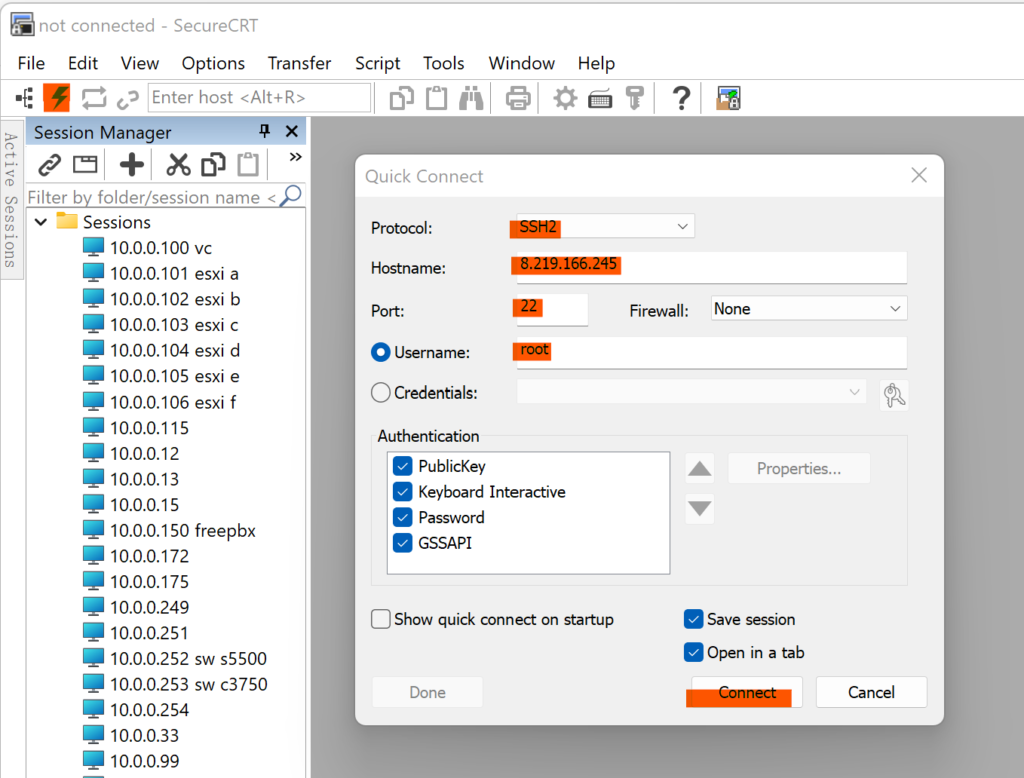
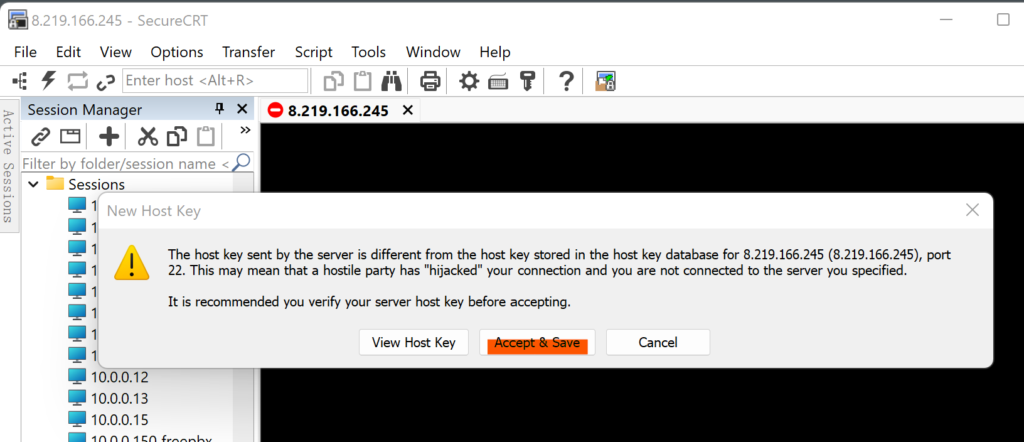
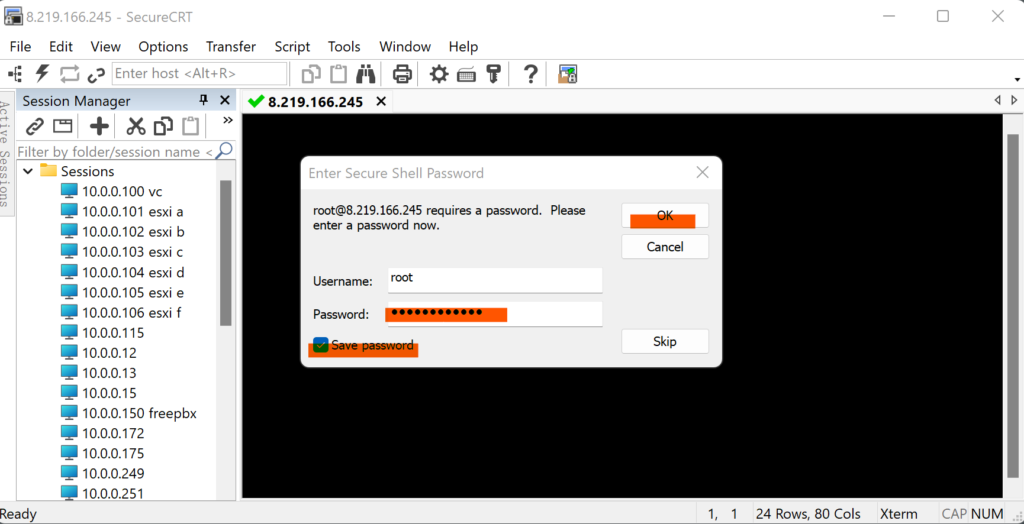
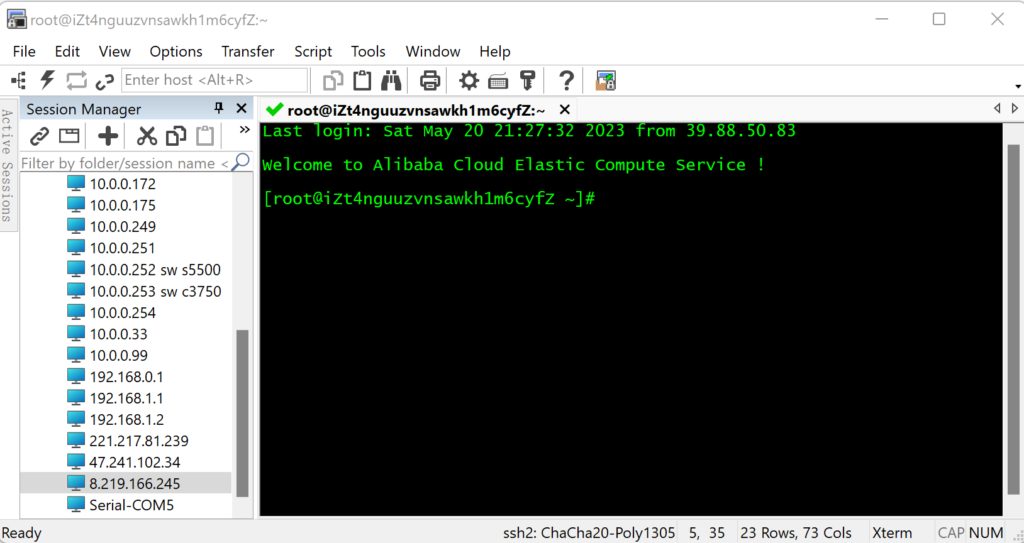
root身份SSH连接Centos 7
………………………………………………………………………………………………
CentOS 7 环境配置
设置时区为上海 ↓
timedatectl set-timezone Asia/Shanghai设置NTP时钟服务器 ↓
ntpdate cn.ntp.org.cn升级包 ↓
yum -y update设置主机名为 pbx.rsrc.ink ↓
hostnamectl set-hostname pbx.rsrc.ink安装epel yum 源 ↓
yum -y install epel-release关闭selinux防火墙 ↓
setenforce 0禁用selinux ↓
sed -i 's/\(^SELINUX=\).*/\SELINUX=disabled/' /etc/selinux/config………………………………………………………………………………………………
安装Asterisk依赖 ↓
yum -y install wget vim net-tools openssl-develyum -y groupinstall "Development Tools"yum -y install libedit-devel sqlite-devel psmisc ncurses-devel libtermcap-devel sox newt-devel libxml2-devel libtiff-devel audiofile-devel gtk2-devel uuid-devel libtool libuuid-devel subversion git subversion kernel-devel crontabs cronie cronie-anacron wget vim autoconf………………………………………………………………………………………………
安装Jansson ↓
su -cd /usr/src/git clone https://github.com/akheron/jansson.gitcd janssonautoreconf -i./configure --prefix=/usr/make && make install………………………………………………………………………………………………
下载安装 Asterisk 16
cd /usr/src/wget http://downloads.asterisk.org/pub/telephony/asterisk/asterisk-16-current.tar.gztar xvfz asterisk-16-current.tar.gzrm -f asterisk-16-current.tar.gzcd asterisk-16*/./configure --libdir=/usr/lib64如无意外,将呈现以下结果
configure: Menuselect build configuration successfully completed

               .$$$$$$$$$$$$$$$=..
            .$7$7..          .7$$7:.
          .$$:.                 ,$7.7
        .$7.     7$$$$           .$$77
     ..$$.       $$$$$            .$$$7
    ..7$   .?.   $$$$$   .?.       7$$$.
   $.$.   .$$$7. $$$$7 .7$$$.      .$$$.
 .777.   .$$$$$$77$$$77$$$$$7.      $$$,
 $$$~      .7$$$$$$$$$$$$$7.       .$$$.
.$$7          .7$$$$$$$7:          ?$$$.
$$$          ?7$$$$$$$$$$I        .$$$7
$$$       .7$$$$$$$$$$$$$$$$      :$$$.
$$$       $$$$$$7$$$$$$$$$$$$    .$$$.
$$$        $$$   7$$$7  .$$$    .$$$.
$$$$             $$$$7         .$$$.
7$$$7            7$$$$        7$$$
 $$$$$                        $$$
  $$$$7.                       $$  (TM)
   $$$$$$$.           .7$$$$$$  $$
     $$$$$$$$$$$$7$$$$$$$$$.$$$$$$
       $$$$$$$$$$$$$$$$.

configure: Package configured for:
configure: OS type  : linux-gnu
configure: Host CPU : x86_64
configure: build-cpu:vendor:os: x86_64 : pc : linux-gnu :
configure: host-cpu:vendor:os: x86_64 : pc : linux-gnu :
…………………………………………………………………………………………….
设置Asterisk 菜单项
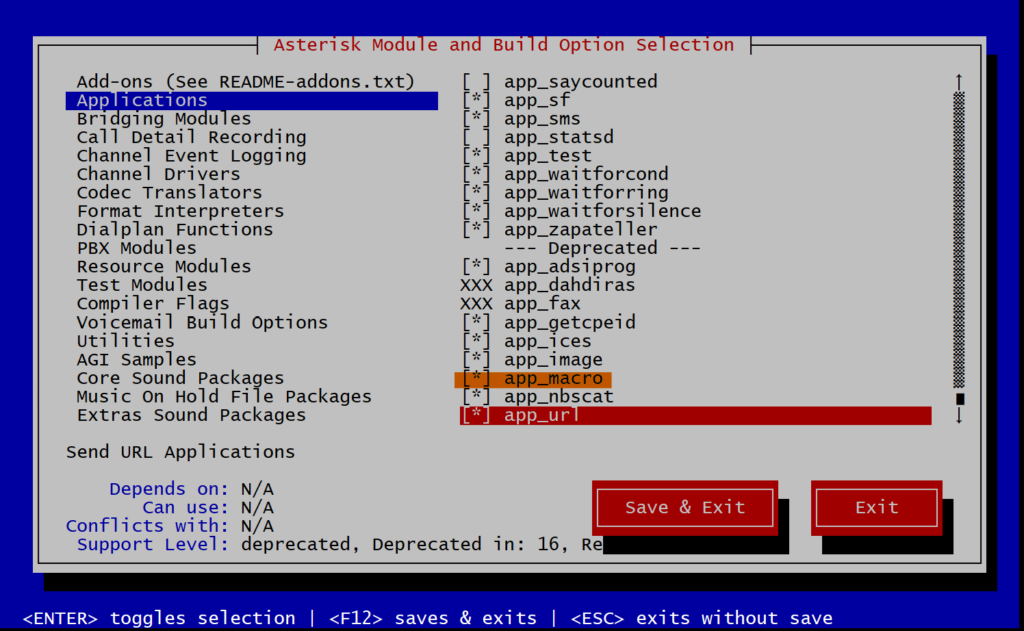
make menuselect参照以下各图添加项目,通过方向键选择,回车键确认选中,F12键盘保存退出
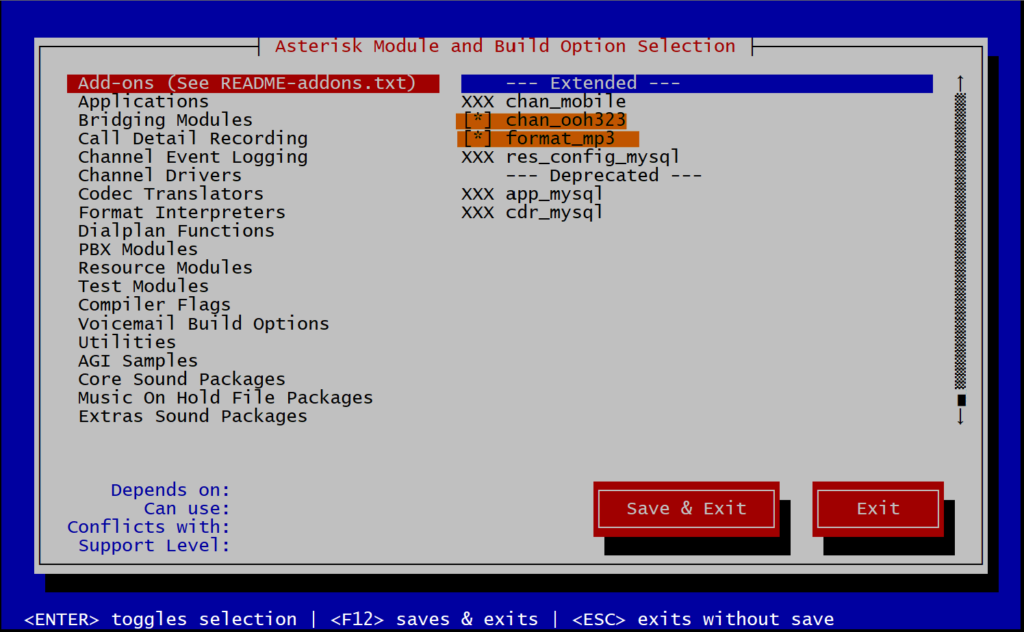
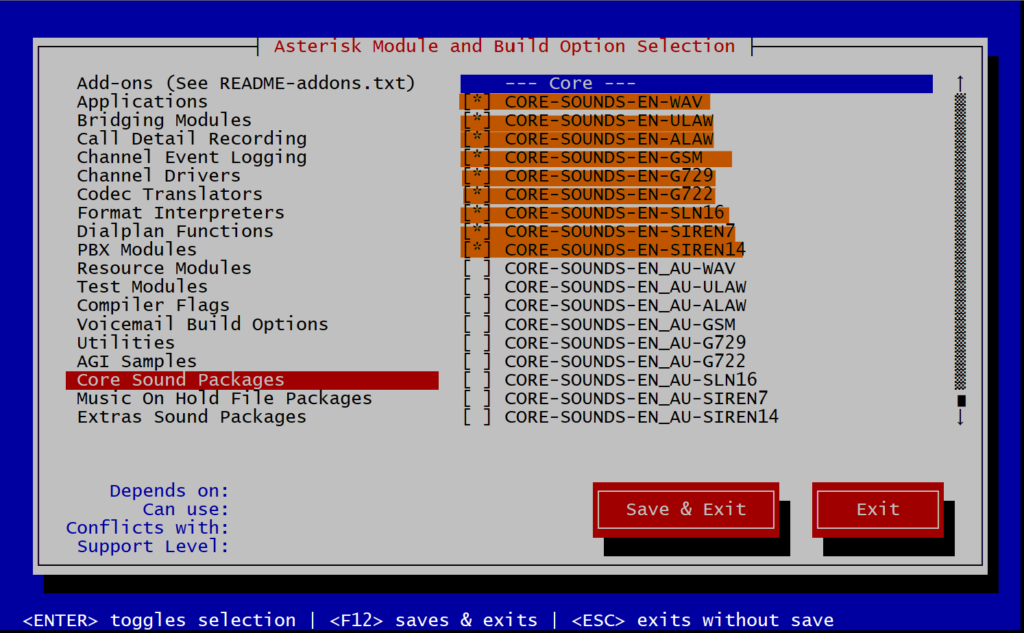
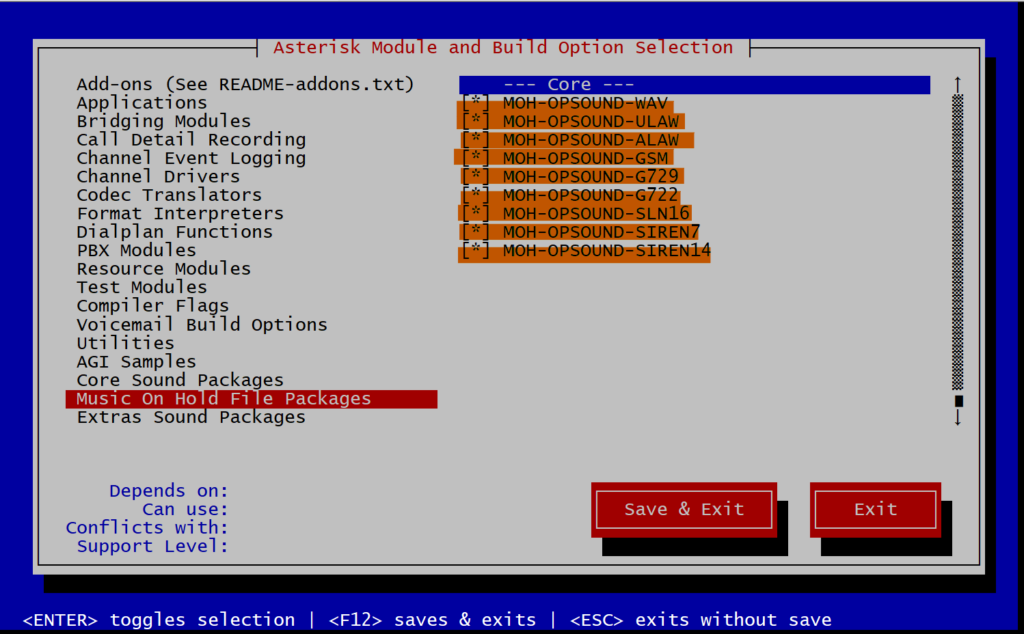
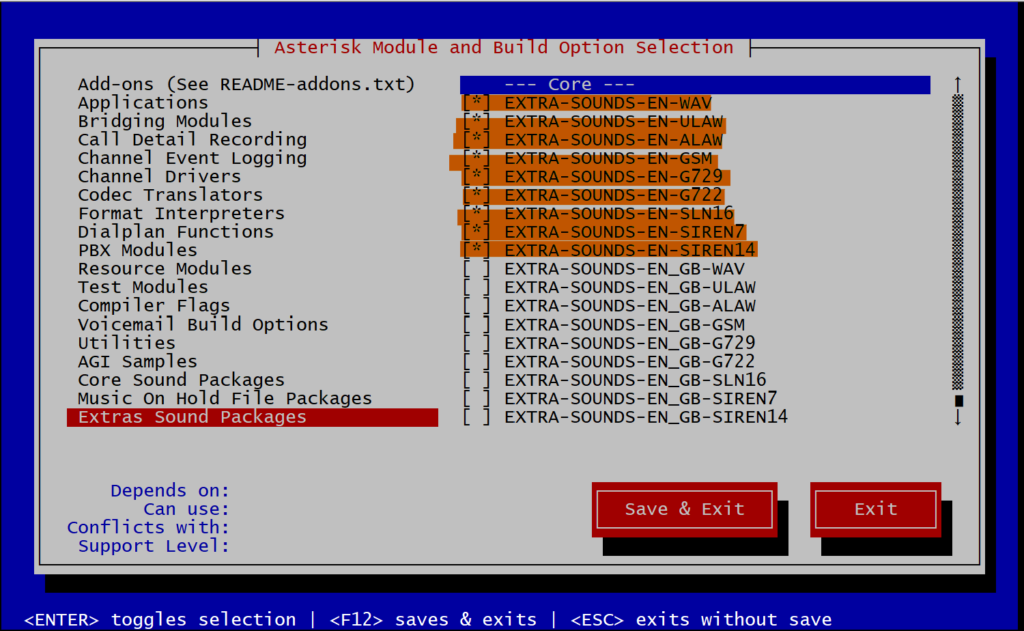
…………………………………………………………………………………………….
下载 MP3库文件,并安装其它依赖
contrib/scripts/get_mp3_source.sh./contrib/scripts/install_prereq install…………………………………………………………………………………………….
编译安装
makemake install安装编译完成将输出以下结果
---- Asterisk Installation Complete -------+
 +                                           +
 +    YOU MUST READ THE SECURITY DOCUMENT    +
 +                                           +
 + Asterisk has successfully been installed. +
 + If you would like to install the sample   +
 + configuration files (overwriting any      +
 + existing config files), run:              +
 +                                           +
 + For generic reference documentation:      +
 +    make samples                           +
 +                                           +
 + For a sample basic PBX:                   +
 +    make basic-pbx                         +
 +                                           +
 +                                           +
 +-----------------  or ---------------------+
 +                                           +
 + You can go ahead and install the asterisk +
 + program documentation now or later run:   +
 +                                           +
 +               make progdocs               +
 +                                           +
 + **Note** This requires that you have      +
 + doxygen installed on your local system    +
 +-------------------------------------------+
make samplesmake configldconfig…………………………………………………………………………………………….
创建用户/组,指定权限
groupadd asteriskuseradd -r -d /var/lib/asterisk -g asterisk asteriskusermod -aG audio,dialout asteriskchown -R asterisk.asterisk /etc/asteriskchown -R asterisk.asterisk /var/{lib,log,spool}/asteriskchown -R asterisk.asterisk /usr/lib64/asterisk…………………………………………………………………………………………….
设置Asterisk 默认用户
vi /etc/sysconfig/asteriskAST_USER="asterisk"
AST_GROUP="asterisk"vi /etc/asterisk/asterisk.confrunuser = asterisk ; The user to run as.
rungroup = asterisk ; The group to run as.…………………………………………………………………………………………….
重启Asterisk,并设置开机启动
systemctl restart asterisksystemctl enable asterisk…………………………………………………………………………………………….
asterisk 安装完成,使用asterisk -rvv 命令测试是否能连接asterisk CLI
[root@pbx asterisk-16.30.0]# asterisk -rvv
Asterisk 16.30.0, Copyright (C) 1999 - 2021, Sangoma Technologies Corporation and others.
Created by Mark Spencer <markster@digium.com>
Asterisk comes with ABSOLUTELY NO WARRANTY; type 'core show warranty' for details.
This is free software, with components licensed under the GNU General Public
License version 2 and other licenses; you are welcome to redistribute it under
certain conditions. Type 'core show license' for details.
=========================================================================
Running as user 'asterisk'
Running under group 'asterisk'
Connected to Asterisk 16.30.0 currently running on pbx (pid = 18512)
[May 27 08:47:45] NOTICE[18572]: chan_sip.c:29062 handle_request_register: Registration from '<sip:1001@8.219.166.245:5060;transport=UDP>' failed for '112.224.71.70:3765' - Wrong password
[May 27 08:48:01] NOTICE[18572]: chan_sip.c:29062 handle_request_register: Registration from '<sip:1002@8.219.166.245;transport=UDP>' failed for '39.88.50.83:65476' - Wrong password
pbx*CLI>
…………………………………………………………………………………………….
第三部分 FreePBX 16 安装
安装依赖
yum -y install lynx tftp-server ncurses-devel sendmail sendmail-cf sox newt-devel libxml2-devel libtiff-devel audiofile-devel gtk2-devel subversion kernel-devel git crontabs cronie cronie-anacron wget vim php-xml uuid-devel sqlite-devel net-tools gnutls-devel unixODBC mysql-connector-odbc…………………………………………………………………………………………….
安装数据库 Mariadb
curl -LsS https://downloads.mariadb.com/MariaDB/mariadb_repo_setup | sudo bash -s --yum -y install MariaDB-server MariaDB-client MariaDB-backup
…………………………………………………………………………………………….
启动并检查数据库状态
systemctl enable --now mariadbsystemctl status mariadb……………………………………………………………………………………………
安装Node.js
yum -y install http://rpms.remirepo.net/enterprise/remi-release-7.rpmyum -y install nodejs npmnode -v呈现以下版本信息
v16.18.1……………………………………………………………………………………………
安装配置Apache
yum -y install httpdcp /etc/httpd/conf/httpd.conf /etc/httpd/conf/httpd.conf_origsed -i 's/^\(User\|Group\).*/\1 asterisk/' /etc/httpd/conf/httpd.confsed -i 's/AllowOverride None/AllowOverride All/' /etc/httpd/conf/httpd.confrm -f /var/www/html/index.htmlrm /etc/httpd/conf.d/welcome.confsystemctl enable --now httpd……………………………………………………………………………………………
安装PHP及扩展
yum -y install epel-release yum-utilsyum -y install http://rpms.remirepo.net/enterprise/remi-release-7.rpmyum-config-manager --disable remi-php54yum-config-manager --enable remi-php74yum -y install wget php php-pear php-cgi php-common php-curl php-mbstring php-gd php-mysql php-gettext php-bcmath php-zip php-xml php-imap php-json php-process php-snmpsed -i 's/\(^upload_max_filesize = \).*/\120M/' /etc/php.inised -i 's/\(^memory_limit = \).*/\1256M/' /etc/php.ini……………………………………………………………………………………………
安装FreePBX
yum -y install wgetwget http://mirror.freepbx.org/modules/packages/freepbx/7.4/freepbx-16.0-latest.tgztar xfz freepbx-16.0-latest.tgzrm -f freepbx-16.0-latest.tgzcd freepbxsystemctl disable --now asterisk./start_asterisk start./install -n./install -n --dbuser root --dbpass dbpassword注: dbpassword 替换为根用户数据库密码
……………………………………………………………………………………………
安装功能模块
fwconsole ma disablerepo commercialfwconsole ma installallfwconsole ma delete firewallfwconsole reloadfwconsole restart……………………………………………………………………………………………
重启web server,配置防火墙放行http,https服务
systemctl restart httpdfirewall-cmd --add-service={http,https} --permanentfirewall-cmd --reload……………………………………………………………………………………………
配置FreePBX开机运行,并重新启动Centos 7
tee /etc/systemd/system/freepbx.service<<EOF
[Unit]
Description=FreePBX VoIP Server
After=mariadb.service
[Service]
Type=oneshot
RemainAfterExit=yes
ExecStart=/usr/sbin/fwconsole start -q
ExecStop=/usr/sbin/fwconsole stop -q
[Install]
WantedBy=multi-user.target
EOF
systemctl daemon-reloadsystemctl enable freepbxreboot……………………………………………………………………………………………
第四部分 配置及测试
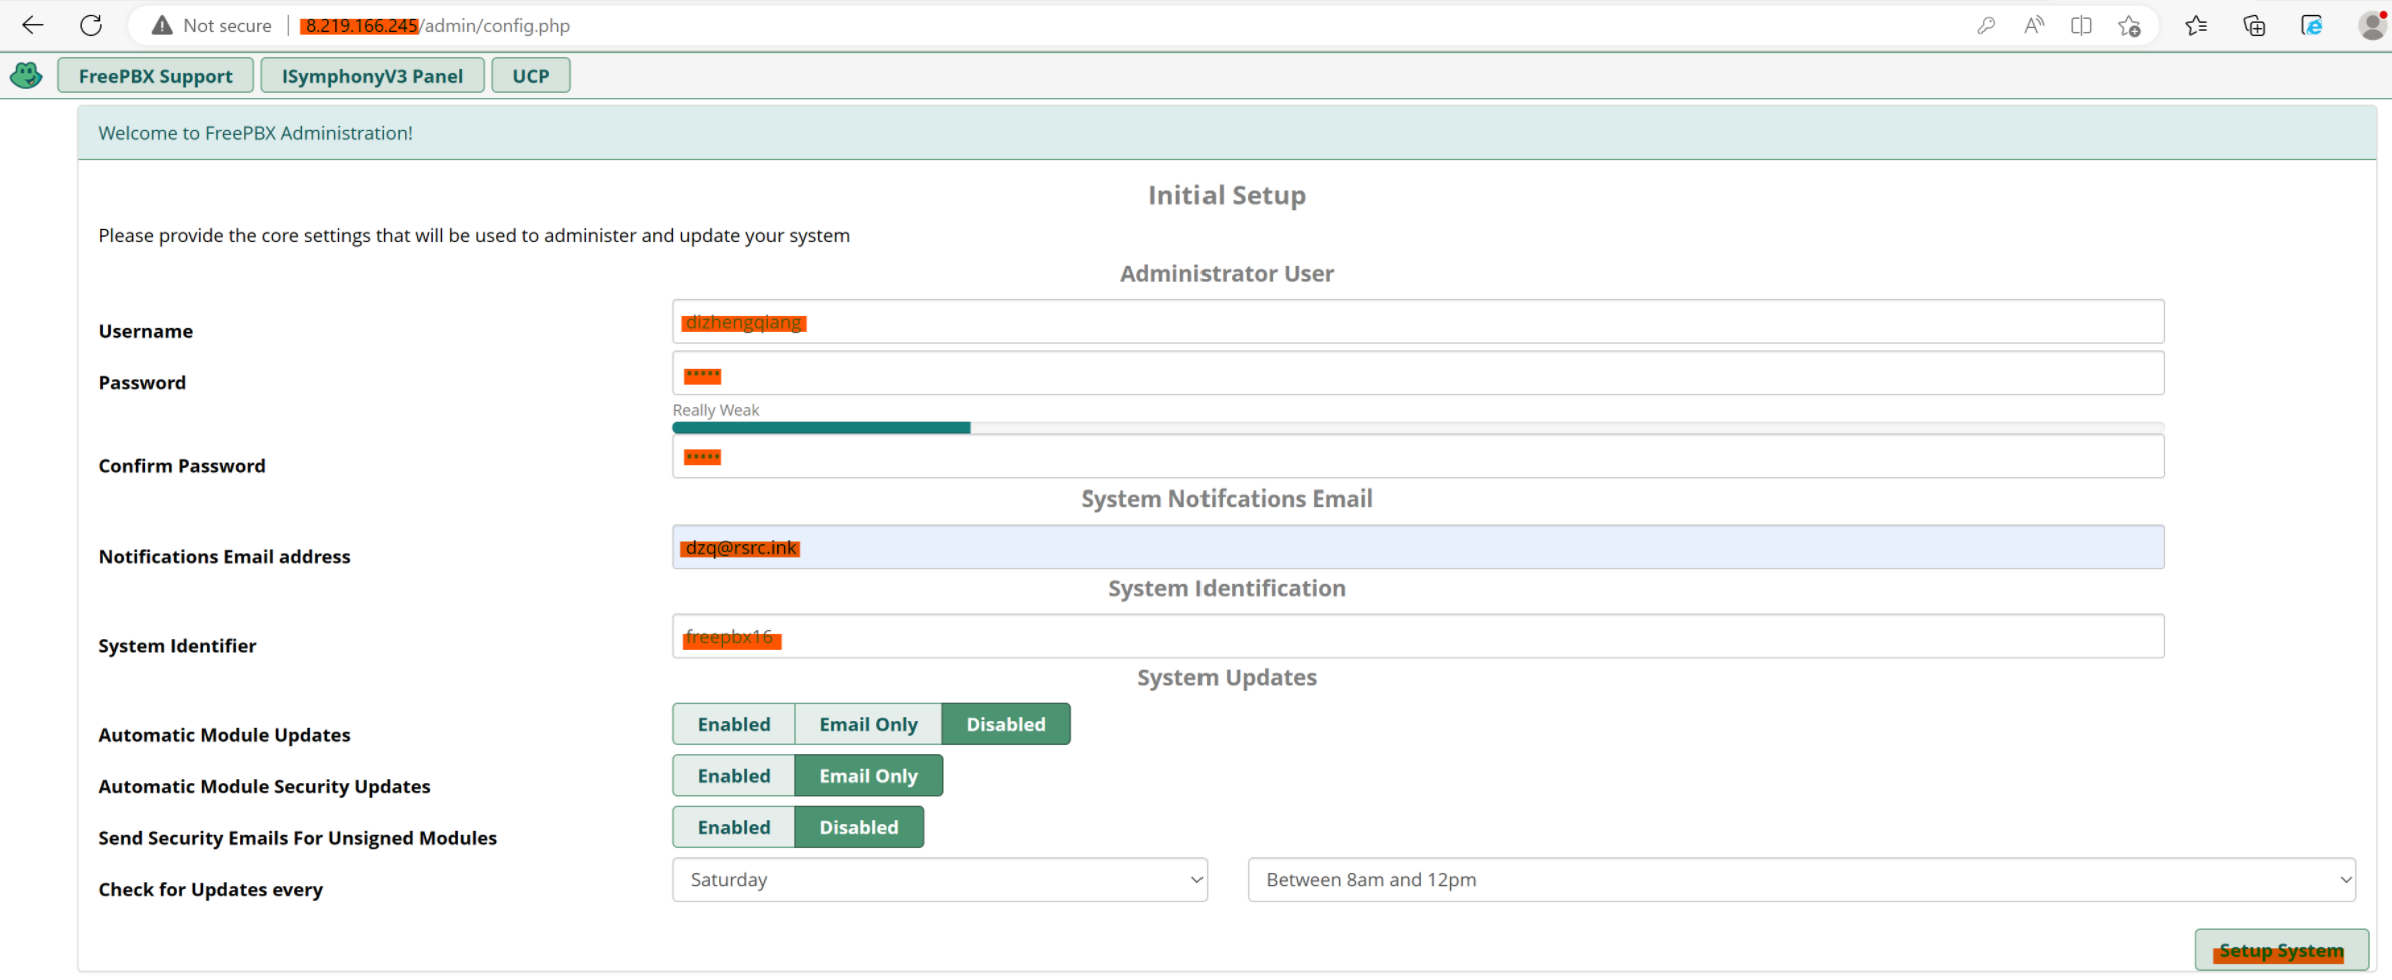
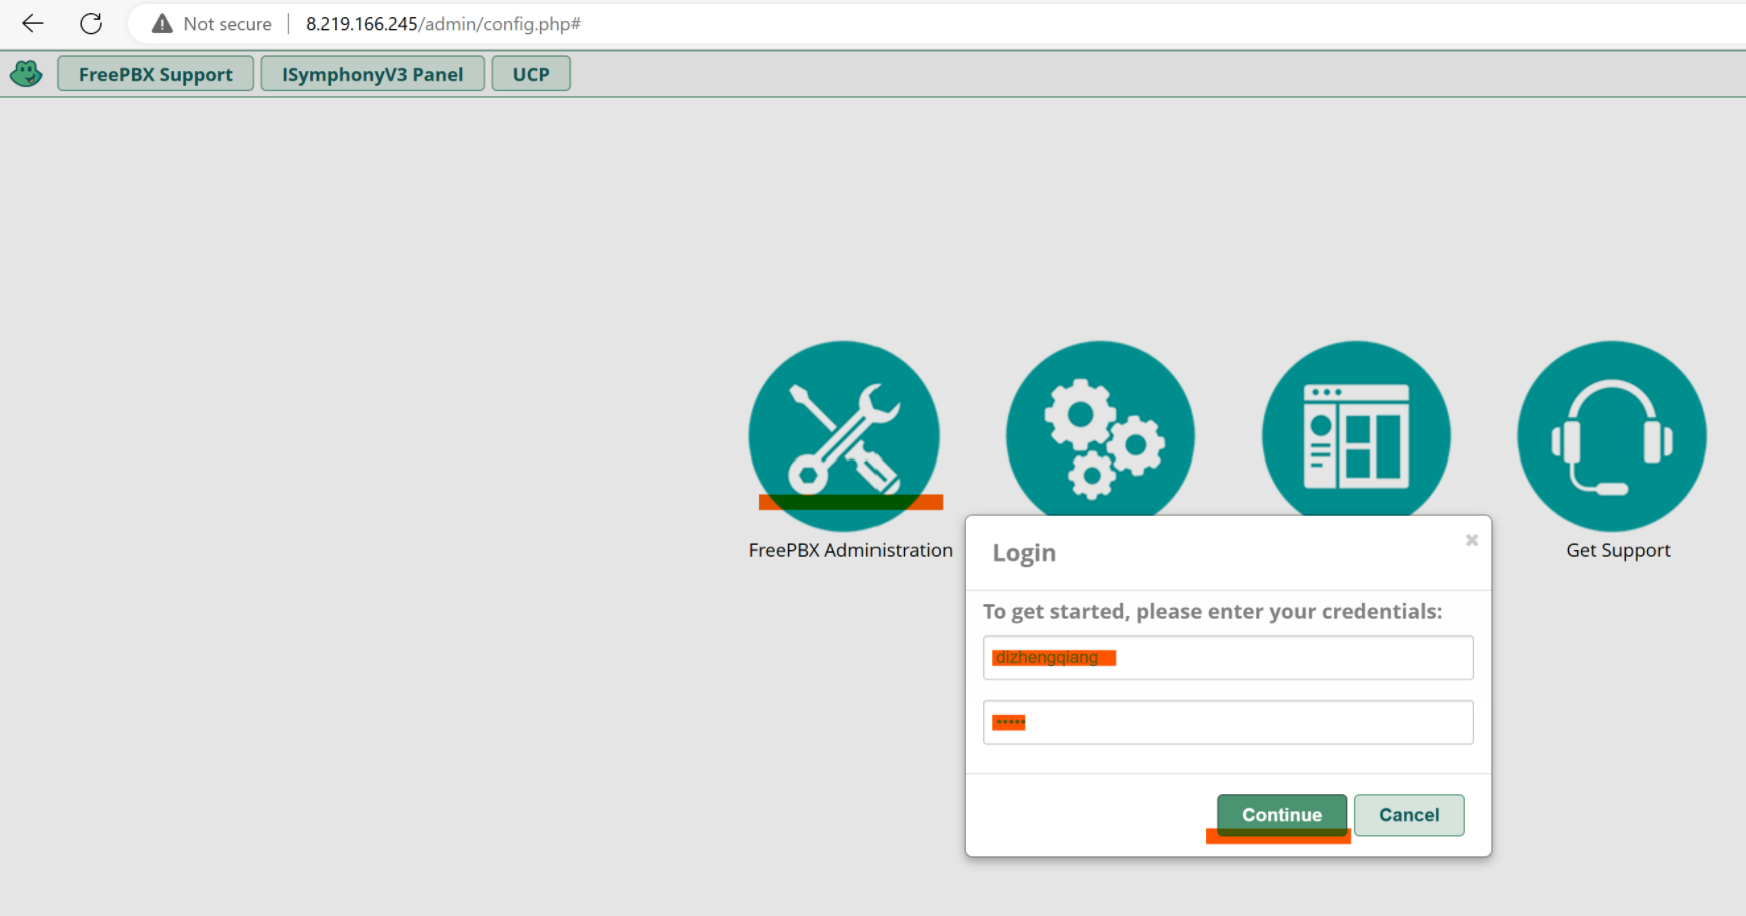
WEB访问服务器,初始化freepbx配置

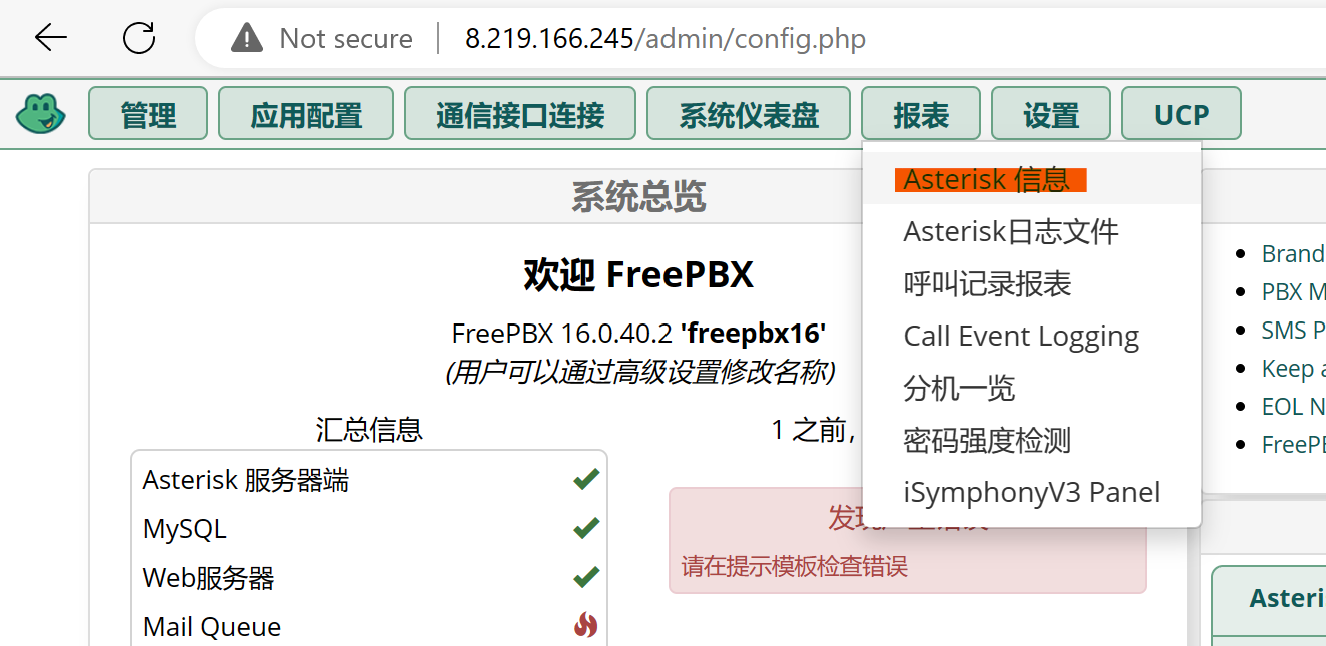
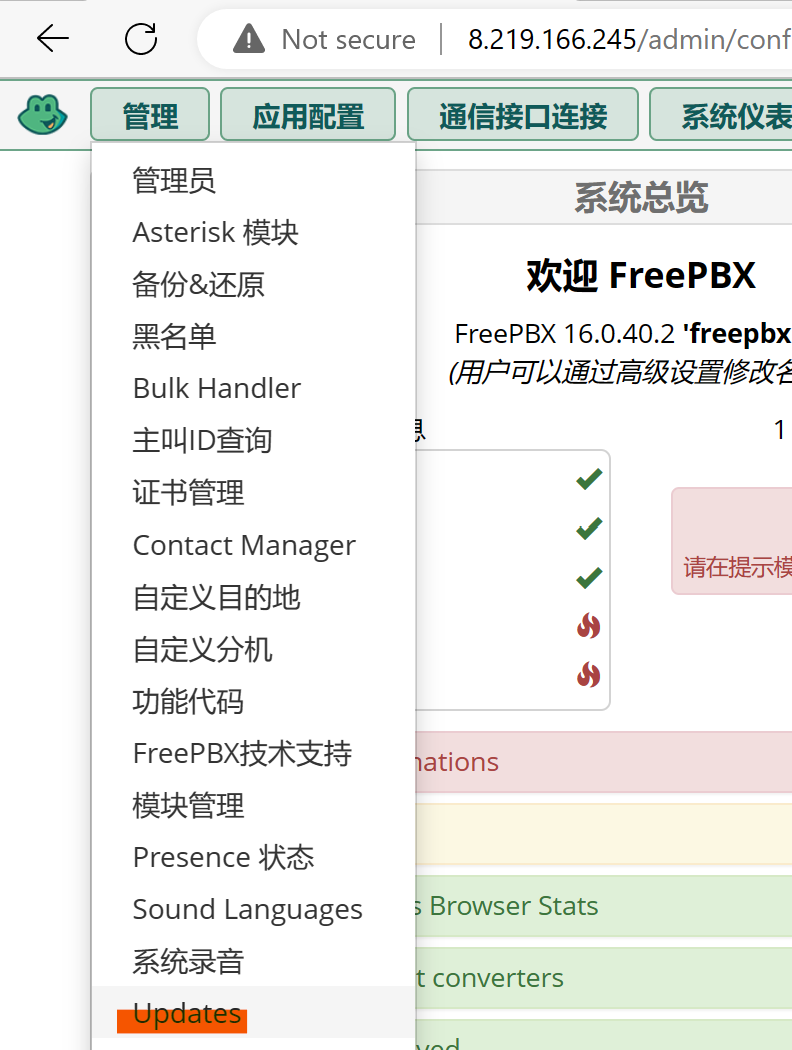
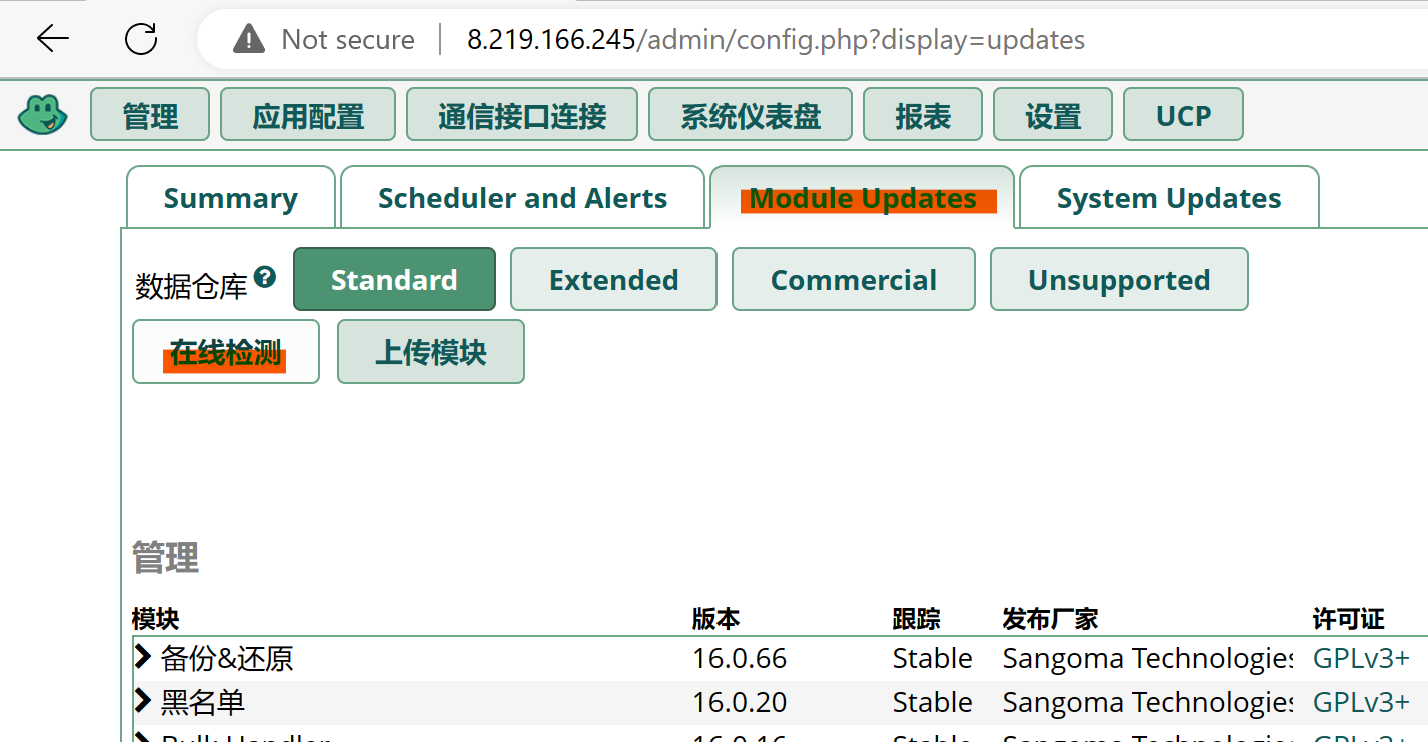
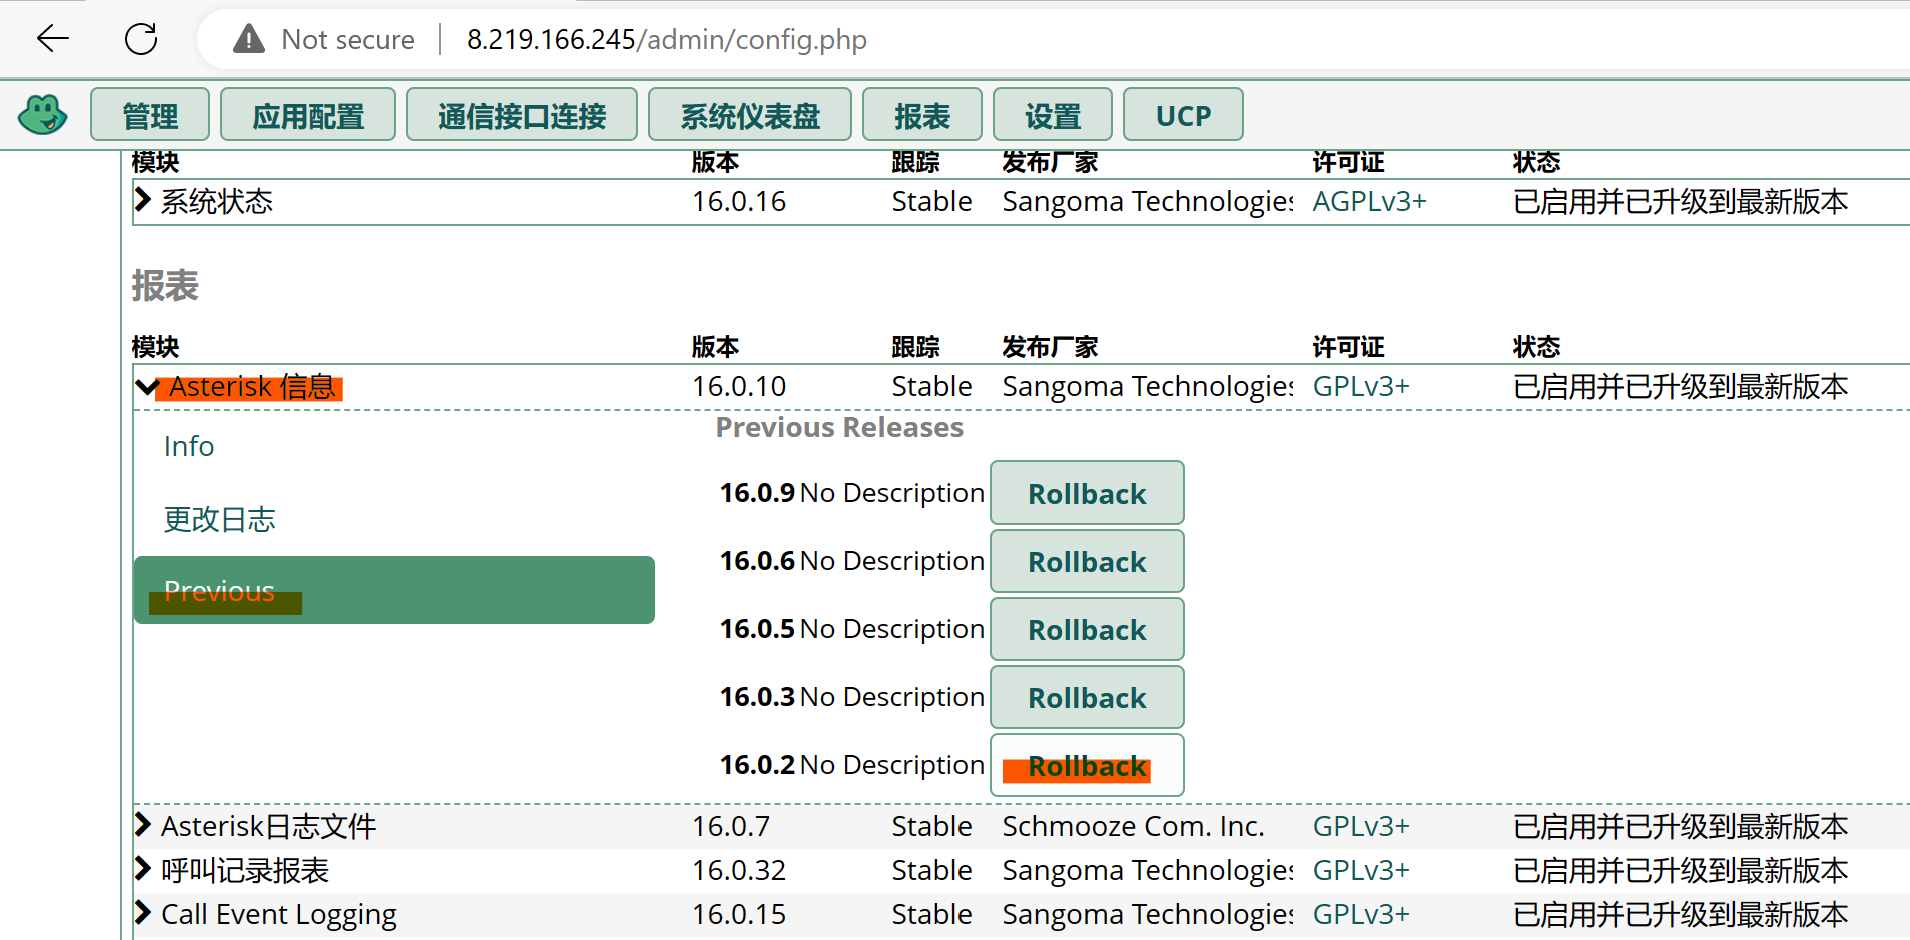
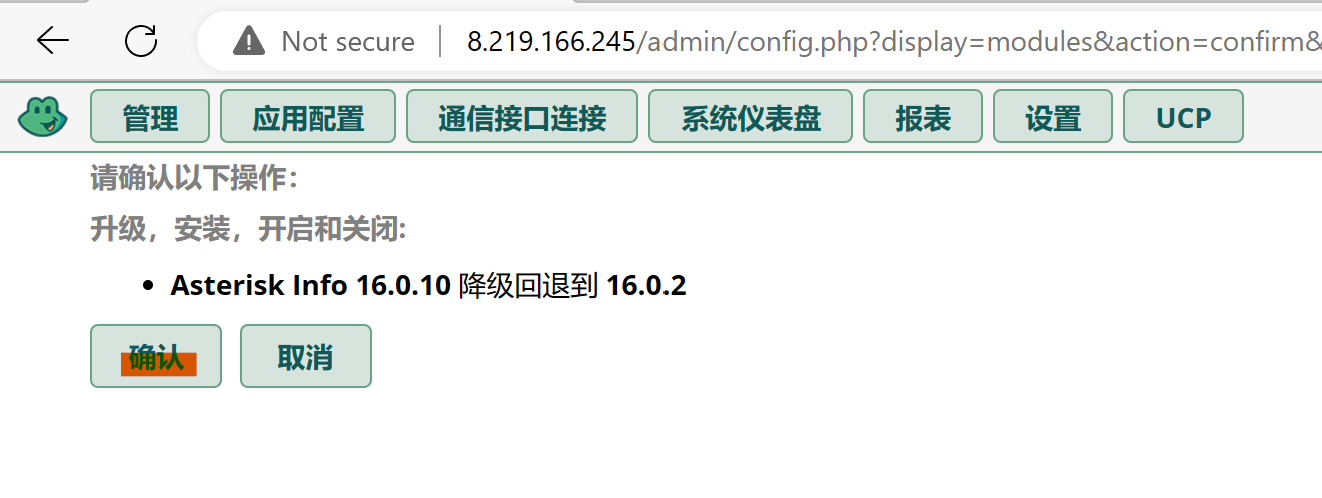
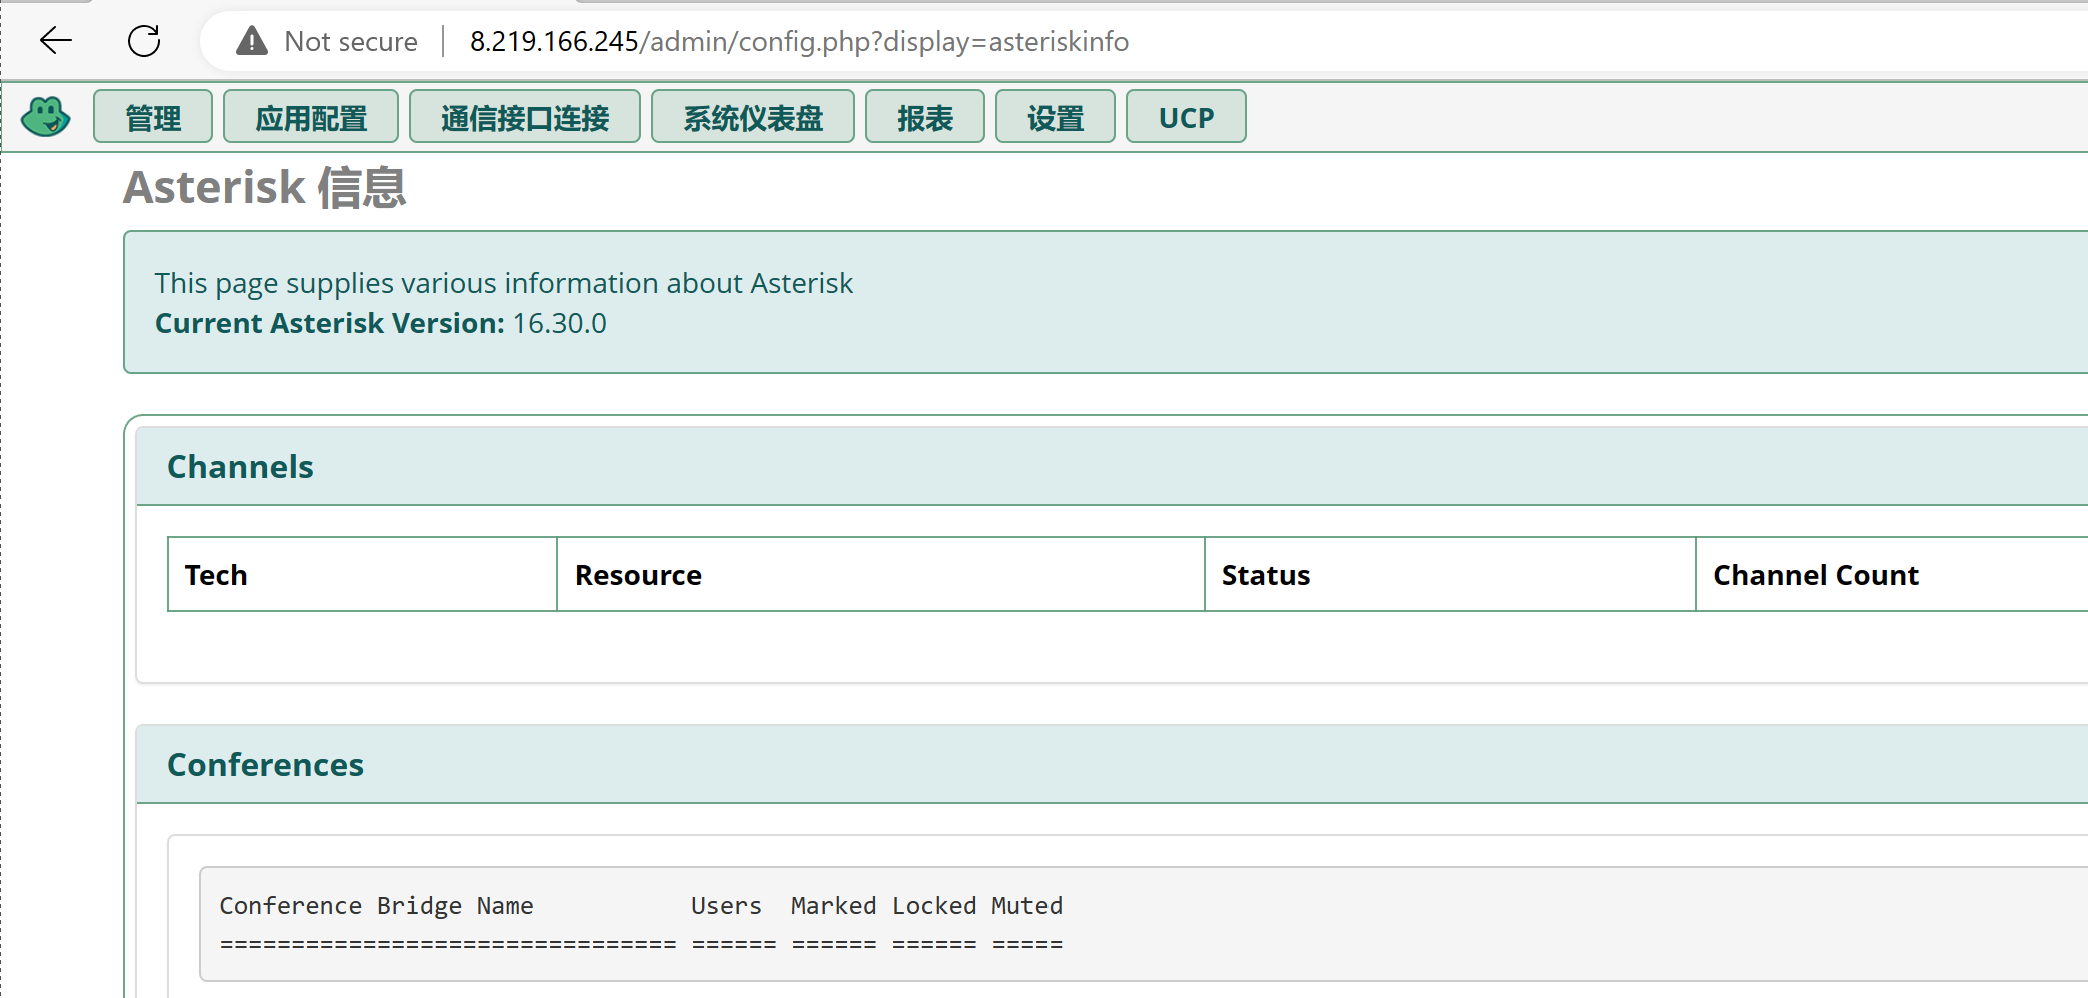
Asterisk 信息模块报错

……………………………………………………………………………………………
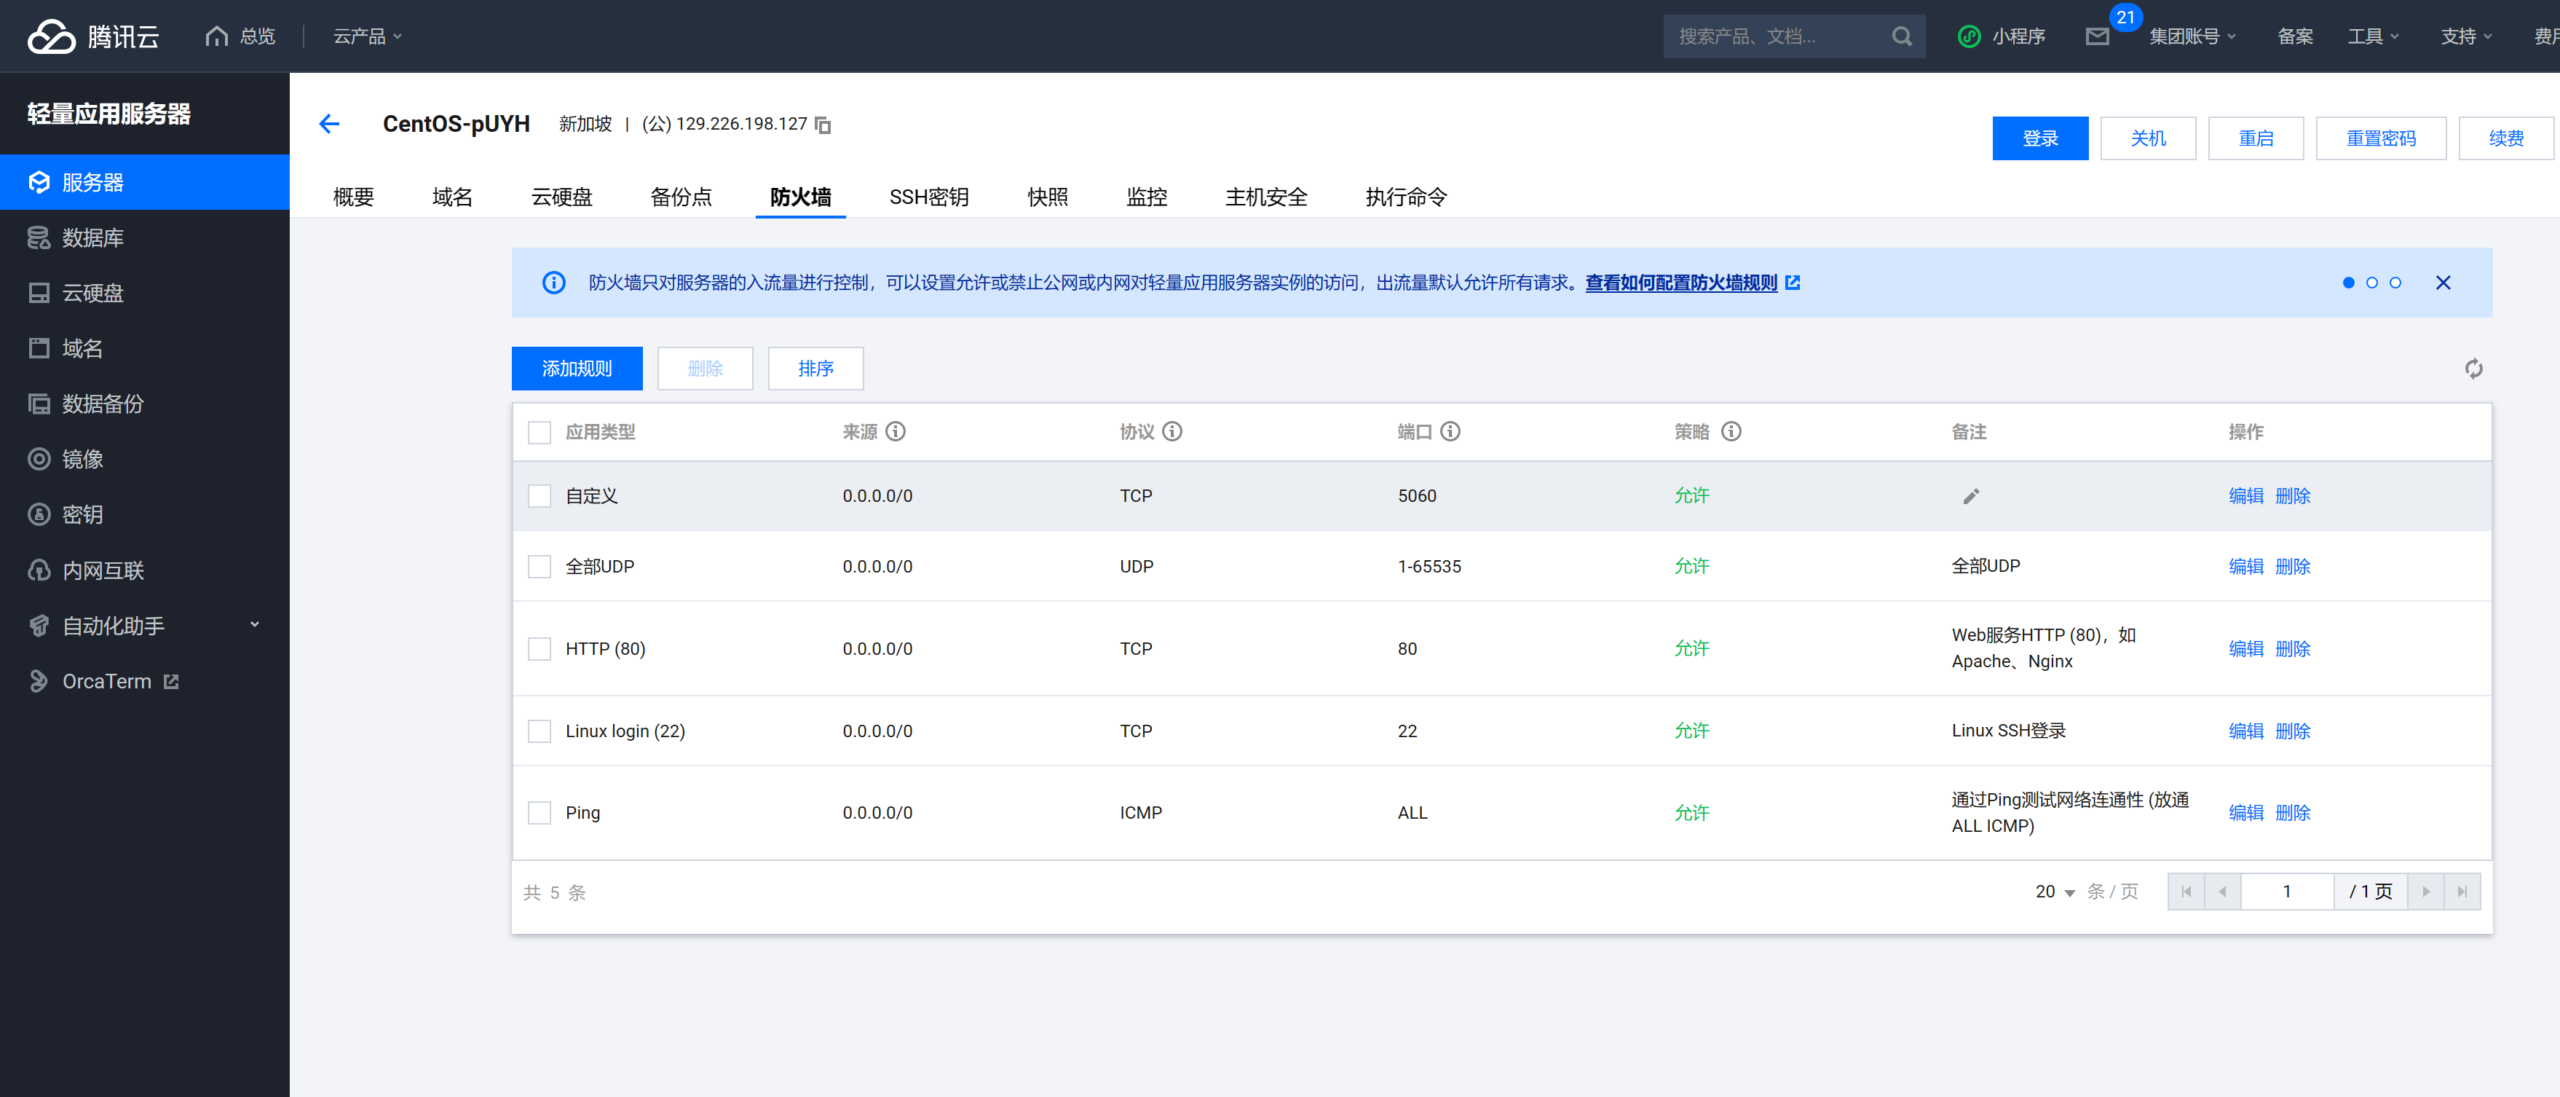
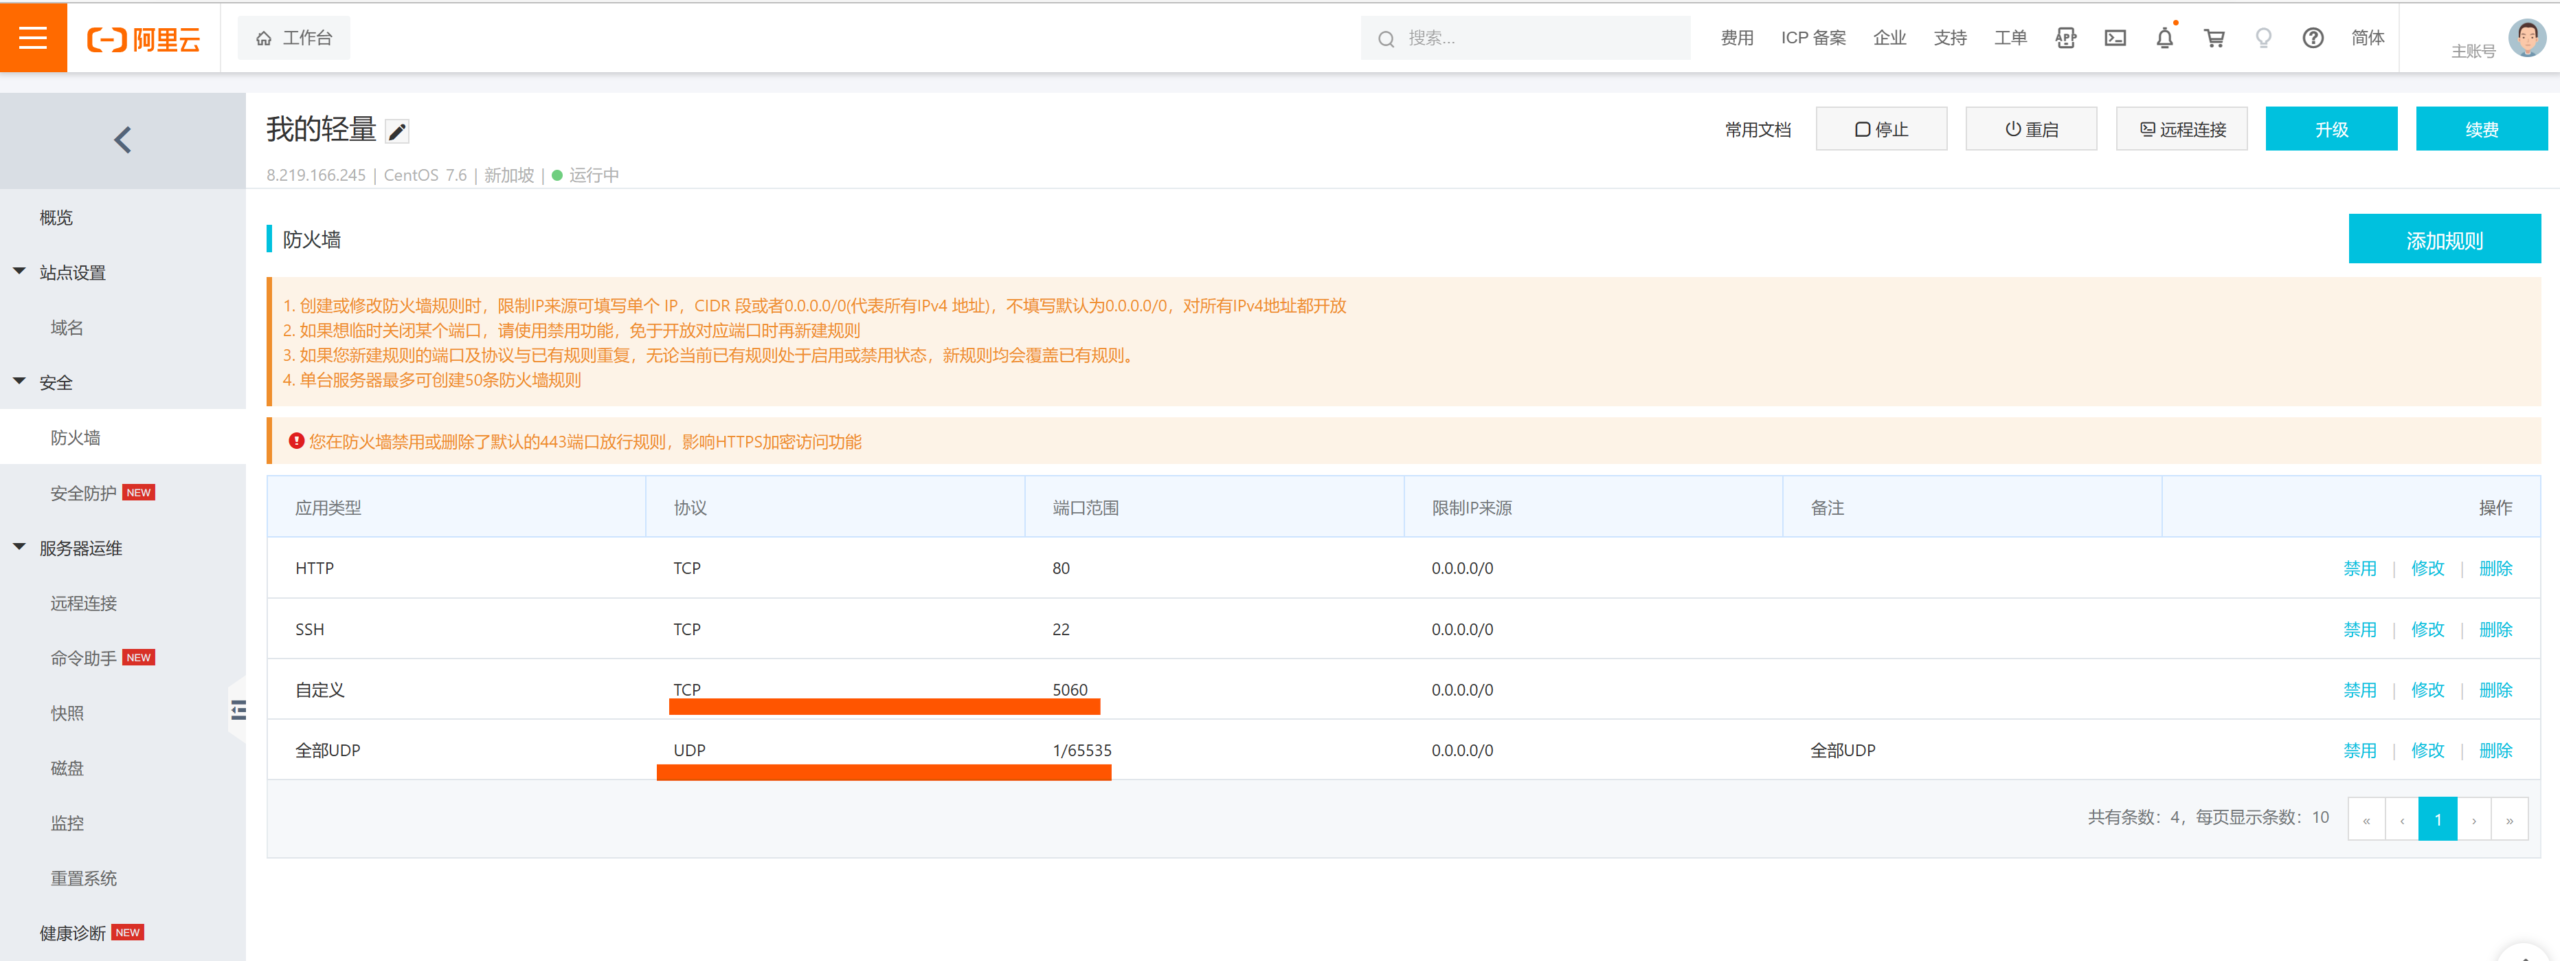
配置云防火墙策略,允许tcp 5060, udp 1-65535
……………………………………………………………………………………………
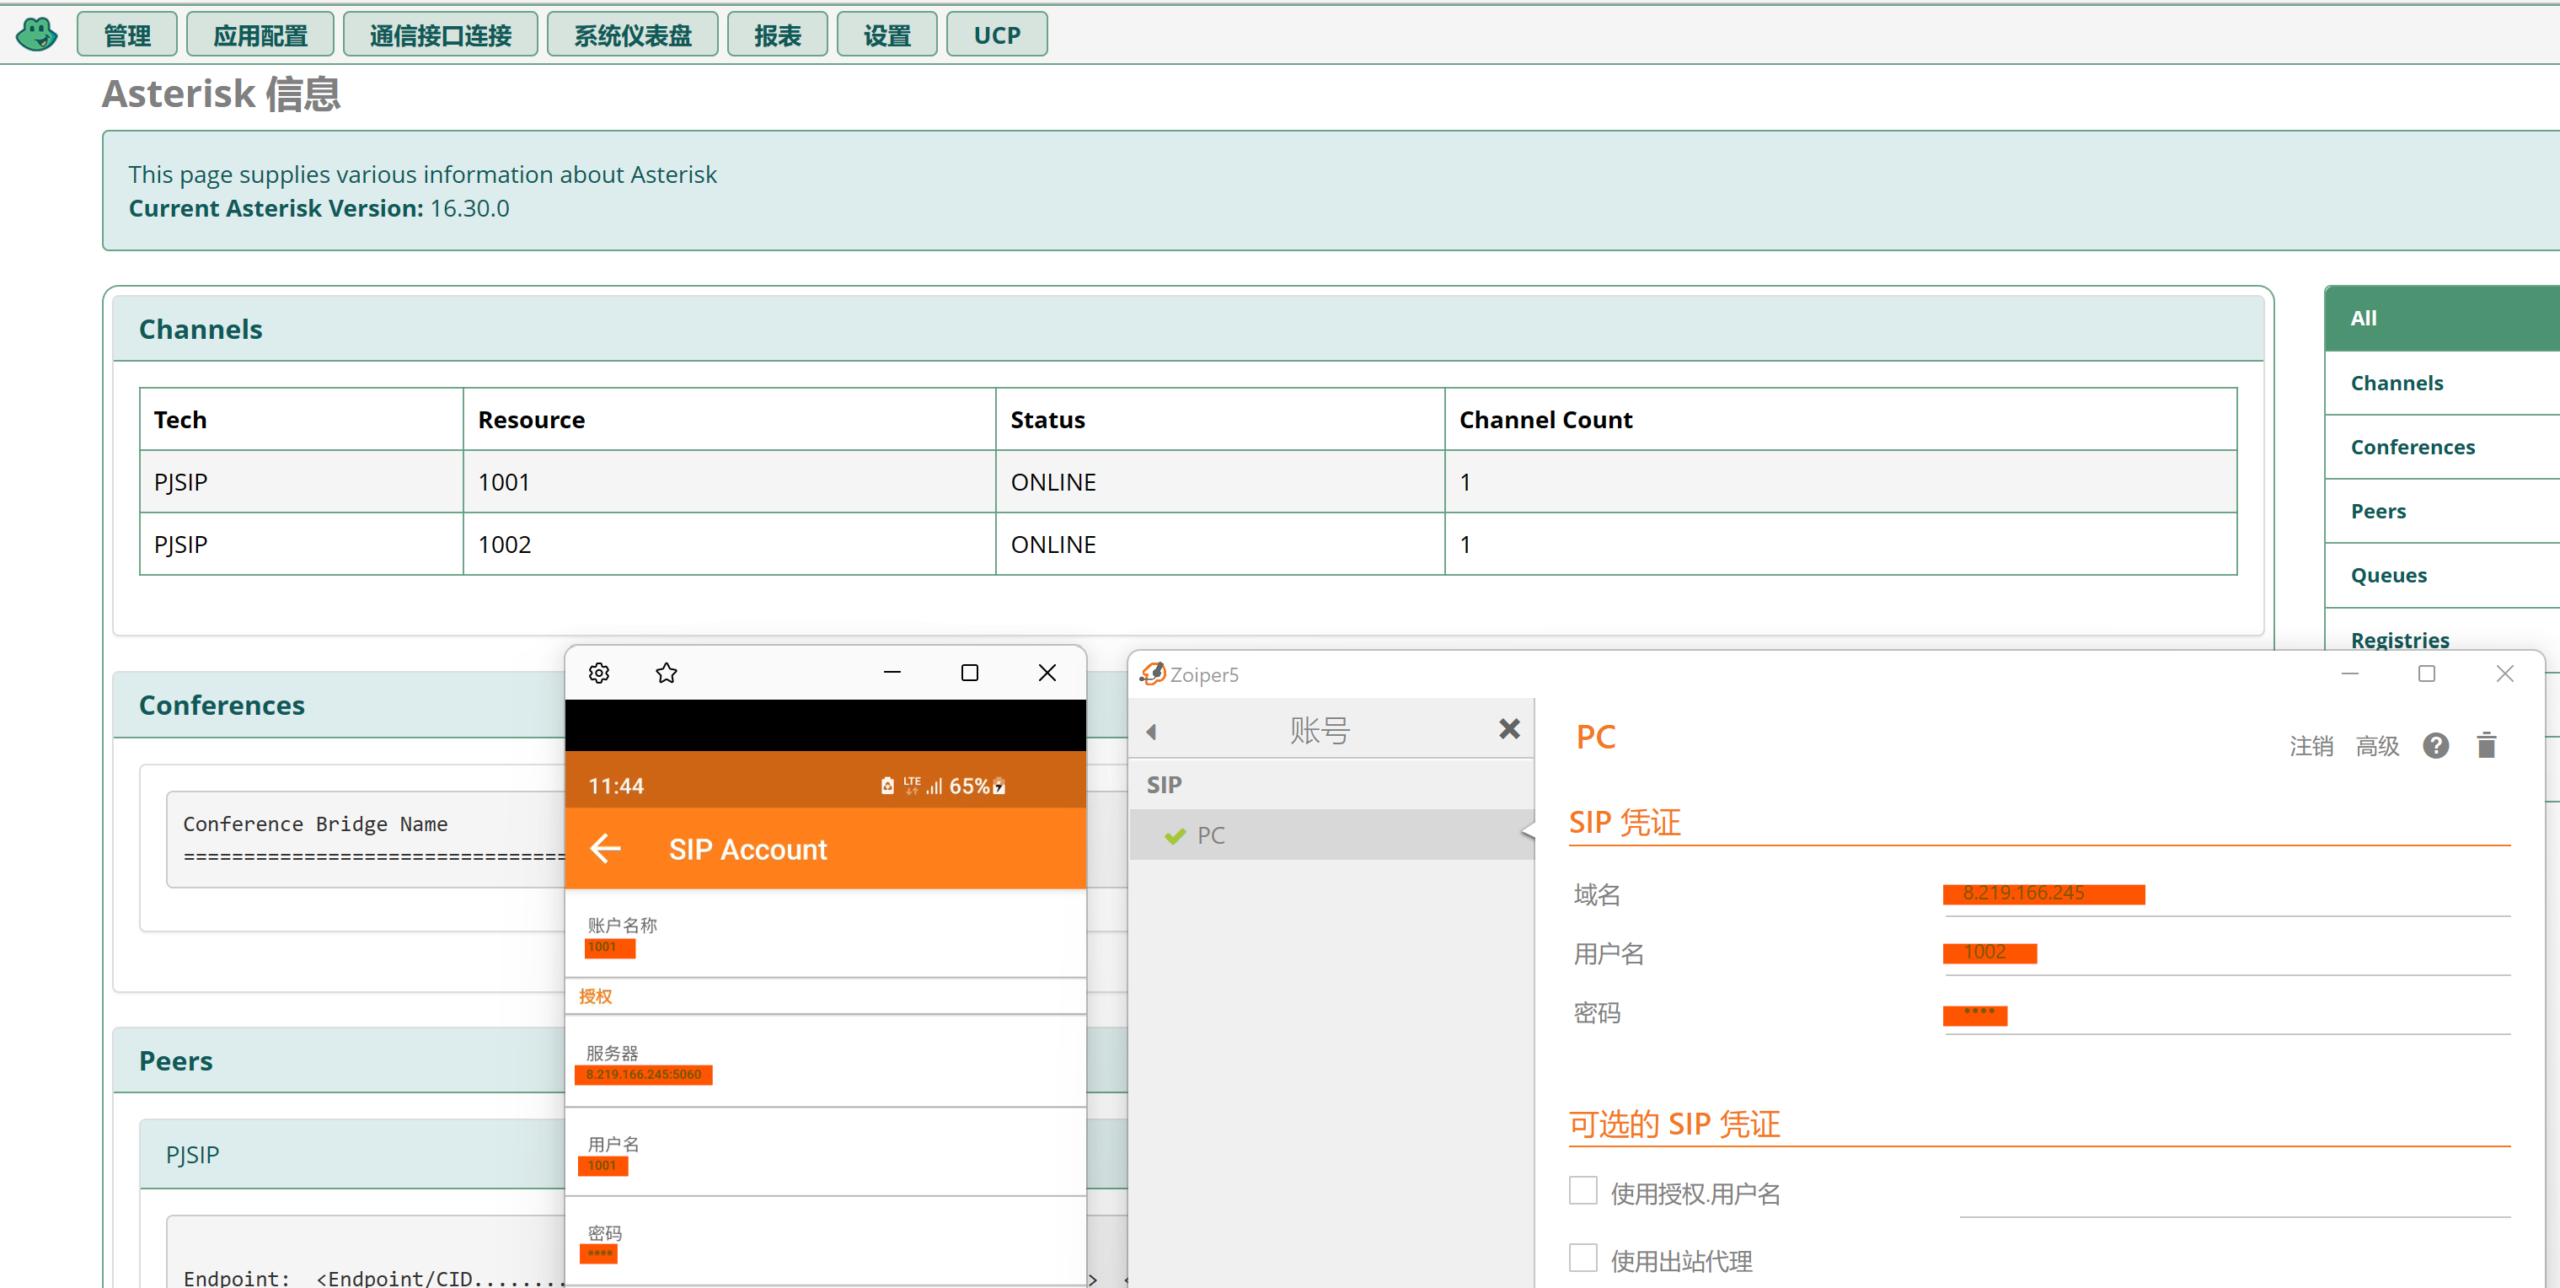
配置安卓,windows Zoiper客户端
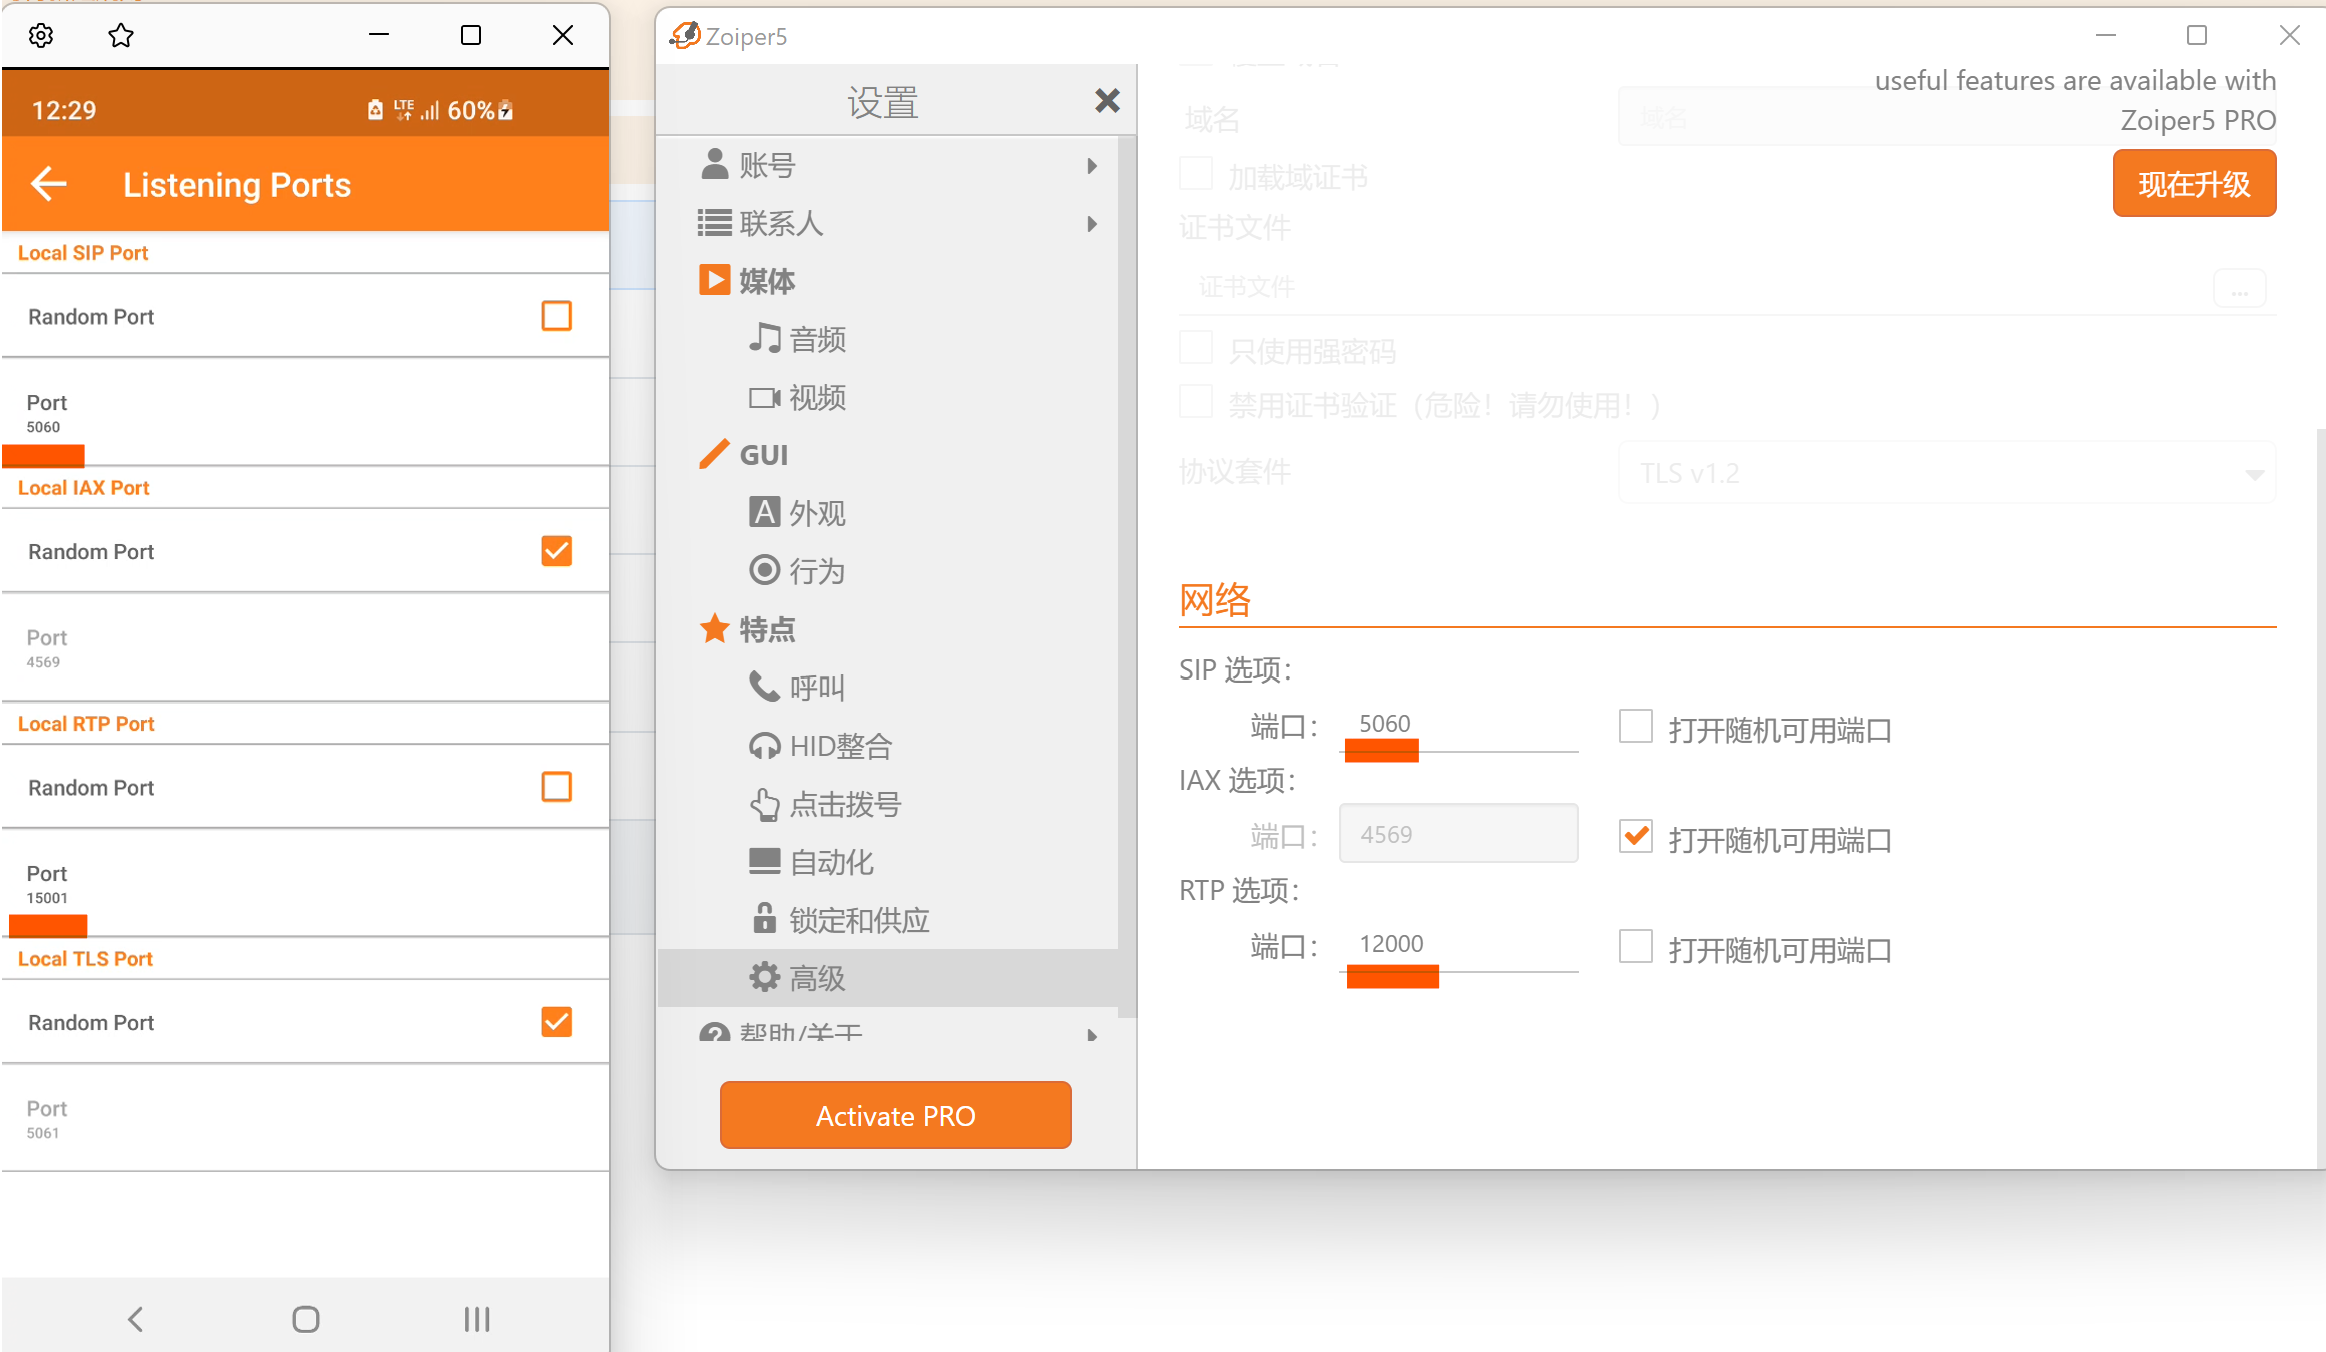
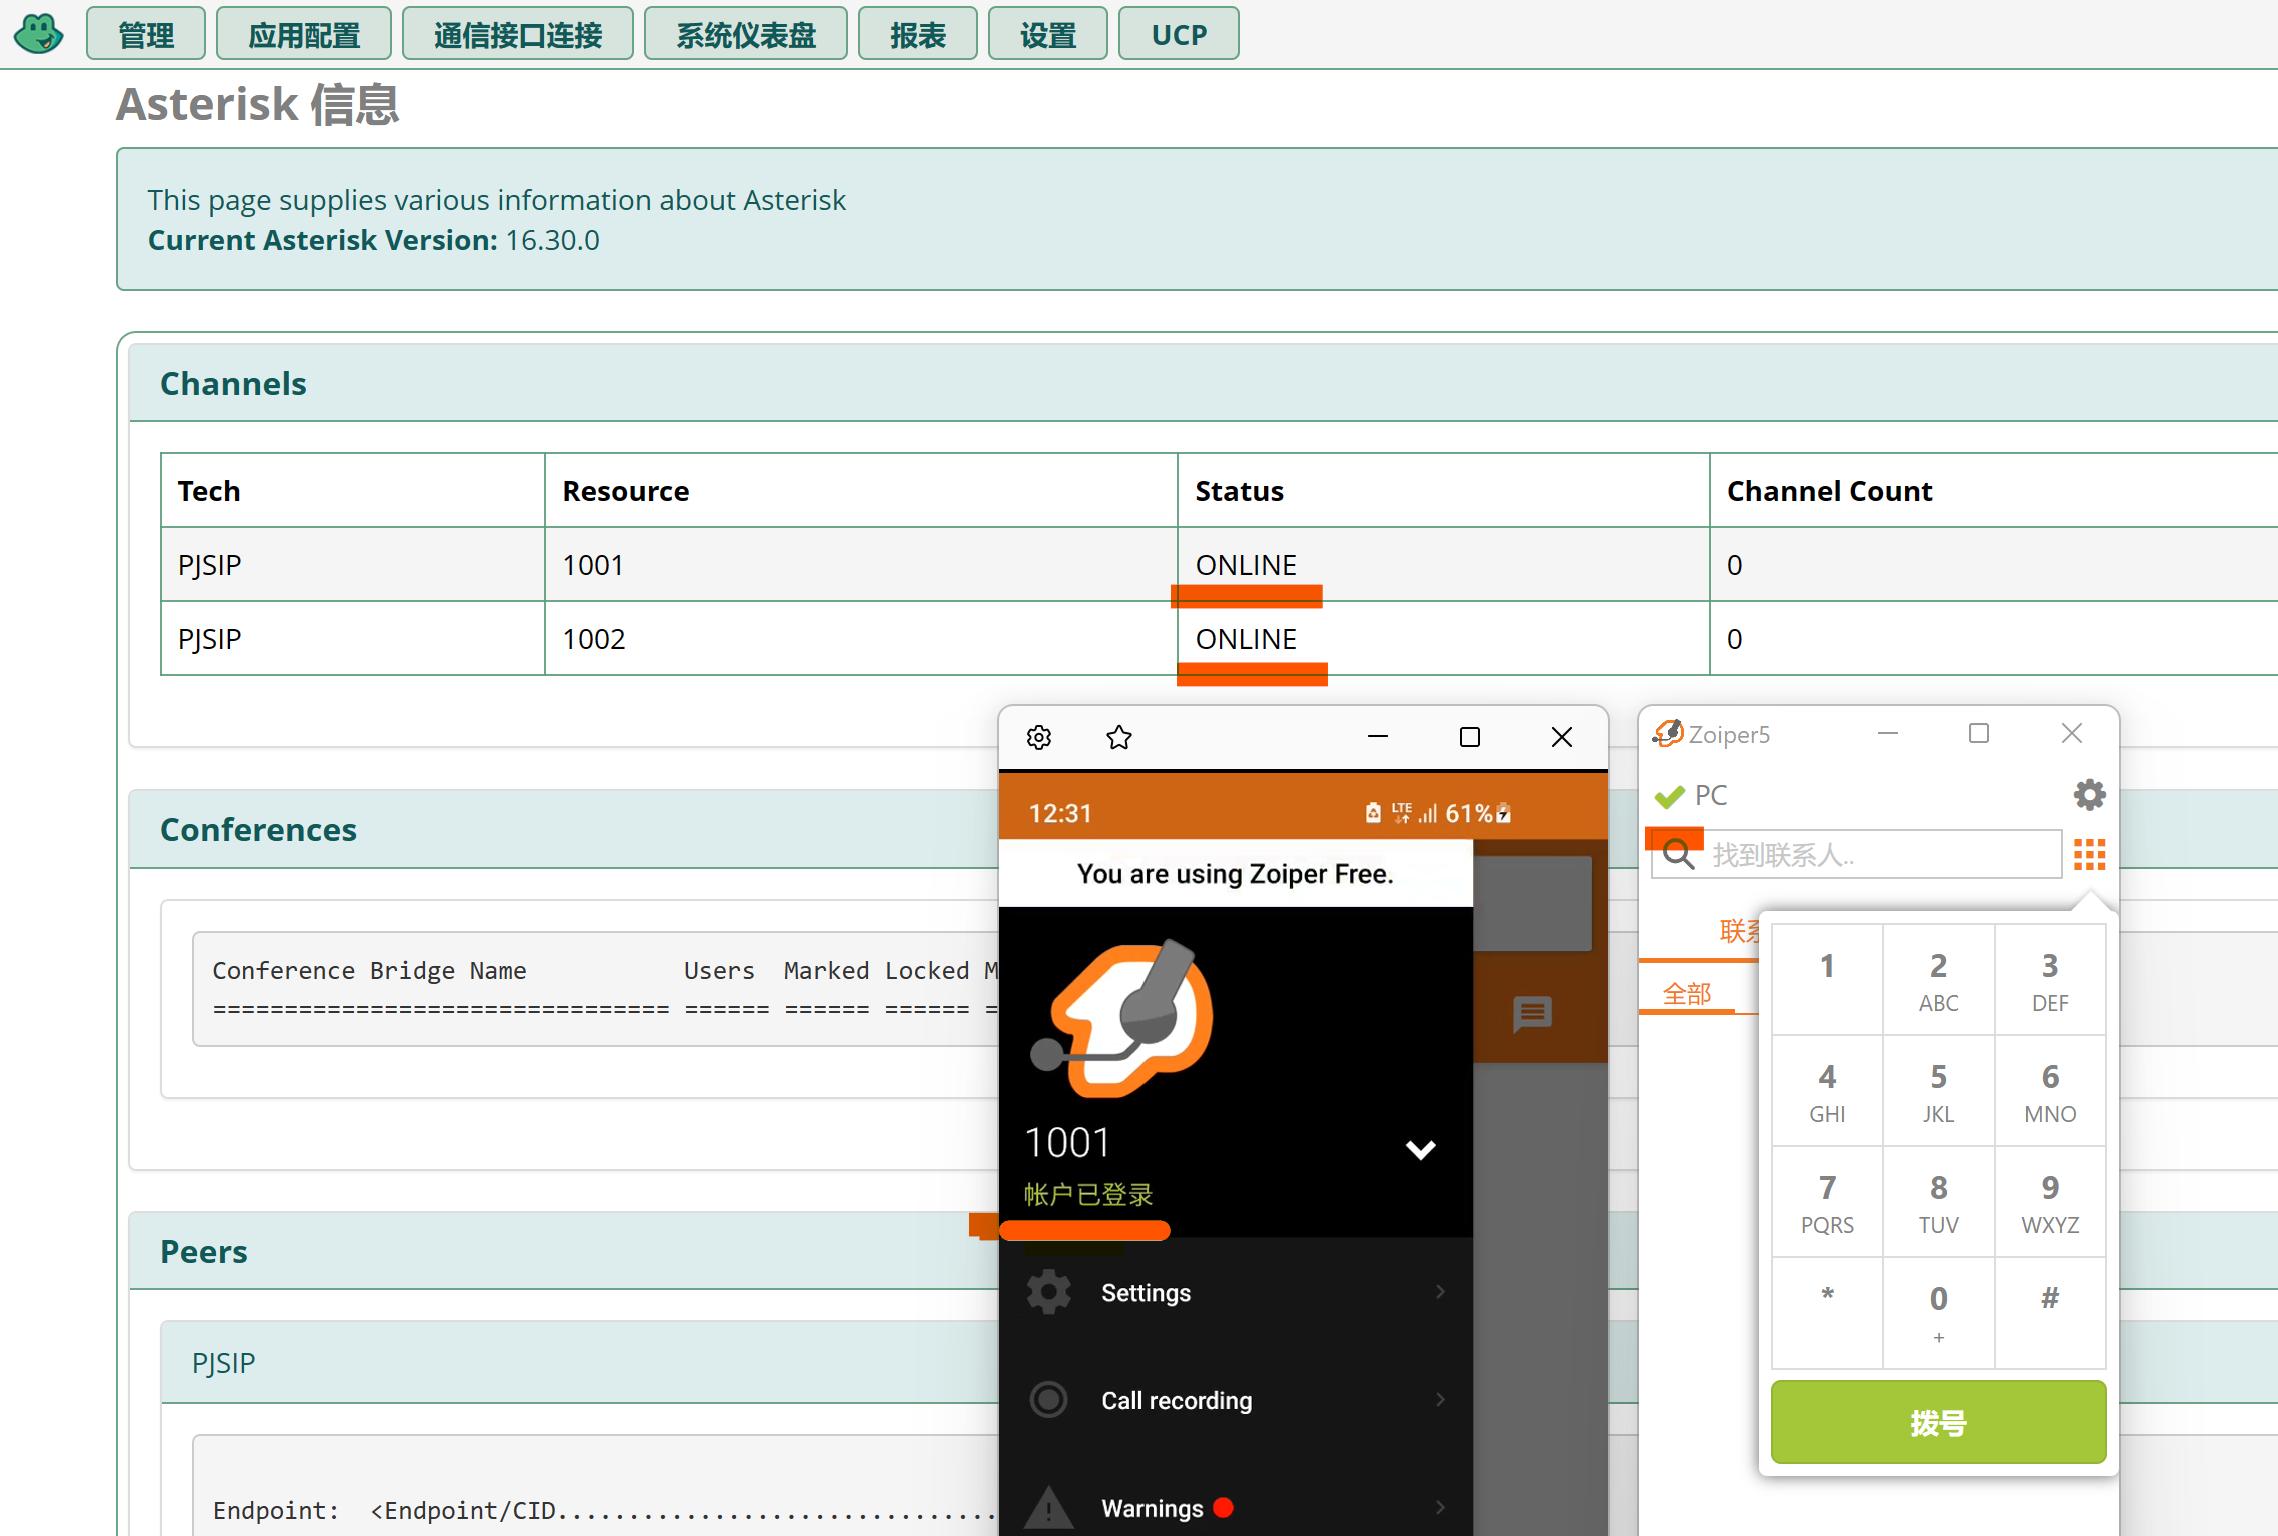
……………………………………………………………………………………………
呼叫测试
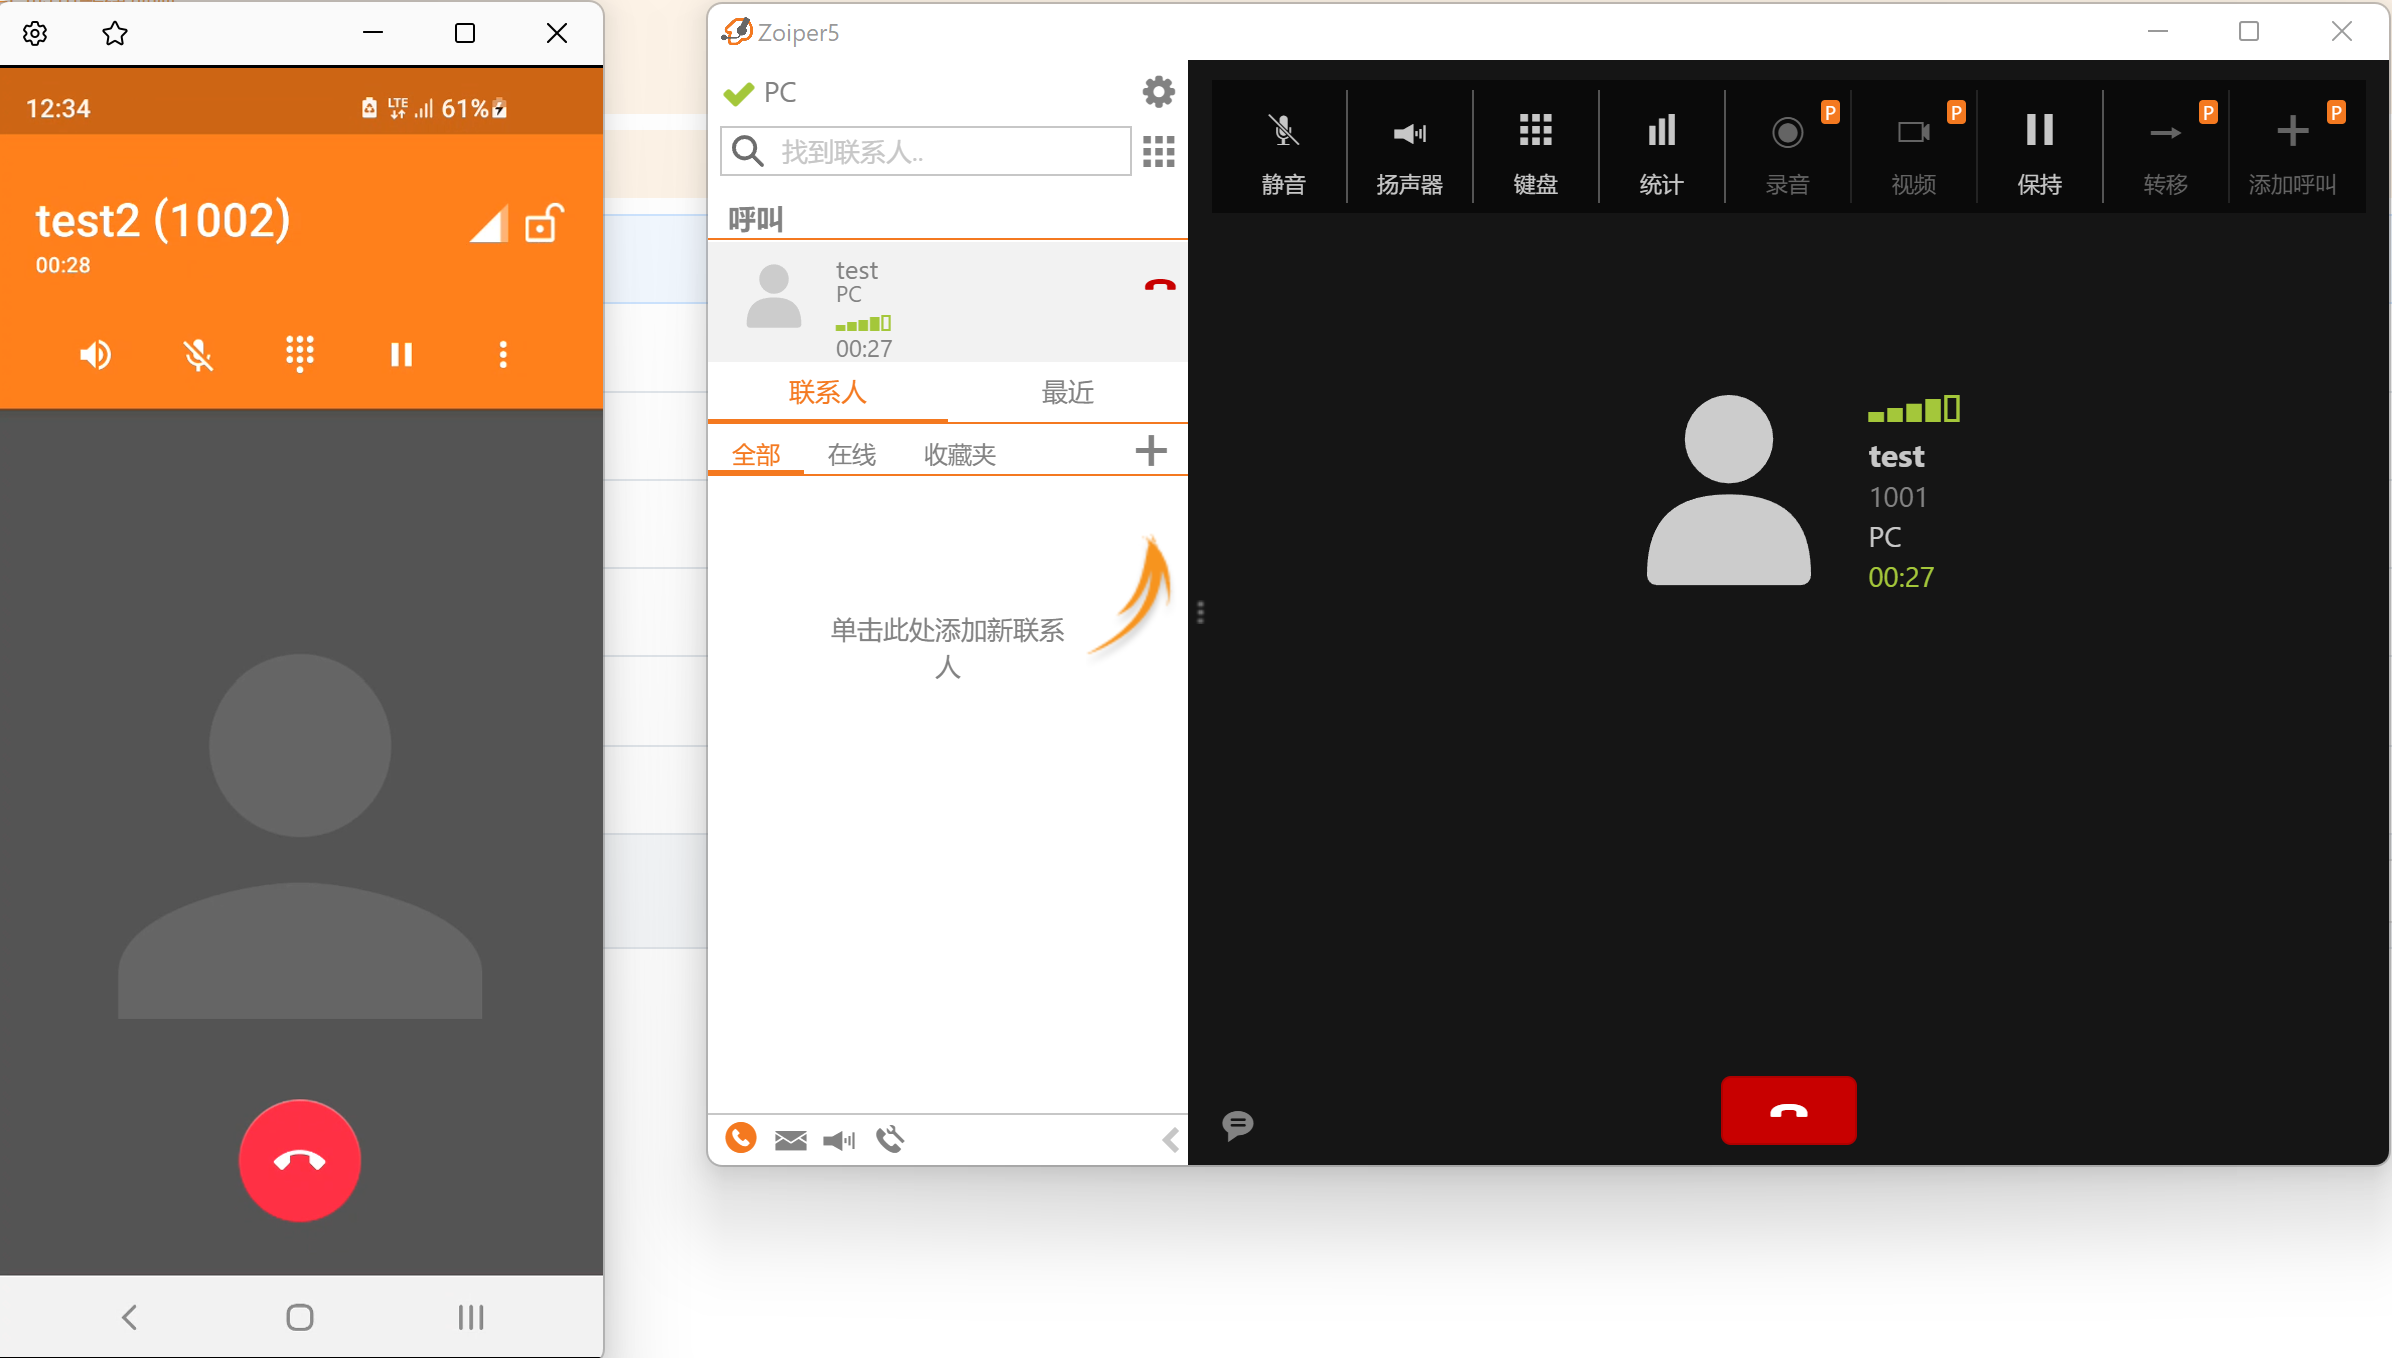
……………………………………………………………………………………………